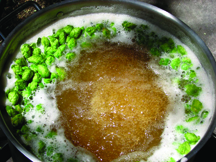
Showing posts with label Homebrew Equipment. Show all posts

Monday, February 29, 2016

Happy Leap Day from Brew Boss!


Great way to celebrate Leap Day is with a #Homebrew!  Check out #BrewBoss Electric Homebrewing equipment to get started.  www.brew-boss.com  CHEERS!

Tuesday, February 2, 2016

Happy Groundhog Day!

Stuck in a rut? Ready for a newer, better way to make your own beer? Then you are ready for the Brew Boss Electric Homebrew System! www.brew-boss.com


#homebrew #beer #EBIAB #electricbrewing

Monday, January 18, 2016

Brew Boss Video - How to clean your Chugger pump.

#Brew-Boss is starting a new Brew-Boss Tips and Trick video series. Here is the first one. 

How to clean your Chugger pump.

Brew Boss Electric #Homebrew Equipment
www.brew-boss.com

Thursday, January 7, 2016

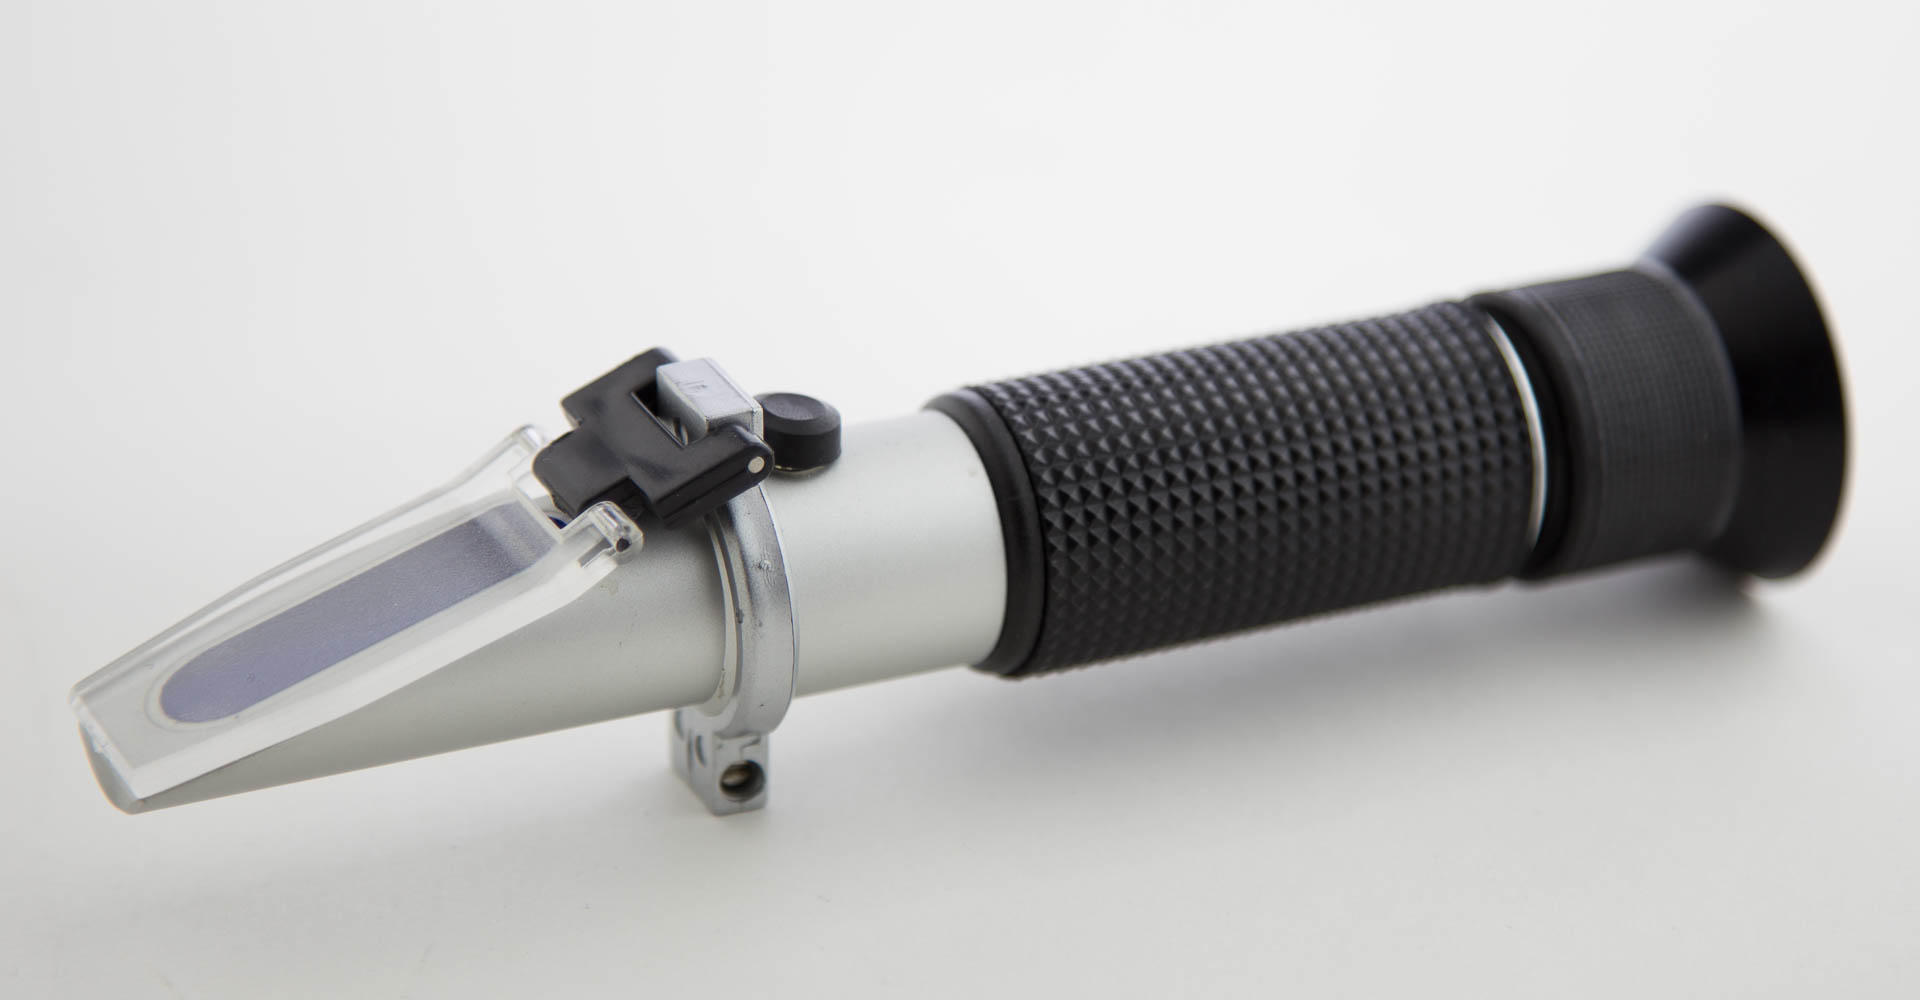
3 Things to Check Before You Buy a Refractometer

Want the best electric home brew system? www.brew-boss.com #homebrew #BIAB
3 Things to Check Before You Buy a Refractometer Primary


When you remove the daily post from your mailbox, how often do you find a catalog chock full of shiny new homebrewing toys? Anywhere from four to six of these arrive at my house per month, and although the products remain mostly the same from one issue to the next, I never fail to browse the whole thing cover to cover every time. The siren’s song of new gadgets is simply too beautiful to ignore.

I managed to ignore the #refractometer for a long time. After all, a #hydrometer is much cheaper and measures wort specific gravity just as well. But refractometers do offer some nice advantages. Only a small wort sample is needed, a couple of drops rather than a test tube’s worth. A refractometer won’t roll off the counter and onto the floor, shattering into countless shards of glass. Also they look cool.

The refractometer operates on the optical principle that light passing through a liquid refracts at different angles according to the density of that liquid. Rephrasing that statement, light passing through a small sample of wort refracts at different angles according to the concentration of dissolved sugar in that wort. The refracted light illuminates a scale, upon which is printed a range of wort densities. You peek through an eyepiece and read the wort density from the scale.

Temperature Compensation


The refractive index of a liquid doesn’t just change with density; it also changes with temperature. Most good refractometers feature automatic temperature compensation (ATC) and will report the same value over a wide range of practical temperatures, usually between 55 and 85°F (13 and 29°C). ATC is a convenience well worth seeking out because a couple of drops of even boiling wort will quickly cool to within this range. This is of particular advantage to all-grain brewers who want to monitor the gravity of runoff, which is typically around 170°F (77°C).

Units of Measurement


Most refractometers available to homebrewers these days are dual-scale instruments that report results in both Brix and specific gravity units of measurement. Brewers usually prefer to express density in either specific gravity or Plato units, while winemakers often prefer Brix. In fact, Brix and Plato are closely related, and the two units may be considered equal to within 5 percent.

If you are accustomed to working in specific gravity (SG) units, then take a second look before pulling the trigger on a too-good-to-be-true refractometer bargain to make sure it includes a specific gravity scale. Working in Brix isn’t terribly inconvenient, but you don’t want to be surprised on brew day.

Final Gravity Adjustment


One area where the hydrometer remains superior to the refractometer is in measuring final gravity (FG). Unlike reading a hydrometer, which simply floats in the mixture of water, sugar, and ethanol that we call beer, using a refractometer to get FG is a little tricky. To wit, you’ll need to know the gravity of the original wort, and then you have to perform a conversion. You can calculate it by hand (not recommended), or numerous tools such as BeerSmith include refractometer calculators that will do it for you. This shouldn’t make or break your decision to purchase one of these optical wonders, but keep it in mind so that you have realistic expectations.

Ultimately, the refractometer is simply another tool for your homebrewing arsenal. It won’t replace the trusty hydrometer, but in the hands of an educated brewer, it can be a valuable investment.

AUTHOR: DAVE CARPENTER

Thursday, December 17, 2015

5 Homebrewing Gifts That (Usually) Cost Less Than $100

5 Homebrewing Gifts That (Usually) Cost Less Than $100 Primary
The holidays are officially upon us, though one could easily be forgiven for thinking they’ve been upon us since mid-September. Some of us put off buying gifts until only a couple of days are left and then make up for our procrastination by doing our part to ensure the continued success of the overnight shipping industry. But if you like to get an early start, you may already be shopping for friends, family, and loved ones.

For the homebrewers on your list, here are five ideas for gifts that usually cost less than $100. If you shop around, you may even find them for considerably less.

1. Stir plate

To brew the best beer possible, yeast propagation really needs to be part of the equation. To that end, many of us rig up makeshift stir plates from old computer fans, magnets, cell phone chargers, and several rolls of duct tape. But a purpose-made stir plate is an affordable luxury that any hobby brewer would love to have. Look for a model that can handle 2 liters, which is the maximum size that most of us usually make. Larger plates can handle larger volumes, but of course, they come with a larger price tag. And don’t forget the stir bar!

2. Refractometer

Refractometers let brewers measure wort specific gravity using a very small sample, and most feature automatic temperature compensation (ATC). All-grain brewers in particular will enjoy the convenience of being able to take gravity readings throughout the runoff. In addition to ATC, look for a model that displays results in both Brix and specific gravity (SG). Consider throwing in a bottle of distilled water in case your brewer is eager to calibrate his or her new toy straight away.

3. Mash paddle

A sturdy wooden or stainless steel mash paddle will cut through the thickest of grists and just feels right in your hands. Generally speaking, good mash paddles don’t have lots of features to watch out for, but some can be customized with your brewer’s initials or a decorative, beer-themed emblem.

4. Fancy growler

Gone are the days when transporting your kegged homebrew automatically meant filling up a standard-issue glass growler from the neighborhood pub (and trying to find a cap!). Now you can find stainless steel vacuum flasks, mini-kegs, and even growlers that accept a small carbon dioxide charger and dispense beer draft-style.

5. Digital temperature controller

Good temperature control improves the quality of any brew and is essential for making lagers. Give your brewer the gift of predictability with a digital controller. This plugs right into a standard wall outlet and features a probe to measure the temperature of fermenting beer. It then turns an old refrigerator or chest freezer on or off to maintain the desired temperature.
This is but a small smattering of ideas for gifts that any homebrewer would be thrilled to receive this holiday season. And remember, if you like craft beer, giving a piece of gear to an enthusiastic homebrewer means that your investment will come back to you in the form of delicious homebrew for years and years to come.

Saturday, November 7, 2015

Learn to Homebrew Day 11/7/2015


Learn to Homebrew Day (LTHD) was established by the American Homebrewers Association (AHA) in 1999 to encourage homebrewers to introduce their non-brewer friends and family to the most rewarding hobby, obsession and lifestyle since the beginning of time!

Make your own beer today! www.brew-boss.com Electric Homebrew Equipment

Saturday, June 6, 2015

New to Home Brewing

    
Boilingwortenhanced


Brewing is the process of making beer — a fermented, alcoholic beverage made from grains. The most commonly used grain for brewing is barley, but there are others (including wheat, rye, oats and sorghum). Brewing is similar in some ways to making wine, which is a fermented alcoholic beverage made from fruits (most often grapes) or mead, which is fermented honey. However, the brewing process has its own unique elements as well.

You can think of beer as a beverage made from (essentially) four ingredients using four main steps. The ingredients in beer are malt, hops, yeast and water and the four steps are malting, mashing, boiling and fermenting.

The Four Ingredients

Malt:
Malt is a grain that has been prepared for brewing (by a process called, not surprisingly, malting). Malted barley is the most common base grain used in beer, but malted wheat is also prevalent. In some beers, unmalted ingredients — including corn and rice — are used. Malt provides the sugar that the yeast consume during the brewing process and therefore determines the strength of the beer. More malt equals stronger beer. Most homebrewers, or professional brewers for that matter, do not malt their own grains. They simply purchase malt produced by maltsters or they use malt extract, a more highly processed form of malt.

Hops: Hops provide the bitterness to balance the sweetness in beer. Compared to malt, hops are added in small quantities to beer, even in the most bitter IPAs. Most homebrewers use pelletized hops in their brewing as this is a convenient form to store and use.

Yeast: Yeast converts the unfermented beer (called wort) that brewers make on brewing day into beer. They consume sugars from the malt and convert them to alcohol and carbon dioxide. Alcohol is, of course, what gives beer its "kick" and carbon dioxide is what gives beer its fizz.
Water: Most beers are over 90% water by volume. And, quite a bit of water is used in the brewing process that does not end up in beer. A basic (although not infallible) rule of thumb in homebrewing is, if your water tastes good, it's suitable for brewing. If your tap water doesn't taste good, try using bottled spring water instead.

The Four Steps

Malting: As mentioned before, malting is usually done by maltsters. However, malting begins the process of converting raw materials into beer and we'd be remiss if we didn't mention it. In malting, naturally-occurring enzymes in the grains are activated so they can be used for the next step, malting. Then, the grains are dried by heating (called kilning). Kilning dries the grains, which allows them to be stored for long periods of time, and also develops malt flavors and aromas that get extracted in the brewing process.

Mashing: In mashing, malted grains are soaked in hot water. In the process, the starch molecules in the grains are dissolved in the hot liquid and the enzymes (activated by the maltster) chop the large starch molecules into smaller molecules of sugar. The main sugar produced in the process of mashing is maltose. Malt sugars from the mash are what fuel the yeast cells during fermentation.
For homebrewers who brew with extract, this process has been done for them. Malt extract is made from malted grains that have been mashed. The resulting liquid is then condensed into syrup or dried into a powder.

Boiling (and Cooling): The solution of water, malt sugars and other substances from the malt is called wort (or unfermented beer). Before wort can be fermented, it must be boiled. Boiling sanitizes the wort and helps to make the finished beer a more stable product. During the boil, the hops are added to the wort and bitter compounds are extracted from them. After the boiling, the wort is cooled so that yeast can be added.

Fermenting (and Conditioning): Once the wort is cooled, yeast is added to it. After a short time in which the yeast acclimate to the wort, fermentation begins. For homebrewers making average-strength ales, fermentation will last from a few days to a week. For brewers making stronger beers or lagers, fermentation can last longer, up to months. After the beer has fully fermented (and sometimes conditioned for awhile), it is ready to be bottled (or kegged) and served.

Homebrewing Equipment

In order to make homebrew, you will need a small amount of specialized equipment. Most homebrew shops sell starter kits, consisting of a bucket fermenter and some other basic equipment, starting at around $60 (US). The more complex the brewing method the more equipment you will tend to need. You will also need a large pot to boil your wort in. A 5-gallon (19 L) stainless steel pot is a great one to start brewing in and these can be found starting at around $40 (US) in many homebrew shops.

Items You Will Need
You will need a few items that you might not already have in your kitchen. You can find these items at your local homebrew shop or in a catalog or www.Brew-Boss.com :
  • Stainless steel brewkettle. Anything less than four gallons will be frustrating due to boilovers or scorching. You will want a top for it if possible. This is a good thrift-store item.
  • Five-gallon (19 L) glass or plastic carboy and five-gallon/19 L (or larger) food-grade plastic bucket, or two plastic buckets. You will use these as a fermenter and bottling vessel. If you choose a carboy, you'll need a #7 drilled rubber stopper; if you go for two buckets, you'll need a lid for one of them with a hole drilled for the airlock.
  • An airlock. This allows carbon dioxide produced during fermentation to escape from your fermenter.
  • A racking cane (rigid plastic) and 6 feet of vinyl siphon hose that fits over the end of the cane.
  • Two cases of clean, non-twist-top beer bottles.
  • A bottle capper and a package of crown caps.
  • Malted grains, dried malt extract or liquid malt extract (depending on your brewing method and recipe).
  • Hops Choose pellets or "leaf" (whole flower) hops, but pick those that are as green as possible. Yellowed hops might be old or losing some flavor.
  • A package of ale yeast. Dry yeast, rather than a liquid culture, is fine for a first batch, or you can use liquid yeast if you prefer.
  • 2/3 cup of dextrose, also known as corn sugar, to use at bottling time.
  • Homebrew-friendly cleaning and sanitizing chemicals.
Around your kitchen you might find a few other items that will make your mission more fun or easier: a measuring cup, a large spoon for stirring, a large funnel (if fermenting in a carboy), and a large strainer (if using leaf hops).

Cleaning and sanitizing
There are many kinds of brewers, from extract brewers making their beer in 5-gallon (19-L) buckets to commercial brewers making their beer in multi-story fermenters. The skills these brewers need and the procedures they use vary substantially. However, there are two skills that every brewer needs, no matter what size brewery they brew in: cleaning and sanitizing.

Cleaning and sanitizing your brewing equipment is the first step listed in the procedure on brew day. Your brewing equipment needs to be as clean and as free from biological growth as possible. The only organism you want growing in your fermenter is yeast. Growth of other organisms in wort can spoil the resulting beer. Contaminated beer may turn out sour or develop other off flavors. It can smell like baby diapers. In addition, the beer may gush when opened or your bottles may explode.

To clean your equipment, you'll need a special solution that's made for brewing equipment. TSP (tri-sodium phosphate) and PBW (Powder Brewery Wash) are two good cleaners to use in your homebrewery. Make up the solution, grab a scrub brush and clean all the surfaces you can reach. Run your cleaning solution through your racking cane and fermentation lock. After cleaning, rinse the equipment. When you're done, visually inspect your equipment, especially those surfaces that will contact the wort. If you see any dirt or residue, repeat your cleaning procedures. Don't rely on your sanitizer to take care of any surfaces that are not spotless — it doesn't work that way. You'll need your equipment to be as clean as possible for the sanitizer to be effective.

To sanitize, soak any equipment that will touch wort in sanitizing solution. There are a few homebrew-friendly sanitizers to choose from, including iodophor. Make a solution with iodophor by combining 1 ounce in 5 gallons of water. Be sure to run sanitizing solution through your racking cane and fermentation lock and let it sit there for the same amount of time your bucket is soaking. When you're done, rinse the equipment with clean water.

The final step is prevention. Don't take this the wrong way, but you may be the biggest threat to your beer! Every day, you pick up bacteria and yeasts from every surface you touch. You transfer these microorganisms to every surface you touch subsequently. On brew day, you handle malt extract and grains. You may also touch brewing equipment that wasn't completely cleaned after your last brewing session. All these things may be harboring strains of bacteria or yeasts that can live in your wort.
So don't touch any surface that will touch wort (the inside of buckets, submerged parts of racking canes). In addition, wash your hands often while brewing. When you're done, clean your brewing equipment thoroughly and wipe down all surfaces that may have gotten spattered, like your kitchen counters and stovetop.

A Word About Troubleshooting

If your first batch is not the best beer you have ever had, there are generally only two possible reasons:

Contamination. If a microorganism other than your brewer's yeast got in your batch you will likely know it. Vinegar flavor, mud puddle, locker room/dirty socks, or compost pile odors are classic signs of contamination. (These contaminators won't kill you, but they might make you sad or discouraged if you have to dump out all that hard work.) Analyze your routine. If you can figure out the source of contamination, fix it and try again. Sanitization does get easier as you brew more.

Not what you expected. There are many nuances you can add as you gain brewing experience, among them: specialty grains, boiling of a larger wort volume (and add less water to the fermenter), more complex hopping, efficient wort cooling, liquid yeast cultures, dry hopping, and all-grain brewing, wherein you start from grain instead of extract. A simple improvement is to add a "secondary fermentation" step: When fermentation has finished, transfer the beer to another carboy for two weeks or so. This can give you clearer, cleaner beer.

These additional procedures offer more options, more ways to tweak your product. Good brewing notes and more attention to details will allow you to customize your flavors, too.

Very faint sherry-like or cardboardy flavors should not discourage you, because they are fixable; as you get more comfortable brewing, handle hot wort and finished beer very gently. Aeration (splashing, spraying, bubbling) of hot wort or of finished beer can lead to oxidation and produce those flavors. The only time you should aerate actively is when your freshly brewed wort has cooled, so siphon gently, stir primings carefully, and so forth. If you have not reached perfection in your routine, you'll still have the ability to make great beer. Don't worry if your siphon hose bubbles when you're filling a bottle, but think about ways to reduce the bubbles next time.

http://byo.com/newbrew/your-first-home-brew

Thursday, June 4, 2015

Carbonation Priming Chart

The amount of carbonation in bottle-conditioned homebrew is dependent on two things — the residual level of carbon dioxide after fermentation and the amount of carbonation obtained from the priming sugar.

To get the level of carbonation you desire in your homebrew, choose a level of carbonation (from Section A) and subtract the amount of residual carbonation in your beer after fermentation (from Section B). This is the amount of carbonation you to add via priming sugar. The amount of carbonation produced by three different priming agents (anhydrous glucose, glucose monohydrate and sucrose) in 5 gallons (19 L) of beer is given in Section C.

For example, let's say you fermented an American pale ale at 68 °F (20 °C) and plan to carbonate it with corn sugar (glucose monohydrate). From Section A below, you decide that you want your carbonation level to be 2.4 volumes of CO2. From Section B, you see that you should have 0.85 volumes of CO2 in your beer after fermentation at 68 °F (20 °C). Subtracting 0.85 from 2.4 gives you 1.55 volumes of CO2, the amount of carbonation required from the priming sugar. From Section C, you see that adding 4.5 oz. (128 g) yields 1.53 volumes of CO2, which is pretty close.

Section A: Levels of Carbonation in Various Beer Styles


Sunday, May 31, 2015

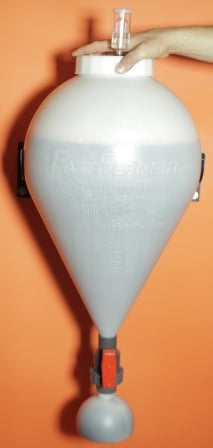
Conical Fermenter Advantages for Home Brewing

Conical fermenters, once out of reach for home brewers, have recently become very popular as companies have started making conicals in small and affordable packages. Many home brew sized conicals have entered the market in the last few years in the sub-$200 price range. I have to say, I’ve been using primarily carboys for many years, but the conical does offer some advantages over a bucket or carboy.

BUY A FERMENTER AT: http://www.brew-boss.com/category-s/127.htm


Professional Conical Fermenters

Most modern professional fermentation vessels are cylindo-conical. They are typically cylindrical on the top, but have a conical shape on the bottom, and vary in size from a as little as a half barrel (about 60 liters) to hundreds of barrels (several thousand liters). Professional fermenters are made from stainless steel as it is easy to clean and can be reused almost indefinitely. They all have a valve at the very bottom of the cone which can be used to remove sediment, and also drain the finished beer for bottling or kegging when done. Most also have a second port higher on the cone which can be used to draw samples of beer for measurement or tasting.

The Advantage of the Conical Fermenter

The reason conicals are used almost exclusively in professional brewing is that they have several advantages for beer production:
  • One significant advantage is that a conical is a “uni-tank” which means that you can perform the primary fermentation as well as aging/storage in the same vessel. With a flat bottomed fermentation vessel, you have to transfer the beer to a second vessel to separate the sediment from the beer for aging. However in a conical, you can simply slowly open the valve at the bottom to let the sediment out, but leave the beer behind.
  • Closely related to that is the ability to remove yeast and sediment from the beer easily, and at any point in the fermentation. This makes it easy to reuse the yeast by drawing some yeast off and washing the yeast. This can save you some money in the long run as you can use one yeast vial for several batches.
  • Another advantage is that you can transfer the wort without siphoning, using just gravity as long as your fermenter is higher than your bottling/kegging vessel. Some fermenters with closed tops even allow you to apply CO2 pressure to the top of the fermenter to force the beer out the bottom to transfer.
  • Many conicals are made from stainless steel which makes them easy to clean and maintain. Even a plastic conical can be cleaned pretty easily in most cases.

Using a Conical Fermenter

Conicals are pretty easy to use. You transfer and ferment your wort just as you normally would. Most homebrew sized conicals have an airlock on the top to relieve pressure during fermentation, and you can draw sediment as desired from the bottom of the conical.
When drawing off yeast and sediment you will usually get a mix of beer and sediment – it is rare to get a clean plug of yeast. Its best to draw just a bit of sediment at a time from the bottom over several days than it is to try to remove all of the yeast/sediment all at once. Also you need to be aware that on some conicals, yeast can stick to the side of the cone, so it may require a gentle nudge to get it out. If harvesting yeast for reuse, I recommend that you wash your yeast and store it properly.
When drawing liquid from the bottom of a conical you also need to be aware that some air will enter via your airlock. Make sure you use a two-way airlock that will allow some air in or remove the airlock temporarily. Though adding air to the fermenter is not ideal, it will be fine if drawing off small amounts of sediment as there will still be a layer of CO2 over the beer protecting it, and also some fermentation will still be generating CO2 to push the air out.
When transferring for bottling/kegging, try to separate the sediment first, and once you have a mix that is mostly beer, let the valve run and transfer it all.


http://beersmith.com/blog/2014/12/30/conical-fermenter-advantages-for-home-brewing/

Saturday, May 23, 2015

Whirlpooling Makes a World of Difference

Homebrewing Whirlpooling
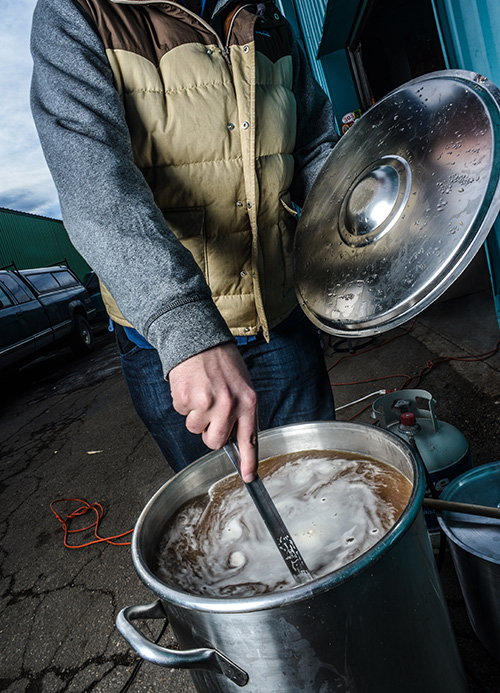
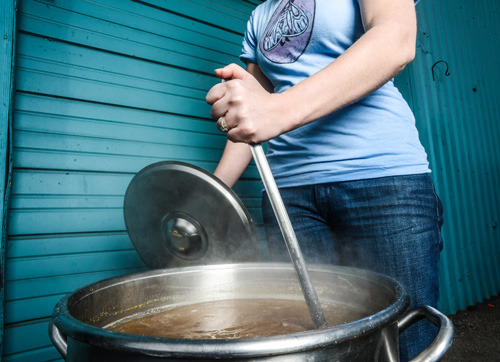
Whirpooling is an easy process to include in your brew day that can greatly impact your beers. If you have a spoon, you can whirlpool!
The Benefits of Whirlpooling
Quicker Chilling: The time it takes to chill wort to yeast pitching temperatures is greatly decreased when whirlpooling. Because the wort is circulating, the cool and warm wort will constantly be churning and combining to promote quick chilling. Also, whirlpooling with a wort chiller can offer increased control of hitting an exact pitching temperature.
Clearer Wort: A whirlpool promotes clearer wort by collecting the cold break solids in the center of the brew kettle. The chilled wort can then either be siphoned from the side of the kettle or through the kettle valve to avoid transferring any particulate.
Improved Hop Flavor & Aroma: Because whirlpooling cools wort faster, post-boil hop additions instill more flavor and aroma without too much of the bitterness. Hops will continue to isomerize—the process which attaches alpha acids to water molecules creating bitterness—above 180°F (82°C). Being able to drop below this temperature will prevent isomerization in hop additions that are intended to instill just flavors and aromas.
Reduced DMS: The heat from the boil converts s-methyl methionine (SMM) in malt to dimethyl sulfide (DMS), which appears in beer as an unfavorable cooked or cream corn flavor. A longer, vigours boil—especially when using Pilsner malt, which contains eight times more SMM then typical base malts—can drive off DMS. When the boil is over, the heat continues to convert SMM to DMS until temperature drops below about 140°F (60 °C). Whirlpooling cools wort quickly, reducing the amount of DMS occurring in the post-boil.

How to Whirlpool

Whirlpooling involves creating a circular current in the brew kettle, and this can be done using various techniques and equipment.
Spoon
WhirlpoolingThe simplest way, whether using an ice bath, an immersion chiller or no formal chilling method, is to stir the contents of the kettle with a spoon rapidly until a circular current is achieved. Stir along the walls of the kettle for a few minutes, taking care not to splash to prevent any chances of hot side aeration, until a strong, lasting whirlpool forms. Depending on what your goals are (e.g., clarification, hop flavor/aroma), allow the whirlpool to stand for 10-30 minutes before racking.
Pump or Counterflow Chiller
If a pump is available, or you are using a counterflow chiller, a whirlpool can be created by angling the pump-out hose along the side of the kettle a few inches below the surface of the wort. This flow will cause the wort to spin in a circular current. Be careful when creating a whirlpool with a pump as it can cause hot wort to splash out of the kettle.
One of the most effective means of whirlpooling and chilling is highlighted by Jamil Zainasheff in “A New Spin on an Old Chiller” in the January/February 2007 Zymurgy(AHA members can access this issue instantly on eZymurgy or with the Zymurgy mobile apps). Zainasheff offers an upgrade to the typical immersion chiller that makes for effecting whirlpooling and chilling.

The Physics of Whirlpooling

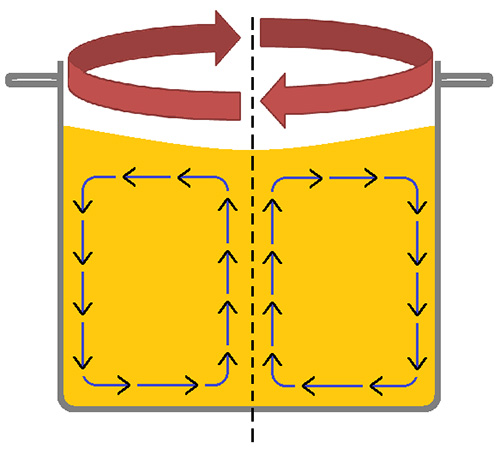
whirlpoolingIt may seem logical that a whirlpool would send the solid material to the outside of the kettle because of our child hood experiments with swinging a bucket of water around in circle without any falling on our heads. However, because the contents of the boil kettle are light enough, they will collect in the center due to something called the “tea leaf paradox.”
Basically, stirring the wort into a whirlpool is creating centripetal force, but because of friction caused by the liquid’s contact with the bottom and sides of the kettle, the liquid towards the bottom slows, creating a pressure gradient. This pressure gradient is lower than the upper portion of the liquid, so the solid materials in the kettle are pulled towards the center of the bottom (things move from higher to lower pressures). Isn’t physics phun?
Class dismissed!


Tuesday, May 19, 2015

Homebrewing: How to Dry Hop Your Beer


20110325-144121-Homebrew-Dry-Hopping.jpg

Opening a sealed package of hops from the homebrew store gives a blast of that fresh aroma that sometimes seems to be difficult to capture in a beer. The truth is, the simple technique of dry hopping is all it takes to bring out those wonderfully fresh citrus, pine and earthy aromas in your homebrew.
Dry hopping is basically the ultimate late hop addition.
Traditional boiling changes the natural alpha acids in hops into iso-alpha acids—they're the stable compound that provides the bitter flavors in beer. Unfortunately, boiling also breaks down the volatile essential oils that comprise the aromas and much of the flavor of the hop itself. When we first talked about hops, I mentioned that the later the hops are added to the boil, the more they will affect flavor and aroma. This is because the less time hops are boiled, the fewer bitter iso-alpha acids are produced and the fewer aromatic essential oils are driven away. Dry hopping is basically the ultimate late hop addition. 
The phrase is a bit of a misnomer, since you don't keep the hops dry at all. Instead they are added to the beer in the conditioning phase, after the fermentation but before it's time to bottle. Usually this means you'll add the hops after the airlock has stopped bubbling. If you're doing a two-stage fermentation, then the dry hops would be added at the time you transfer your beer to a secondary fermentation vessel. Otherwise the rapid discharge of carbon dioxide will "scrub" the delicate flavors that we're trying to preserve. Since the beer is only around 65°F at this point in the process, the breakdown of essential oils occurs much more slowly, preserving the flavor and aromas of the hops.
Dry hopping is a great way to experiment with different recipes. You can always dry hop a Pale Ale or an IPA with the same variety of hops used in the recipe. Or you can try to find a variety that complements the flavors you're already using. In our Pale Ale, for example, dry hopping with the citrusy Amarillo hops would help bring out the grapefruit character of the Cascades added late in the boil. But you can also try dry hopping other, more unexpected styles to make a hoppy American-style Stout or a hoppy wheat beer.
When you do dry hop a homebrew, you'll want to drink it a little quicker than usual. The added aromas are still quite volatile, even at cooler temperatures, and they will dissipate within a few months of bottling. Some lasting flavors and aromas will remain after that, but you will notice that the first few bottles you open will have a much stronger aroma than the last ones in the batch.

Dry Hopping Instructions

The only equipment needed is a nylon hop bag, a few clean glass marbles, and about an ounce of hops. The job of the marbles is to sink the bag of hops to the bottom of the carboy or fermentation bucket. You can use as much as two ounces of hops for a five gallon batch, but one is enough to get the job done.
Sanitation is still important here, but since we add the hops after fermentation is complete, the alcohol present in the beer provides some protection against unwanted bacteria. Simply boil the hop bag and the marbles for about 10 minutes to sanitize. Hops are naturally antiseptic, which is one of the reasons they're used in the brewing process to begin with, so there is no reason to sanitize them. Now, just add the marbles and the hops to the bag, and put them in the fermentation vessel.

The majority of the benefits will occur within a week, but you can leave the dry hops in the fermenting vessel up to two weeks if you would like. After that, just transfer to a bottling bucket and bottle as usual.

Sunday, May 17, 2015

Home Brew Recipe: "Miller Like"

Home Brew Recipe (5 gallon batch) by www.Brew-Boss.com

Note: Hops in the recipes below are pellets.

 "Miller Like" This is a basic drinkable beer that resembles a typical American "blonde" beer. It is a lighter beer that everyone enjoys. If Malt is purchased in bulk (50-55lb) bags, you can expect this recipe to cost a little over $10!

8 lbs pale Ale Malt (2 Row)

1 oz Cascade Hops (Boiling)

½ oz Hallertau Hops (Aroma) added 15 minutes before end of boil

1 tsp Irish Moss added 15 minutes before end of boil

1 packets Safale US-05 Yeast or equivalent


Strike Temp 154F
Mash Time 60 Minutes @ 152F
Sparge Time 15Minutes at 168F
Boil Time 60 Minutes

Calculating Starting Water Volume
We've found that 9 pounds of grain absorbs about 1 gallon of water during mashing. We also lose about 1 gallon of volume per hour of boil. So, for the Miller Like recipe example above, we have 8 lbs of grain, so we'll lose about 1 gallon of water to grain absorption. We have a 1 hour boil, so we'll lose another gallon, totaling 2 gallons lost. If we want 5.5 gallons into our fermenter (allowing for trub loss), we'll need 7.5 gallons of water to start. This same calculation can be made for any recipe.


Friday, May 15, 2015

Homebrewing: Introduction to Mashing and All-Grain Brewing


Making the jump from extract brewing to all-grain brewing can be daunting. There is all new terminology to learn, a seemingly an endless supply of expensive equipment, and more science than most of us have done since high school. But the truth is, starting out in all-grain brewing doesn't really have to be hard or expensive.

The Brew-Boss® home brew system is an all electric home brewing system that allows home brewers to brew extract and all-grain recipes with complete and accurate automatic control of temperature and timing. 

Before we jump into recipes, we need to look at the biggest difference between brewing an extract beer and an all-grain beer. All the sugar in liquid or dry malt extract has been extracted from base malts. After the malt has been processed, it's condensed into a form that's easy to package and work with. When making an all-grain style recipe, the sugar extraction step is done by the homebrewer through a process called mashing. Mashing gives the homebrewer complete control over the type of sugar that is extracted and gives more flexibility with the varieties of grain that can be used.

Mashing simply means to combine crushed grain with hot water at a ratio of around 1.25 quarts per pound of grain. The grain will soak for about an hour, and then the liquid will be drained from the grain. Once the liquid is separated from the grain, you can proceed with your brew day in the same way you would an extract batch. While it sounds trivial, beneath the surface of that simple grain and water mixture is a myriad of complex chemical processes that produce fermentable wort.

Enzymes


Enzymes are proteins that speed up chemical processes. Mashing activates enzymes that naturally exist in the base malts. A wide variety of enzymes are present in base malt, and each one facilitates a different chemical process. The most useful enzymes for homebrewers are the ones that break down complex carbohydrates into simple sugars for the yeast to eat. Other enzymes in the mash will help eliminate proteins that cause haze, and some will produce nitrogen compounds that aid in yeast health during fermentation.

There are some enzymes that the brewer wants to avoid, such as ones that will destroy head retention or create watery mouthfeel. The challenge of the homebrewer is to coax out the enzymes that will improve the beer, and avoid the ones that will cause problems.

Mash Temperature and pH


Different enzymes will activate and deactivate depending on the temperature and pH of the mash.

Different enzymes will activate and deactivate depending on the temperature and pH of the mash. For the homebrewer just getting into all-grain style recipes, controlling the mash pH is not as big of a concern as controlling temperature. Mixing the right proportions of grain and hot water on a homebrewing scale naturally produces a pH that is between 5.1 and 5.5, which is ideal for the enzymes we want to activate. Testing the pH is as simple as picking up inexpensive testing strips from your homebrew shop. Remove a small ladle of liquid from the mash after it has been thoroughly mixed and immerse the testing strip for the length of time listed on the package.

Temperature control is key to proper mashing. In order to activate the enzymes that convert grain into simple sugar, the mash temperature must be between 145°F and 158°F. For most styles of beer, a mash temperature of 150-154°F is used, and will produce a wort that can be easily fermented by the yeast while retaining a medium body. If the mash temperature is in the 145-150°F range, the enzymes will produce highly fermentable sugars and the final product will have a drier finish. Mash temperatures in the 155-158°F range will produce sugars that are harder for the yeast to ferment, resulting in a fuller bodied beer. Mashing in the lower temperature range is appropriate for styles like a Saison or a Tripel, where the higher temperature range is used for Scotch ales and Sweet Stouts.

When first venturing into the world of mashing and all-grain brewing, proper mash temperature can be very difficult to achieve.  Using the the Brew-Boss system dials in the correct temperature.  If you don't yet have a Brew-Boss my rule of thumb for people just starting out is "Close is good enough". If the thermometer in your mash is reading within 5°F of your target, you have nothing to worry about. The thermometer was not even used in commercial brewing until at least the late 1700's, and widespread use didn't happen until much later. Prior to that, it was impossible for brewers to know exactly what temperature their mash was at, and presumably they were made able to make decent beer. You should always try to hit the proper mash temperature, but don't stress out if you miss it, get a Brew-Boss.

Mashout and Lauter


After the mash sits for about an hour, the next step is to stop all enzymes from working. Homebrewers usually accomplish this by adding hotter water to increase the mash temperature to 170°F. At this temperature, all enzymatic activity is stopped, and the sugar that was produced begins to flow freely like honey in the microwave. This step is called the mashout. The temperature shouldn't exceed 170°F, otherwise unpleasant tannins from the grain will leach into the wort.


Lautering is a brewing term for draining the liquid wort out of the grain. There is a lot of different homebrewing equipment that will help you with lautering, ranging from pre-made heavy strainers to a do-it-yourself braided hose for the more crafty homebrewers. The first recipes we'll be looking at will use the simplest and cheapest method of lautering, called the brew-in-a-bag method. After the the wort is separated from the grain, the brew day proceeds in the same way as when you brew with an extract-style recipe.


http://drinks.seriouseats.com/2011/05/homebrewing-introduction-to-mashing-how-to-all-grain-brew.html

Wednesday, May 13, 2015

Seven Easy Ways to Improve Your IPA!


Here are 7 easy ways on how you can improve your Home Brewed IPA!

1) Every Beer Starts with Water!

Never under estimate the importance of beers primary ingredient, water. The water that you are using to make your beer is critical, especially when it comes to all grain brewing. Water plays an important part in everything from the taste and the mouth feel of a beer to the sugar conversion and acidity in a finished beer.

If you are using city water that has been treated with chlorine, always make sure that you are removing the chlorine with a carbon filter or alternative method. It is also a good idea to check your city’s water report to see if you are lacking or have an over abundance of minerals in your water that may be impacting your beer. Vinnie suggests treating your water with gypsum in both your mash and your boil to heighten the hop flavor of your beer. You can also use low level sodium additions to have a similar effect. Before making these additions you should first examine your existing levels to make sure that it will not detract from the quality of your finished beer.

2) Dry Hop Until You Just Can’t Dry Hop Anymore!

Unlike adding hops early in the boil, dry hopping adds little to no bitterness to the finished beer but what it does add is a strong and fresh hop aroma! When dry hopping beer, I always recommend adding the hops after the airlock has stopped bubbling in fermentation. That ways the escaping CO2 will not carry the hop aroma out of the fermentor along with it. Vinnie suggests adding multiple dry hop additions at different times which may deliver additional hop aroma to your finished IPA!

3) Do Not Rush Your Fermentation!

We all want to try out our latest beer as quickly as possible, but there is allot to be said for patience in home brewing! If you have the ability to temperature control your fermentation, set the temp between 65F to 67F. Yeast loves a low stable temperature and produces far less off flavors than at higher temps. It will take longer to ferment at a lower temperature but your beer will come out cleaner tasting so that your robust hop profile can really shine in the finished beer! Also, cold crash your beer once your fermentation has completed. Try to crash at around 36F for 2 weeks if possible. This will help force any residual yeast out of suspension and leave you with a cleaner tasting and clearer beer!

4) Don’t Skimp On the Yeast!

Now a days home brewers have a huge variety of options when it comes to yeast. If you want your beer to be as good as possible, then you are going to have to use the best and most suitable yeast for the style of beer that you are brewing. A great West Coast IPA yeast strain is theWhite Labs WLP001 Ale Yeast.

Make sure that you create a yeast starter, insuring viability and that you pitch a sufficient quantity of yeast for the strength of beer that you are brewing.

5) Do Not Overload Your Beer With Crystal or Malty Grains!

Vinnie suggests that you add crystal malts sparingly to your grain bill. He remarks that the sweet flavors and aromatics derived from those grains can compete with the flavors and aromas of your hops. An IPA is a showcase for the hops and the other ingredients should complement them not detract from them.

6) Consider Adding Hop Resin Extract to Your Boil!

Pure hop resign extracts can be a great way of boosting the bitterness of your wort with out having to add an extreme amount of hop additions to your boil. Just like with actual hops, in order for the bitterness to be captured by the wort, the hop resign still needs to be boiled in the wort for a sufficient amount of time.

7) Opt For a Dryer Beer!

A dryer beer can really help the hops in your IPA stand out! Vinnie suggests supplementing approximately 5% of your grain bills sugars with dextrose. Dextrose is a very simple sugar that yeast can easily ferment. Another option would be dropping your mash temp down by a degree or two in order to create less complex sugars during the mashing process.


http://www.westcoastbrewer.com/BrewersBlog/home-beer-brewing-techniques/seven-easy-ways-to-improve-your-ipa/

Thursday, May 7, 2015

The stout matrix


http://draftmag.com/the-stout-matrix/

The stout matrix
Practically black and forever brooding, stout’s claim to fame is its swirls of cocoa, coffee, char and cola notes extracted from roasted malt. But the style’s ever-expanding with fruit, barrels and hops shining new light into our favorite dark brew.

1. Cocoa conspires with all that dark roast to elevate chocolate stouts to confectionary status.

2. Coffee stouts give a double jolt: The first from real coffee (beans or cold brew!) in the batch, the second from some bonus booze.

3. Beans in the brew give vanilla stouts a floral, high-pitched sweetness.

4. Real bivalves—meat and shells!—lend a distinct brininess to oyster stouts.

5. Funky, fruity Belgian yeast gives Belgian stouts a strangely alluring sweet spice.

6. Blueberries, pineapple, squash; there’s no limit to the sweet stuff brewers will slip into a fruit stout.

7. Smoldering smoked stouts spark a little campfire (via smoked malts) in every sip.

8. Sturdy malts make stouts good for wood. Barrel-aged stouts nap in new vats or ones that once held rum, whiskey or wine; they emerge mature and high in alcohol.

9. A little lactose in the brew gives sweet stouts velvety creaminess and a milky-sweet smirk.

10. Oatmeal stouts augment roasted barley with sweet oats for a chewy, crazy-creamy mouthfeel.

11. Intense roast, complex malts and high alcohol make imperial stouts some of beer’s biggest boozers.

12. Sessionable dry stouts are a step up from porters—and fish ‘n’ chips best friend.

13. Bitter U.S. hops color American stouts with subtle greenness.

14. Like foreign extra stouts but sweeter, tropical stouts dial up their fruit and molasses flavors.

15. Assertive roast headlines foreign extra stouts, but ABVs under 8% keep them manageable.


Want to brew your own stout?  Brew Boss has the system for you!
Cheers! www.brew-boss.com

Sunday, May 3, 2015

New Technology from Brew Boss - COFI

Brew-Boss.com has developed a new technology we are calling the COFI filter. COFI is an acronym for:

Center
Out
Forced
Infusion


The Brew-Boss COFI filter is an exciting new patent pending technology that optimizes the efficiency of Brew-In-A-Bag (BIAB) type brewing. The filter is manufactured from 304 grade stainless steel mesh which holds the grain during the mash process, but allows water to flow through.


A central infusion tube, that is perforated with a series of flow-matched holes, extends all the way to the bottom of the filter.


During the mash cycle, water/wort is continuously pumped from the bottom of the kettle to the top of the filter, into the central infusion tube, where it is forced through the grain bed. Water passing through the grain bed flows out of the filter to the bottom of the kettle. This Center Out Forced Infusion (COFI) technology assures that all the grain is in constant contact with the mash water and that there are no dead spots. No stirring is required as the system is self agitating and efficiency is thereby optimized. The COFI filter is also very easy to clean, simply invert it in a sink and spray it with your sprayer! Because it is made of stainless steel, it will not rust and will last indefinitely.


The central infusion tube is also connected to a false bottom. After mashing is completed, the elbow fitting at the top of the COFI filter is exchanged with a lifting ring. When removing the filter, the filter is lifted by the lift ring. This brings the false bottom towards the fixed cover, allowing the weight of the filter to squeeze the grain. This squeezing action extracts much of the trapped sweet wort from the grain.


Visit www.brew-boss.com and purchase this new technology for your home brewing!

Thursday, April 23, 2015

HOPS-Boss App Now Available!

The Hops-Boss application is completed for both Android and iOS (iPhones and iPads)!


Now you can add the Hops-Boss automated hops feeder to your existing brew kettle. The new App allows you to program hops addition times into the unit for stand-alone operation or to manually control the feeder. Purchase the hops boss feeder at http://www.brew-boss.com/product-p/hb-master.htm and download the app from the Google Play store or iTunes.

Here is a video link showing the Hops-Boss hops feeder:
https://www.youtube.com/watch?v=NNiwBl_035U