Monday, May 30, 2016

My Beer Is Flat And Won't Carbonate!

#carbonate #homebrew Brew Boss Electric Homebrew Equipment www.brew-boss.com

by David Ackley
Beer carbonates when beer yeast consumes sugar and excretes CO2, and the CO2 has no where to go but into solution because the beer bottle or keg has been sealed. Let me share some theories with you about what’s going on and some possible fixes for your flat beer.
The problem you’re describing is probably caused by one of the following:

  • Not enough time/ the room's not warm enough - I understand you’ve waited four weeks already, but if you did everything correctly, chances are very good that with more time and the beer bottles located in a slightly warmer room, your beer will carbonate. Some beer yeasts work more slowly than others, and high gravity beers generally take longer to carbonate. I know it’s tough with all that beer sitting there, but patience may be the answer to fixing you flat beer.

  • Not enough priming sugar - If you brewed the beer as instructed, this probably isn’t the case. However, did the priming sugar get well-mixed into the beer? I usually pour the sugar/water solution into the bottling bucket first, then siphon the beer into it. This usually mixes things up pretty well. I also recommend checking out this nomograph, which shows the correct amount of priming sugar to use based on temperature, desired carbonation level (vols CO2), and type of sugar.

  • Non-fermentable or slowly fermenting priming sugar - If for some reason you used a non-fermentable sugar to prime your bottles, such as lactose sugar, it’s probably not going to give you any carbonation. Similarly, if you used a complex sugar to prime, it may just take longer for the yeast to ferment those complicated sugar molecules. Corn sugar, cane sugar, and dried malt extract work best for priming.
  • Bad seal on the bottles - It’s possible that there isn’t a good seal on your beer bottles, allowing CO2 to escape. The result is a flat beer or a beer that won't carbonate completely. This could be the case if you’re using a twist-off instead of pop-off style beer bottles. You could also just be getting a bad seal when you cap.

  • Yeast killed off - If there was sanitizer left in your bottles or bottling bucket, there’s a small chance that yeast got killed and whatever yeast that’s left is having a tough time carbonating your beer. If you use a “no-rinse” sanitizer on your bottling bucket and bottles, make sure the sanitizer dries completely before use. I usually rinse after sanitizing, even when using a no-rinse sanitizer.

How to fix a flat beer that won’t carbonate

So, what can be done to fix a flat beer? Here are a few possible ways to carbonate your beer, with the easiest and most likely solutions listed first:

  • Hurry up and wait...then wait some more - The first thing I would do is move the bottles to a room that’s a little warmer, consistently around 70°-75°F degrees, to try to “wake up” the yeast into carbonating your beer. 99% of the time, this will fix your problem. If it doesn’t fix the problem after 8 weeks or so, you’ll need to take more drastic action. Keep in mind that higher gravity beers may just take longer to carbonate than others.

  • Add more sugar - If you’ve already waited for eight or more weeks and know that you didn’t add enough priming sugar, you could open up each bottle and add a pinch more. It’s important to be very careful with this -- if you add too much sugar, you could get some bottle bombs. It is possible to create so much carbonation pressure in the bottle that the glass will fail. Move the bottles somewhere safe where they won’t hurt anyone and won’t make too much of a mess if they explode.

  • Keg it - In theory, you could open up all the beer bottles and pour them into a keg, then prime or force carbonate with CO2. Then again, if you have a keg, you probably wouldn’t be bottling, would you?

  • Add more beer yeast - I’ve heard of homebrewers adding a few grains of dry yeast to each bottle of flat beer to help it to carbonate, but this sounds like a recipe for a bottle bomb, so I wouldn’t recommend it.
Again, if you did everything right, the best thing to do is just wait it out. I’m as guilty as anyone of opening up a homebrew before it’s ready, but in homebrewing, as in life, patience is a virtue. Give your flat beer some more time, and see if that doesn't get it to carbonate.

- See more at: http://www.eckraus.com/blog/my-beer-is-flat-wont-carbonate#sthash.6U9YoMlT.dpuf

Saturday, May 28, 2016

Empowering Dry Yeast with Simple Rehydration

#yeast #beer Brew Boss Electric Homebrew Equipment www.brew-boss.com


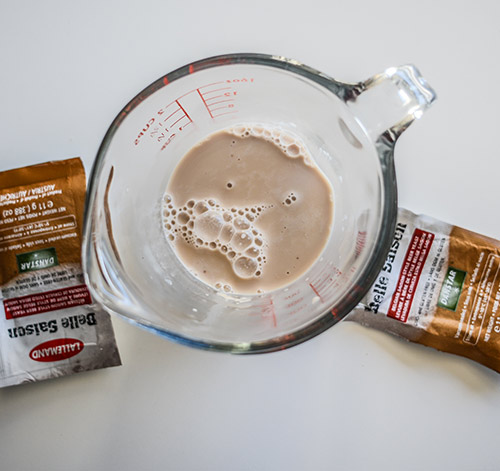
When using dry yeast, a recipe will often instruct for the packet to be pitched directly into the chilled wort. This action will most likely kick off fermentation, but it is not the most ideal way to introduce yeast to their new, sugary environment.

Directly pitching dry yeast is said to kill a large portion of the viable yeast cells, leaving those that remain stressed from the extra work they have ahead of them. Stressed yeast can create unwanted flavors and aromas during the fermentation process, so it is good practice to rehydrate dry yeast before pitching into the wort.

How to Rehydrate Dry Yeast

Rehydrating yeast can be done while chilling your wort and shouldn’t take more than 15 to 20 minutes. The idea is to combine water and dry yeast in order to “wake up” the yeast and restart its metabolism. When pitched directly into wort, the sugars that are present can prevent the yeast cells from drawing enough water through their cell membranes to kick start their metabolism.

Some packets of dry yeast will come with directions on how to rehydrate, and those should be followed. If a packet does not come with directions, follow these steps:


  • Warm the dry yeast to room temperature
  • In a sanitized container, prepare an amount of sterile water at 95-105°F (35-41°C) equal to 10 times the weight of yeast (10 ml/g of yeast)
  • Optional: Add a rehydration nutrient like Go-Ferm, following the products instructions for appropriate amounts.
  • Sprinkle the dry yeast on top of the water, trying to avoid setting up large, dry clumps. Let sit 15 minutes, then gently stir.
  • When the yeast has reconstituted, gently stir again to form a cream and let sit another 5 minutes.
  • Carefully and slowly, adjust the temperature of the yeast to within 15°F of the wort temperature.
  • Pitch the resultant cream into the fermentation vessel, ideally as soon as possible.

Thursday, May 26, 2016

Classical Lager Brewing

#lager #homebrew Brew Boss Electric Homebrew Equipment www.brew-boss.com


By Josh Pfriem http://www.homebrewersassociation.org/zymurgy/classical-lager-brewing/

Brewing classical lager beers is a balancing act that allows you to unleash delicate and subtle flavors while showing off beautiful raw ingredients. To drink a well-made German lager is like experiencing a well performed symphony; it is to experience balance and harmony.

Technical brewing is a combination of engineering, chemistry, biology, physics, mathematics and art. To brew fine and well-made classical lager beers, you will need to take all the elements of brewing and move them up to the next level. This article will show you some gear to step up your brew system and some techniques that will help you become a more sophisticated brewer. The precision of the equipment is very important so you can know what you did, when you did it, and then go back and make changes, if necessary.


Building Your Lager Beer

The beauty of lager brewing is that you subdue fermentation with lower temperatures so that you can showcase your raw ingredients and brewing techniques. The quality of your brewing ingredients is very important. Choose the highest quality grain (I prefer Weyermann over most domestic malted barley) and the greenest, freshest hops. There are many different types of lager yeast available from Wyeast and White Labs; have fun experimenting with different strains.

When building your recipe, take detailed notes of what you are doing and when you are doing it. Record yeast information, grain bill, mashing procedures, lautering procedures, boil additions and gravity information with times and temperatures.

Yeast

There are many ways to do yeast starters. Here is a simple but effective way to get your yeast healthy and pitching numbers up.

Boil 32 ounces (1 liter) of water, add half cup (0.12 liter) of dry malt extract and 3 grams of yeast nutrient. Boil for 15 minutes, cool to 50° F (10 ° C). Do not let the temperature rise above 54° F (12° C). Pour into a sanitized growler with airlock (use vodka in airlock). Pitch at least two packets of yeast from White Labs or Wyeast. Shake very well for aeration. Pitch yeast starter to wort within 24 hours. Pour off as much of the beer on top of yeast as possible, swirl, then pitch.

Brewing Salts

It is very important to understand your water chemistry and pH. There have been many articles and books on this topic; please refer to them for further information. Find out what is going on in your water so you can adjust with brewing salts. The salts can enhance flavor, help immensely with fermentation and finishing, but if used incorrectly can have negative effects on your beer.

  • A carbon filter (found at a local hardware store) at your water source will remove chlorine and heavy metals, but won’t affect the pH or mineral content of your water. Assuming your city water is not too hard or too soft and you are using a carbon filter, below is a guide for a 4-gallon (15 L) batch.
  • Use calcium sulfate for drier, bitter or more hop-focused beers.
  • Use calcium chloride for maltier, softer and fuller beers.
  • Use 2 grams in mash.
  • Use 1.5 grams in kettle.

A measuring scale is helpful.
Mashing

Heat water (one liter per pound of grain) in mash vessel 15° F (8° C) above target temperature. If shooting for 150° F (66° C), raise water temperature to 165° F (74° C). Learn about different step mash procedures to influence your beer. A single infusion mash is fine with modern malts. If you want a maltier beer, encourage alpha amylase activity by make sure you create more alpha amylase by keeping your mash temperature between 153-156° F (67-69° C). Use a chef’s digital thermometer (found in a restaurant supply store) for accurate temperatures.

Mash for 60 minutes.

A mash paddle will help with good mixing and to make sure you do not scorch your mash.

At 60 minutes, add 1 gallon of 190° F (88° C) water and add heat to bottom of mash vessel (assuming you are using a direct-fired tun), bringing the mash temperature up to 160° F (71° C).

Lautering


Move all grain to lautering vessel. Make sure this vessel has a false bottom and sparge capability. Let grain settle for 10 minutes, then vorlauf for five. When vorlaufing, pull wort off slowly with a pouring vessel, then gently pour over the top of the grain bed.

After vorlauf is complete, turn sparge water on (178° F, 81° C) over the top of grain bed. While running wort to kettle, make sure the grain bed is always covered with water. Slowly run wort to kettle. It should take 45 minutes. Do not collect wort that is less than 1.010 or 2.5 P at 60° F (16° C). Collect 7 gallons (26 L) of wort (or 12 gallons or 45 L if collecting for two fermentation vessels.)

Kettle Boil

Once kettle is at desired level, it should be at a boil within 5 minutes. Boil wort for 90 minutes, starting hop additions at the beginning of the boil. Try to keep a strong rolling boil for the entire duration. You should have 5 gallons (19 L) of wort at the end of the boil.

A stick with measured lines for liquid levels is helpful for your kettle level.

With 10 minutes left toward the end of the boil, add Whirlfloc or Irish moss (1 gram) and yeast nutrient (1.5 grams).


Whirlpool

At flame out or knock out, use a mash paddle to whirlpool wort for 30 seconds. Let wort rest and settle for 30 minutes.

Strike Out and Aeration

A plate chiller is a crucial piece of equipment for lager brewing. Run the wort through the plate chiller, bringing the temperature down to 50° F (10° C) for lagers.

An inline temperature gauge is ideal for temperature control, combined with an inline aeration stone hooked up to a small aeration pump (use a fish tank pump).

Run wort to the fermentation vessel, leaving 20 percent head space for fermentation. Leave the last gallon or so of wort in the kettle, noticing the hop/trub cone that you have left behind. Take a gravity sample halfway through transfer.

Yeast Pitching

Once your strikeout is complete, shake the yeast starter well and pour it into the fermentation vessel.

Fermentation

Yeast health, viability, and numbers are incredibly important. Ferment your lager beer in the lower 50s (10-12° C).

You will need a dedicated refrigerator or freezer with a temperature control unit set at 50° F (10° C) in order to lager your beer properly. When fermentation is nearly complete, raise refrigerator temperature to 57° F (14° C) for diacetyl rest. Fermentation should take between 8-12 days and longer the higher the gravity. Once fermentation is complete, take a gravity sample to ensure how much attenuation you have achieved and find out your alcohol percentage. Lower your refrigerator down to 30° F (-1° C). Age your beer for a minimum of 35 days total, longer for higher gravity beers. Transfer and remove your beer every week to avoid autolysis.

Filtration

In order to remove all the yeast from your beer, you will need to filter it.

A plate filter and 2 micron filter sheets will suffice to filter your beer at home.You will only have a good filtration if you do everything above correctly. Follow the directions that come with your plate filter.

Filtration is a very important part of technical brewing and the benefits are huge. Here is an analogy I created to help people understand its importance.

The Organic Vegetable Garden: Come spring, you decide to make the best organic vegetable garden possible. You gather the finest soil, best manure, the choicest seeds and plants. You pay detailed attention to the proper amount of sunlight-to-water ratio for your entire growing season. When harvest comes, you proudly pluck your vegetable out of the ground. At that moment when the vegetable is covered in dirt and manure, it has the most flavor and purest form. But if you take the vegetable to the sink and rinse it well, you can now hold it up to the light and admire the brilliance of your hard work as you bite into and taste all the subtle perfections because they are no longer hidden behind dirt and manure.
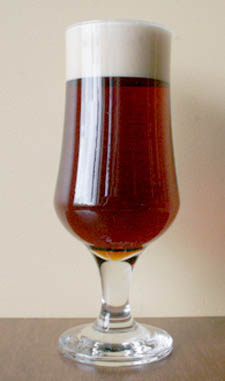

Most brewers yeast, even when in its finest form, is harsh and bitter tasting. There are little to no positive attributes by leaving yeast in beer. The exception to this is beer such as German hefeweizen or Belgian wit where the yeast is desirable to drink.

Filtration is one of the most technical processes used in a brewery. Brewers who understand the great benefit of filtration pride themselves in that they have the technical ability, understanding, education and knowledge to create “brilliant beer.” Other brewers sometimes pass off unfiltered beer as a positive thing because filtration strips flavor from beer. As we see from our vegetable analogy they are correct, but what type of flavors do you like in your beer?
Fermentation Vessels

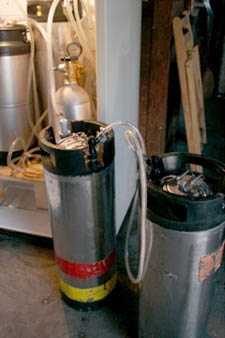
Cornelius kegs can be used instead of standard carboys.

You can ferment 4 gallons (15 L) of beer in a Corny keg. During fermentation hook up the “in” ball lock valve with tubing going into a jar of water creating a vent line. Once fermentation is complete, pull off the “in” valve, leaving a closed system. Place pressure with CO2 on top of keg; hook up cobra head to remove yeast from around dip tub. Then take an “out” ball lock valve connected to an “out” ball lock valve with tubing in-between to create a transfer line. Hook up clean, sanitized, and purged Corny keg to the one with beer in it. Use CO2 pressure to transfer beer into the new Corny keg. Pull and turn pressure relief valve, and leave it open on the Corny keg you are transferring beer to. When transfer is complete, close the pressure relief valve and place pressure on keg.

Carbonation

Once your beer is filtered into a clean vessel, hook up to CO2 at 10 PSI, leave it hooked up and rock the keg for four minutes (assuming that the beer is at 30° F or -1° C.). Leave beer hooked up to CO2 and let it settle for 24 hours. Look up Zahm and Nagel chart to find exact CO2 volumes. Use your PSI setting combined with temperature of beer for results. 2.6 to 2.9 volumes of CO2 are the range you will be looking for.

Sanitation and Purging

Every part of your equipment that will come in contact with your beer on the cold side will need to be cleaned, rinsed and sanitized.

To clean, use PBW cleaning agent (one tablespoon for each gallon of water) with 120° F (49° C) water with contact for at least 10 minutes. Triple rinse, then use Star San solution to sanitize (1 ounce for a 5 gallon bucket, 28g per 19 L). Do not rinse, but drain thoroughly. After fermentation, purge vessels with CO2 before putting beer in them.

Spray bottles with a strong Star San/water solution are very helpful.
Tasting and Evaluating Beer

You cannot be a technical brewer without having a technical palate. Drink your beer (and professional beer) with a technical palate.

Look for flavor and technical flaws so you can make your beer better next time. Study beers from the style that you are about to brew.

Discovering the beautiful world of classical German lager beers is wonderful and exciting. Fall in love with the rich maltiness of a Munich dunkel, the subtle breadiness of a helles, the full malt flavor of a Dortmunder, and the crisp hoppiness and flowery aroma of a German Pilsner. Dive into style guidelines and try to perfect your beers. Have fun with lager brewing!
Dunkel

Ingredients for 4 U.S. gallons (15.1 liters)
4.5 lb (2.04 kg) Weyermann Pilsner
5.5 lb (2.49 kg) Weyermann Munich II
0.2 lb (90 g) Weyermann Carafa® III
0.3 lb (136 g) Weyermann Caraaroma®
0.25 oz (7 g) Hallertauer Tradition pellets 5% AA (90 min)
0.75 oz (21 g) Hallertauer Tradition pellets 5% AA (60 min)
Wyeast Bavarian Lager 2206
Original Gravity: 1.055
Final Gravity: 1.016
SRM: 19
IBU: 20

Directions

Use all information from above article.

Tuesday, May 24, 2016

LAB Coconut Porter Recipe

#homebrewrecipe  Make this in your Brew-Boss Brew System! www.brew-boss.com

This #homebrew recipe comes from London Amateur Brewers (LAB) member Ken Bazley. Bazley earned a gold medal for this beer recipe in the 2013 UK National Homebrew Competition. It was first brewed for the Sebright Arms and was inspire by Maui Brewing’s coconut porter.

This recipe was originally featured in the article “London Area Brewers Go Pro” in the September/October 2013 issue of Zymurgy magazine. Access this issue of Zymurgymagazine instantly online!

LAB Coconut Porter | Specialty Beer

INGREDIENTS

  • For 5 gallons (19 L)
    • 10.8 lb (4.9 kg) Maris Otter pale malt
    • 0.55 lb (250 g) Crystal malt
    • 0.48 lb (218 g) Chocolate malt
    • 0.48 lb (218 g) Carafa I
    • 13.4 oz (380 g) Toasted coconut flakes (secondary)
    • 3.8 oz (110 g) Black patent malt
    • 0.5 oz (14 g) Chinook hops, 13.1% a.a. (60 min)
    • 0.7 oz (20 g) Willamette hops, 6.3% a.a. (40 min)
    • 0.5 oz (14 g) Willamette hops, 6.3% a.a. (20 min)
    • Safale US-05, rehydrated

    SPECIFICATIONS

    • Original Gravity: 1.065
    • Final Gravity: 1.019
    • IBU: 39
    • SRM: 74
    • Boil Time: 60 minutes

    DIRECTIONS


    Mash grains at 152° F (67° C) for one hour. Ferment at 68° F (20° C). After fermentation, preheat oven to 150° F (66° C) and toast coconut until golden brown (about 40 minutes). Turn the coconut every 10 minutes to ensure even toasting. Rack the beer into an airtight vessel (secondary or Cornelius keg) and add the coconut loose when cool. Give the vessel a good shake every day. Bottle after 12 to 14 days. Prime to achieve 2.0 volumes of CO2.

    Extract Version

    Substitute 7.75 lb (3.52 kg) pale malt extract syrup for Maris Otter malt. Steep remaining grains for 30 minutes in 160° F (71° C) water. Drain, rinse grains, and proceed with boil.

    Sunday, May 22, 2016

    8 Tips for Aging & Cellaring Beers at Home

    #homebrew #cellar Brew Boss Electric Homebrew Systems www.brew-boss.com


    http://www.homebrewersassociation.org/how-to-brew/what-to-age-in-your-beer-cellar/

    #Cellaring is the process of allowing a #beer to mature under specific conditions to achieve nuances, particularly in its flavor and aroma, that often can only be achieved with aging. What you’re left with after aging beer successfully is what is called “vintage beer.”

    Choosing a Beer Cellar Location


    Before jumping into some tips on what makes a beer optimal to age (because not all of them are!), it is important to understand the beer cellar environment that is ideal for aging beer for an extended time.

    1. Temperature

    Arguably the most important aspect of a beer cellar is the temperature. 55°F (12.8°C) has become a widely accepted temperature for aging most ales. Lagers aren’t usual suspects for cellaring, but a good rule to follow is to aim to keep beer cellar temperatures about 10°F below the temperature at which the beer is fermented.

    Generally, ales are fermented around 65°F (18.3°C) and lagers at 50°F (10°C). Being able to maintain a temperature in this range with little fluctuation will allow the beer to mature at an appropriate rate. If it’s too cold, the maturation period slows significantly, and if too warm it can speed things up and cause off-flavors.

    2. Darkness

    The second thing to keep in mind is light. Keep your cellar dark! UV light interacts with hops in beer to create the dreaded light-struck flavor, otherwise known as “skunked” beer. Keep your beers shielded from light in any way possible, especially if they are packaged in clear or green bottles. A cheap way to prevent light-struck beer is to stick them in a sealed box or paper bag.

    Those are the basics, but the trickiest part for cellaring is deciding which beers are suitable for aging because, after all, some just aren’t up for the task.

    Tips for Picking a Beers to Cellar


    1. The more alcohol, the better

    When aging beer, it is crucial that there is a preservative present, which will essentially slow the aging process. A good rule of thumb is to aim for a beer that has at least 8% alcohol by volume (ABV). You may think speeding up the aging process is desirable, but in the case of cellaring beer the best technique is a slow-and-steady approach. A preservative like alcohol makes beer more resilient to potential staling flavors, which are typically caused by oxidation. And keep in mind that the booziness that is often present in fresh beers with high ABVs will typically mellow over time, allowing other flavors to come to the forefront.

    All of that being said, there are some exceptions to the “more alcohol, the better” rule. The lactic acid in sour beers and the smokey phenols in smoked beers also act as preservatives, lessening the importance of the level of alcohol.

    2. Body by beer cellar

    During the aging process, the malt proteins present in beer will drop out. This reaction causes the body of beer to reduce over time, and the result is often a very thin and some cases overly-dry beer after it’s been aged. Wheat-derived proteins tend to fall out exceptionally quick, making wheat-based styles very tricky to age successfully. Because of this, it is important to cellar beers that are very full-bodied when they are fresh. This allows the malt proteins to drop out while still retaining some of the body and overall balance.

    If a beer seems to thicken, becoming almost syrupy over time instead of thinning, it most likely means the alcohol character has decreased (as mentioned in #1) to the point where it creates the impression that the body thickened.


    3. Mind your esters and phenols

    The yeast-derived character of both esters and phenols will evolve and change over time, which may or may not be desirable depending on the base style of the beer.

    The fruity esters—reminiscent of pears and other tree fruits—commonly found in Belgian and some British style ales will develop into more dark fruit-like character (think raisin and figs). Banana esters, like those common in German hefeweizens, tend to disappear altogether in a fairly short span of time. Esters from Brett will take much longer period of times to change, but have the potential to achieve interesting flavors like pineapple and grapefruit.

    Phenols—the spicy yeast flavors that come across as clove or pepper—will evolve into much different flavors, including vanilla, tobacco and leather. In instances where earthy phenolics are present in the fresh beer, there is the potential to achieve complex flavors that are all but impossible to achieve unless done with aging.

    4. More hops isn’t always best

    Remember when we said beer needs some sort of preservative to be a good candidate for cellaring? Well, despite hops reputation as being originally used for its antibacterial utility, hop bitterness and flavor/aroma are not well suited for aging. Simply put, the presence of hops fades over time, and this can drastically affect the balance of a beer. After all, if a hoppy beer style like IPA was brewed to a desirable balance of malt and hops, then reducing the presence of hops can throw this harmony out of wack.

    In some instances hop character not only diminishes but can result in unfavorable flavors left behind. For example, American hop varieties with high levels of alpha acids can leave behind stale, paper-like flavors. On the other hand, English hop varieties with high beta acids, which are said to have a better chance of retaining bitterness, can impart fruity notes similar to pineapple and cherry as they age.


    5. Sours

    Sours can be a tricky beast when aging, and the results may not be what you expect. First off, the tart, lip-puckering character that puts the “sour” in “sour beer” will lessen with time, diminishing that typically-dominant characteristic. This softening of the sourness can be either a good or bad thing depending on the balance of the cellared beer at the time it’s consumed.

    It’s important to note that while the sour character mellows and in some instances evolves (as with Brettanomyces) at a very, very slow rate, it is not uncommon for some sour beers to become even more sour in the first few years it’s being aged. It’s also not unusual for sour beers that have been aged for extended periods of time to appear more sour due to other characters, particularly the malt, diminishing.

    Brett (short for Brettanomyces), though slow to evolve in the cellar, can undergo very drastic evolution when aged. Brett is a slow-acting yeast but a hungry one, and it will basically eat through all available fermentable sugars slowly but surely. This means extensive aging can often leave Brett beers bone dry, which can throw off the balance. During this process, the esters can evolve as mentioned in #3, but there is also the potential for aggressive phenolics to develop, which can be undesirable.

    6. Keep the yeast in the bottle

    Beers that are bottle conditioned, unfiltered and/or unpasteurized are generally better-suited for aging. By having yeast in the bottle, the beer is essentially a living entity that can consume residual oxygen and continue to condition slowly. This opens up a wider possibility of aging produced cellar character that a beer without yeast otherwise might not be able to achieve.

    Filtered and/or pasteurized beers can still exhibit character evolution from aging but to a much lesser extent.

    Friday, May 20, 2016

    Best Hop Techniques for Homebrewing

    #brewboss #hops #homebrew Brew Boss Electric Homebrew Equipment www.brew-boss.com

    by BRAD SMITH

    A good understanding of various hop techniques is critical for successful brewing. Yet the wide array of hopping techniques with terms such as mash hopping, first wort hops, dry hops, boil hops, and late hop additions can be confusing to first time and experienced brewers alike.

    Beginners and intermediate brewers alike often apply the wrong technique to a given beer style. Knowing which technique to use for a particular style or desired flavor profile is part art form, but it all starts with a firm understanding of the techniques themselves.

    We’ll present the most common hop methods in something of a chronological order, starting with the mash and ending with finished beer:

    Mash Hopping

    Mash hopping is simply the addition of hops directly to the mash tun itself. The hops is often placed on top of the grain bed and left to sit as the mash is sparged. Mash hopping is reported to provide a better overall balance and character to the beer, though it adds almost no bitterness.

    Mash hopping is seldom used today because it requires a fairly large amount of hops and adds very little in direct flavor. Since the hops are never boiled, no bitterness is released and most of the flavorful oils from the hop flower are lost in the boil that follows.

    Brewers today theorize that most of the reported benefits from mash hopping are a byproduct of lower pH from mash hopping and not the hops itself. Given the high cost of hops, as well as many cheaper methods exist for controlling the pH of your wort, I’m not sure why a homebrewer would choose to mash hop.

    First Wort Hops

    First wort hops are hops added to the boil pot at the very start of the lautering process. Unlike mash hops, first wort hops remain in the boiler during the boil and therefore do contribute bitterness to the wort.
    First wort hopping is an old German method that has enjoyed a home brewing resurgence. In blind taste tests, beers brewed with this method are perceived as smoother, better blended and have less of a bitter edge and aftertaste. I have personally used this method with great success on a variety of beers where a smooth well balanced bitterness is desirable. I’ve even used it on lightly hopped styles as it helps to reduce the perceived bitterness without upsetting the malt-bitterness balance of the beer.

    Bittering Hops

    Bittering hops or boil hops are just that – hops added for the bulk of the boil to add bitterness to the beer. Boiling hops releases the alpha acids that provide bitterness in your beer. The longer you boil your hops, the more bitterness you will add.

    Beer software, such as BeerSmith can help you estimate the bitterness for a given hop additions. In general, your bittering additions should be boiled for full length of your boil (typically 60-90 minutes) to extract as much bitterness per ounce of hops as possible. I will usually add my bittering hop addition at the beginning of the boil.

    Late Hop Additions


    Hops added in the last 5-15 minutes of the boil are called late hop additions. These hops are usually not added for bittering, though they do contribute a small amount of bitterness to the beer. The main purpose for late hop additions is to add aroma and aromatic hop oils to your beer.

    In addition to bittering compounds, hop cones from “aromatic” hop varieties contain volatile hop oils that provide the strong flowery aromatic flavor and scent desirable in many hoppy beer styles. Unfortunately most of these compounds boil off within 10-20 minutes of adding the hops.

    Late hop additions should always use “aromatic” hop varieties, and should be done within the last 10 minutes of the boil to preserve as many aromatic oils as possible. In addition, late hop additions are most appropriate for beer styles where a hoppy flavor and aroma is needed. You would not add late hop additions to a malty or low hop beer style.

    The Hop Back

    A hop back is a device containing hops used inline between the boiler and chiller to infuse fragile hop oils and aroma directly into the hot wort before it is cooled and transferred to the fermenter. While a hop back does not add any significant bitterness to the beer, it can add great aroma to your finished beer. 

    Dry Hopping

    Dry hopping is the addition of hops after the beer has fermented. Hops are typically added in the secondary fermenter or keg and left for a period of several days to several weeks. Dry hopping is used to add a hoppy aroma to the beer, as no bitterness is added with this method. Dry hopping is also used in many commercial beers for a hoppy burst of aroma.

    The basic method is to add a few ounces of hops to the secondary before bottling. If kegging, use about half as much hops. Again you should use only aromatic hop varieties, and you should only use this method with hoppy beer styles where a strong hop aroma is desired.

    Combining Hop Methods


    Advanced brewers often use a combination of hop additions to achieve a burst of hop aroma and flavor, particularly for hoppy styles like India Pale Ale. In fact, many true hopheads will add substantial first wort and boil hops, followed by multiple late hop additions and a final dose of dry hops.

    Personally, I try to keep things simple, so I will typically add a single boil or first wort addition for bitterness, followed by a single late hop addition in the last 5-10 minutes of the boil to preserve aromatics and dry hopping if appropriate. In these hop starved times, I’ll also try to use higher alpha bittering hops for the main boil hops and save my precious aromatics for the late addition and for dry hopping.

    On non-hoppy styles, I’ll often choose to add a single bittering addition, often as first wort hops since I like the smooth blending perception this method produces.

    Wednesday, May 18, 2016

    Mash pH for Brew in a Bag, No-Sparge, and Decoction Mashing

    #biab #electricbrewing Brew Boss Electric Homebrewing Systems www.brew-boss.com

    by BRAD SMITH

    Controlling your mash pH is a critical concern for all brewers using all-grain, but can be a special concern for those using Brew-in-a-bag (BIAB) or decoction mashes with high water to grain ratios. The larger water to grain ratios used in these mashes can lead to higher mash pH during conversion, so brewers need to take additional care working with these methods.


    Why Mash pH Matters


    The pH of the mash matters for any all grain brewer. Ideally you want to keep your mash pH in the 5.2-5.5 range, and for lighter beers driving the mash pH down to the 5.2 level becomes even more important to achieve good beer clarity. All grain beers benefits greatly from a low mash pH – promoting better conversion, a cleaner finish and a more balanced overall beer flavor. Unfortunately most mash mixtures will come in at a higher pH unless you adjust them.

    Water, whether from a surface or underground sources is typically alkaline. Grains, particularly dark grains, are slightly acidic, and will drive the mash pH lower once you mix the water and grains for the mash. Unless you are brewing a very dark beer style, however, you typically won’t have enough acid in the mash to drive the pH down to the desired 5.2 level. Often additives such as a buffer or acid is needed to adjust the mash pH.


    Why BIAB, No-sparge and Some Decoction Mashes Are a Special Case


    Traditionally, mashing is done at a relatively low water to grain ratio of around 1.25 quarts of water per pound of grain (a bit under 3 liters/kg). This results in a fairly thick mixture, and additional water is added after the mash is complete, during the sparge, to reach full volume.

    With Brew-in-a-bag, no-sparge, and some decoction mashes, a much higher water to grain ratio is used. Typically the full desired boil volume is used in the mash, giving a water to grain ratio that is 3-5x that used in a traditional mash.

    This means you have a relatively large quantity of alkaline water mixed with the same amount of “acidic” grains. So the resulting mixture will have a higher pH during the conversion step than it would have for a traditional mash that had only 1.25-1.5 quarts/lb. So if you want to achieve a proper mash pH, measuring and adjusting your mash pH is even more important for those mashing at high water/grain ratios.

    The Proper Way to Adjust your Mash pH


    Unfortunately there is no way to know ahead of time what your mash pH will be during the critical conversion phase. Working with darker grains will result in a lower mash pH, but unfortunately there is enough variation in the acidity of various malts that it is virtually impossible for an average brewer to determine the mash pH in advance.

    Fortunately there are a lot of tools available to measure mash pH. A pH meter is probably the most accurate, but you can use test strips or a chemical test kit to measure as well. Be sure to get high accuracy test strips designed for brewing because generic water test strips do not have the accuracy needed.

    Once you have measured your mash pH, you need to adjust it – usually driving it lower by adding a buffer or some acid. Some choices include adding acid malt, a buffer such as Five Star’s 5.2 or acid such as lactic acid, all of which are widely available from most home brewing stores. You can either use a tool to calculate the amount to add or just add a little at a time until you get the mash pH you desire.

    I will note that if you are using a sparge or partial sparge, it is worthwhile to treat your sparge water as well. The sparge water does not need to reach 5.2, but I will typically add an amount of acid proportional to what I used for the main mash.

    Monday, May 16, 2016

    Homebrewing Rights


    Federal Law

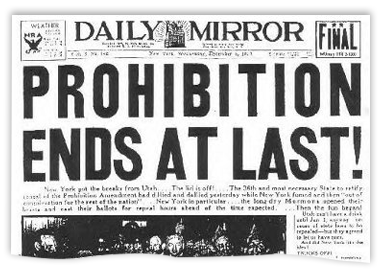
    On January 16, 1919, the 18th Amendment to the U.S. Constitution was ratified, banning the manufacture, sale and transportation of alcohol (Prohibition), including beer made at home. The 21st Amendment repealed Prohibition in 1933, however, the repeal’s legislation mistakenly left out the legalization of home beer making (home wine making was legalized at that time).

    On October 14, 1978, President Jimmy Carter signed H.R. 1337, which contained an amendment sponsored by Senator Alan Cranston (D-CA) creating an exemption from taxation of beer brewed at home for personal or family use. This exemption went into effect on February 1, 1979, making homebrewing legal on a federal level in the U.S.

    State Laws

    Prohibition Ends at LastAlthough homebrewing is legal on both the federal and state levels in the U.S., the 21st Amendment predominantly leaves regulation of alcohol to the individual states. Thus each states’ laws regarding homebrewing vary widely. Some states have very specific laws that outline exactly what can and cannot be done with homebrew, while others are vague. Some states limit consumption of homebrew solely to the residence where it was brewed, while others allow for transportation of homebrew to events such as competitions and club meetings.

    Legalization

    Mississippi and Alabama were the last two states to legalize homebrewing. Alabama law went into effect on May 9, 2013, and the Mississippi law went into effect on July 1, 2013.

    Lobbying

    The American Homebrewers Association (AHA) does not have the resources to maintain a lobbyist in each state, however the AHA can assist homebrewing communities organize effective grassroots campaigns to enact new laws or update existing laws. When acting as a community, homebrewers have strength in numbers to enact change.

    How to Initiate a Lobbying Campaign


    • Use the AHA database to check current laws for homebrewing in your state.
    • Identify the legislative issue to be address (e.g. homebrew cannot be served outside the home where it was brewed).
    • Determine if pursuing legislative change is worth the inherent risk and scrutiny that attempting the change the law will bring. For example, if it is technically not legal to share homebrew at a club meeting in your state, but there has been no enforcement of that law, it may not be worth pursuing as there’s no guarantee of the outcome and could take years to accomplish.
    • Contact the AHA for information on any past or current legislative efforts in your state.
    • Contact homebrewers and homebrew clubs in your state to let them know your intensions, and request their support in the effort.
    • Form an email distribution list (free from Google or Yahoo) for representatives from your state’s homebrew clubs and homebrew shops to facilitate communication and develop a consensus on strategy and tactics.
    • Find a sympathetic legislator who will sponsor your bill (it is preferable to have sponsors in both the House and Senate if possible). Lining up a sponsor prior to the start of the next legislative session will give you the best chance of getting legislation through the often frustratingly slow legislative process.
    • The AHA can help with drafting language for a bill.
    • Once the bill is registered, the AHA can help mobilize AHA members, BA brewery members and the Support Your Local Brewery network to contact legislators urging support for the bill.
    • AHA staff is available to testify on behalf of the bill during legislative committee hearings.
    • The AHA can help generate media attention for the bill.

    Contact Gary Glass, AHA Director 303.447.0816 x 121 | Toll Free: 888.822.6273 x 121

    Note: The information presented here is not substitute for legal advice specific to the laws of your state.

    http://www.homebrewersassociation.org/homebrewing-rights/statutes/

    Thursday, May 12, 2016

    What is Beer Haze and How Can You Fix It?

    #beerhaze #homebrew Brew-Boss Electric Homebrew Equipment www.brew-boss.com
    Beer Haze
    by John Moorhead, AHA Project Coordinator/National Homebrew Competition Director
    Your friend just poured you a fresh homebrew, and it came up cloudy. How do you feel about hazy beer? Is it good? Is it bad? Do you even care?

    Some might say it depends on the beer. After all, certain styles are supposed to be cloudy. Others may think that hazy beer is never appropriate, while still others might prefer to remain neutral and drink up regardless of clarity. Why should you care about cloudy beer? You can’t taste haze—or can you?

    Whether haze is purely cosmetic or flavor-altering, the only way to do anything about it is to first understand it.


    Why Is My Beer Hazy?


    Most homebrewers face beer haze after brewing and fermentation are complete, and haze can be an indicator of a few issues. The first is related to suspended yeast, and the second is caused by a combination of protein and polyphenols.

    Of course, we know yeast is in beer. In some cases, yeast rapidly settles out as fermentation comes to a close, while in others, it remains suspended even when the beer is chilled. A yeast cell’s desire to bind to other yeast cells to form flocs (clumps of yeast that tend to settle out quickly) is called flocculation. Thus, choosing a yeast with good flocculation characteristics tends to produce beer that clears quickly, while selecting a less flocculent strain means that your yeast might hang around in the beer for longer than you’d like. Picking a flocculent strain is a good way to promote beer clarity.

    If you’ve removed the yeast, the remaining cause of haze is usually from protein and polyphenols, and most professional operations spend a lot of resources combating this type of haze. Why? Because polyphenols can contribute to oxidative staling reactions. However, polyphenols come from beer ingredients and occur naturally and universally in beer. So complaining about their presence is a bit like complaining about salt in seawater—unless you accidentally take a big gulp or get it in your eye (the seawater, not polyphenols), you have to accept it and figure out how to work around it.


    In extreme cases, haze can completely cloud your beer (e.g. wheat beers). In less extreme cases, proteins and polyphenols might produce a more subtle haze. Some haze, known as permanent haze, is visible even when beer is at room temperature. Another, known as chill haze, doesn’t appear until the beer is cooled, which can be somewhat maddening because the cloudiness disappears and reappears.

    But beer haze can also indicate a more sinister problem: bacterial infections, which can cloud beer and ruin it with off-flavors. For example,Pediococcus damnsosus is a common brewery infection that generates large amounts of diacetyl, that unwelcome buttery taste. Lactobacillus can produce an array of flavors alongside its characteristic lactic tartness. A third family of haze-causing bacteria includes coliform, which produce vegetal off-flavors reminiscent of parsnips and old celery. Most such bacterial haze develops in the bottle after fermentation, and your only realistic options here are to choke it down, dump it out…orpaint with it.

    How to Fix Haze in Your Beer Recipe

    You can try cold conditioning a yeasty beer for a few days to see if that helps settle out the haze. If cold conditioning doesn’t work, filtering out the yeast can solve the problem, too. Either way, fixing yeast-related haze is as simple as removing the problematic yeast cells.

    Protein and polyphenol hazes are more complex, but they can be addressed in a number of ways. When you regularly use the same ingredients and brewing equipment, you might try tweaking your ingredient selection to include low-protein grains and adjuncts like corn, rice, or refined sugar. Protein rests and proper separation of wort from the hot and cold breaks prior to fermentation can also help reduce beer haze.

    Hops also contribute polyphenols. Some brewers exclusively bitter with low-alpha-acid varieties to promote refined hop character. The downside to this practice is that a large amount of bulky hop material (up to four times as much as would be used of higher-alpha-acid varieties) is needed to achieve the right bitterness level, along with an increase in extracted polyphenols. A study referenced by John Palmer in “What is Beer Haze & Why Do We Care?” (Zymurgy, Sept./Oct. 2003) showed that 70 percent of malt polyphenols can survive hot and cold break, while only 20 percent of hop polyphenols do. The message here for reducing haze-causing polyphenols and proteins is to achieve a good hot break, perhaps aided by Irish moss, and use a wort chiller to get a good cold break.

    If you are an all-grain brewer, your sparging method can also affect the haze in your beer. The higher the sparge temperature, the more polyphenols will end up in your wort. This can become a problem if you sparge above 180° F (82° C). A high mash pH (anything higher than about 8) can also extract large amounts of polyphenols during the last runnings as the buffering power of malt acids is rinsed away from the grain bed. Using a batch sparge can help prevent this problem, as can using fresh, healthy barley and being patient with your mash—don’t rush it.
    Beer Haze

    How to Fix Haze with Filtration and Clarifiers

    You can also use clarifiers and finings, otherwise known as seaweed, fish guts, and JELL-O®, to clear up the haze in your beer. Adding clarifiers to wort or beer chemically and electrostatically pulls haze out of the suspension and allows it to settle to the bottom. Irish moss, Whirlfloc™, and isinglass are among the most common such products used at the homebrewing level.

    Some brewers prefer clarifiers and finings to filtration because they believe filtration might take away flavor from the beer. Although many brewers refuse to use chemical additives, an aversion to filtration is one reason why chemical approaches have developed. Others argue that filtration effectively removes haze without any appreciable effect on beer flavor. Check out the Clarifier Summary Chart below for a more complete list.


    Clarifier Summary Table†
    ClarifierPurposeAmountComments
    Clarifier Summary Table can be found in “What is Beer Haze & Why Do We Care?” by John Palmer, Zymurgy September/October 2003
    Irish MossProtein Coagulant1 teaspoon per 5 gallonsA good clarifier for almost all worts, though not recommended for high adjunct worts.
    WhirlflocProtein Coagulant1 tablet per 5 gallonsA good clarifier for almost all worts, though not recommended for high adjunct worts
    IsinglassYeast Flocculent15-60 mg/L or 2 fl. oz. per 5 gallonsMost effective for settling yeast in finished beer. Will also settle some protein haze.
    GelatinYeast Flocculent60-90 mg/LOnly about one-half to one-thrid as effective as isinglass, also used in finished beer
    Polyclar/PVPPPolyphenol binder6-10 g/5 gallonsA non-aerated slurry should be mixed into finished beer before bottling and allowed to settle out. Should take a day at most.
    Silica GelProtein binder6-10 g/5 gallonsA non-aerated slurry should be mixed into finished beer before bottling and allowed to settle out. Should take a day at most.


    When brewing a show beer to be judged in a homebrew competition or served at a wedding by those who are less understanding (or forgiving) than your fellow homebrewers, filtration could become not just desirable, but essential. If you choose to filter your beer, know that small-scale filtering systems are available, but they require that you keg and force carbonate your beer. Those who bottle condition are out of luck because when yeast is filtered out, beer can’t carbonate in a bottle.

    The concept of filtration is easy to understand: it’s just the removal of solids from a liquid by passage across or through a porous medium. However, theory and practice are two different things. Filters can effectively remove particles of any size from beer, but as you move to ever-finer filters, the risk of stripping away flavor increases.

    Filter fineness is expressed in terms of microns—one micron is one-millionth of a meter or 0.000039 inches. Yeast cells are relatively large, ranging from about three to 20 microns in size. By contrast, even the largest proteins and polyphenols are smaller than a yeast cell, and the smallest are more than 1,000 times smaller at 0.001 microns in size. Homebrewers typically use filters sized at 5, 1, and 0.5 microns, depending upon the level of clarity desired.

    You can also filter out bacteria before they become a problem. Bacteria are relatively large, ranging from about 0.5 to 70 or 80 microns. Unfortunately, filtration is not an effective sanitation technique because you’re not necessarily filtering out all potential spoilage agents. It’s much better to practice better brewing techniques that involve thorough cleansing and sanitation.

    7 steps to clearer beer

    In summary, use the following seven steps to improve the clarity of your homebrew.
    1. Choose high-flocculating yeast.
    2. Brew with low-protein grains.
    3. Use Irish moss to achieve a good hot break.
    4. Cool wort quickly to achieve a good cold break.
    5. Add clarifiers or a fining agent to help clear beer haze.
    6. Cold condition your beer.
    7. Practice better brewing techniques, especially cleaning and sanitation.

    Remember, we drink with our eyes first. By making the effort to reduce haze, you’ll improve your beer’s overall presentation and ensure that your memories of that great homebrew remain crystal clear well past the last sip.