Saturday, October 31, 2015

Happy Halloween!  

It's a great day to enjoy a home brew made on the EBIAB Brew-Boss Electric Home Brew System. www.brew-boss.com


Thursday, October 29, 2015

11 Obscure Beer Styles That Are Worth a Try

BREW BOSS www.brew-boss.com EBIAB Electric Homebrewing Systems


Sure, stouts, India pale ales, and hefeweizens are tasty, but if you want to venture away from the beaten path for your next beer, give one of these styles a shot.

1. GRODZISKIE (GRÄTZER)

A smoky wheat ale that originated in Poland, Grodziskie is a long-lost cousin of Berliner weisse. Like Berliner weisse, it is low in alcohol, occasionally tart, and highly carbonated, but it also features a unique smoky twist thanks to the oak-burning kilns used to malt the wheat. Lichtenhainer is a very similar German take on the style that historically tended to be wilder and sourer in character.

2. GOSE


This medieval German style is currently enjoying a renaissance in the United States. Gose is a top-fermented wheat beer brewed with salt, coriander, and souring cultures. While gose originated in Goslar, it became the regional specialty of Leipzig and as such was allowed an exemption from the Reinheitsgebot (the German purity law). A traditional gose showcases notes of lemon, spice, and salt, but modern takes have added quirkier ingredients like cherries, yuzu, and dry hops. Some examples have even been aged in tequila barrels.

Examples to Try: Bahnhof Liepziger Gose, Döllnitzer Ritterguts Gose, Westbrook Gose andGozu, Off Color Troublesome

3. CHICHA


The official beer of Peru is literally made with spit. Traditional chicha brewers chew on maize to allow natural enzymes from their mouths to unlock the grain’s fermentable sugars. While this practice may sound unsanitary, the grains are then boiled and sterilized of wild yeast and bacteria. Although there are very few commercial examples available in the U.S., there is a thriving culture of homebrewed chicha in South America, with variants ranging from unfermented, sweetened chicha for children to more adult-friendly chichas brewed with spices, fruits, and chiles.

Examples to Try: Dogfish Head Chicha, many unlicensed chicherias in Peru

4. SAHTI/GRUIT


Beer has historically been defined as a beverage made from hops, malt, water, and yeast. How do drinkers deal with a climate that won’t support hops? They improvise, of course! Sahti is a traditional Finnish ale style that is bittered using juniper twigs. It generally features rye malt and estery yeast, giving it notes of spice and banana. The Gruit style is more varied in execution and can combine numerous bittering herbs, the most common being sweet gale, yarrow, and heather.

Examples to Try: Lammin Sahtia, Off Color Bare Bear, Professor Fritz Briem 13th Century Gruit, Upright Special Herbs

5. DAMPFBIER


Before there was steam beer, there was dampfbier. This Bavarian style uses a wheat beer yeast strain without actually including any wheat in the grain bill. Brewed mainly in the summer and fermented at high temperatures (70 degrees Fahrenheit or more), a classic dampfbier will feature notes of clove and banana.

Examples to Try: Dampfbierbrauerei Zwiesel Dampfbier, Surly Dampfbier, Local Option Dampf Loc

6. KOTTBUSSER


Another German beer that defies the German Reinheitsgebot purity law that restricted the definition of beer to only including barley, hops, and water, kottbusser recipes include adjuncts like oats, honey, and molasses. While this style originated in Cottbus, roughly an hour’s drive southeast of Berlin, it was essentially extinct until North American breweries revived it. A kottbusser drinks like a sweeter, smoother, nuttier altbier.

Examples to Try: Off Color Scurry, J Wakefield Kottbusser

7. JOPPENBIER


Another historical style rescued from the grave, Joppenbier is a high gravity, spontaneously fermented Dutch beer that combines elements of English barleywine and Belgian lambic. While the only commercially available example is a speculative recreation, historical sources describe the beer as having a port or sherry-like sweetness followed by a vinous acidity and sourness from the wild yeast.

Example to Try: Witte Klavervier Joppenbier

8. BURTON ALE KK


What’s old is new again! Originating in Burton-on-Trent, the Burton ale was a popular English ale before being supplanted by pale ales and IPAs. The KK designation denotes that the beer was for “Keeping,” meaning it was high in both alcohol and hopping. When Pretty Things Beer and Ale Project attempted to recreate the style using a historical recipe from 1901, the brewers discovered that the combination of roasty, dark malts and aggressive hopping was a dead ringer for a more modern beer style: the Black IPA.

Example to Try: Pretty Things Once Upon a Time 1901 KK

9. FARO


If you find lambic too wild or sour, you might be interested in its kinder, gentler cousin. Faro is sweetened with candi sugar and may also include common Belgian spices like orange peel and coriander. A true historical faro would never have been bottled, as the added sugar would ferment and cause the bottle to explode, but modern versions are pasteurized to avoid this problem. Faro has historically enjoyed a poor reputation that continues to this day—Charles Baudelaire likened it to sewer water, calling it the “beer that you drink twice.” You’ve got to be at least a little curious after reading that description.

Examples to Try: Cantillon Faro, Girardin Faro 1882

10. KOYT (KUIT)


Before this Dutch ale was driven to extinction by the rise of lager, it was mainly brewed with oats and wheat. There is some debate among beer historians on whether koyt was lightly hopped or bittered with herbs and spices like gruit. While we may never know the truth, modern interpretations come across as a creamier take on the pale wheat ale.

Examples to Try: Witte Klavervier Kuit, Jopen Koyt, Reuben’s Brews Koyt, Beau’s Dubbel Koyt

11. KENTUCKY COMMON


A pre-Prohibition ale brewed in the Louisville area, the modern version of the Kentucky common is a distant cousin of bourbon that also uses corn and rye in a sour mash. The result? An easy-drinking brown ale with a slight tartness and acidity.

Examples to Try: Local Option Kentucky Common, Against the Grain Kamen Knuddeln, New Albanian Phoenix, Lervig / To Øl Kentucky Common

http://mentalfloss.com/article/67731/11-obscure-beer-styles-are-worth-try

Wednesday, October 28, 2015

Halloween Homebrew


What's could be better than your own Halloween homebrew? Brew your favorite beers with the EBIAB Brew Boss Electric brewing system! www.brew-boss.com

We know you have many choices for electric brewing systems available to you and also know that after you evaluate all your options, you will find that no competing system is as affordable, versatile, expandable, or full featured. With Brew-Boss, you get more for less! Be careful of the new all-in one appliance type systems out there. They are very limiting in batch size and cost 2 to 3 times more than Brew-Boss. The Brew-Boss system fits the needs of first time brewers as well as experienced brewers.


• Electric Brewing Benefits:
  • - More economical - 1/5 the cost of propane
  • - Safer - No carbon monoxide or risk of explosion
  • - Efficient - 100% of BTUs transferred to wort
  • - Accurate - Holds temperatures +/- 1 degree
  • - Faster - 3½ hours for 10 gallon batch including clean-up
  • - Quiet - No obnoxious “roar” of the burner
  • - Convenient - Brew indoors in a sanitary environment

• Android / IOS Tablet applications provide:
  • - Simple - press “Start” and follow the prompts
  • - Convenient process monitoring and control
  • - Graphical Interface with Speech Prompts
  • - Saving and recalling brew steps & parameters
  • - Automatic or manual control

• Automatic Hops-Boss hops feeder option that dispenses hops automatically.

• All Food/Brewery Grade Components

• Great Value - Affordable

• First time home brewers can brew all grain perfectly the first time!

Tuesday, October 27, 2015

Stop ‘aging’ that hoppy beer. It’s only getting worse.

EBIAB www.brew-boss.com Electric Homebrewing Systems
Fritz Haun's favorite local IPA of the summer was DC Brau’s Solar Abyss, a double IPA made with Mosaic hops. Its deliciousness was matched only by its scarcity: The beer was released in late June, every last can and keg had left the brewery by July 7, and it was drying up in local bars by month’s end. At the release party, it was astoundingly fresh, with tropical hops and pineyness filling my nose, and a sweet, juicy flavor.

Then an acquaintance announced in mid-August that he’d managed to find a case and was thinking about “cellaring” some, aging it in the belief that it would improve, like a fine wine. But I was curious: Would the beer be as zingy as I remembered, and would it get better over time? The answer from the brewery was an unequivocal no.

“Your friend needs to drink it as fresh as they can,” DC Brau brewer Jeff Hancock told me. “The hops start to lose their flavor right away. Don’t sit on it indefinitely.”

As more breweries release limited-edition beers, the question has become not only what to drink, but when. Some beer lovers save rare bottles for a special occasion; others stockpile favorites to keep enjoying once they’re no longer available. And some want to cellar a beer. The problem is, time is not always a beer’s friend, especially if that beer is hoppy.


Bill Sysak of Stone Brewing is aging more than 2,600 bottles of beer in his personal cellar. The secret to success is “really knowing your styles and proven performers, just like wine,” he says. (From Stone Brewing)

When DC Brau customers tell Hancock about plans to age the sometimes-hard-to-find On the Wings of Armageddon Imperial IPA, “I try to dissuade them,” he says. “People don’t know that hops are the first thing to go.”

Dogfish Head founder Sam Calagione says fans often tell him they’re aging My Antonia, a hoppy imperial Pilsener last made in 2013, or the sweet, fruity Chateau Jiahu. “I tell them, ‘If you’re saving it with the intention of drinking it someday, that day is today. Go home and drink it tonight: It’s not going to get any better than it is right now, and it might not even be that good.’”


Not that other beers can’t be aged effectively. “Different styles improve in a positive manner, whether that’s over six months or six years,” says Bill Sysak, craft beer ambassador for Stone Brewing in California, who has emerged as a well-regarded expert in cellaring. “Some beers, I know how they’ll do. It’s really knowing your styles and proven performers, just like wine.”

In fact, a number of beers are brewed with aging in mind. At DC Brau, that includes Exaltation, a strong dark Belgian ale released during the holidays that Hancock wanted to mellow when he formulated it. “It had a lot of herbs and ginger when fresh, and it tasted better with age,” he says.

Dogfish Head has built its reputation on strong, flavorful beer that’s primed to be drunk the day it leaves the Delaware brewery but is formidable enough — high in alcohol and “more winelike in the complexity,” says Calagione — to be aged for years. For its World Wide Stout, an imperial stout that’s up to 20 percent alcohol by volume, “it wasn’t just ‘Let’s brew the strongest beer in the world,’ but ‘Let’s brew a beer that will improve for decades,’ ” he says.

Sam Calagione’s Dogfish Head brewery in Delaware makes strong, high-alcohol beers that can be drunk now or aged for years. (Kevin Fleming)

Calagione’s beer-aging epiphany came in the mid-1990s, when someone gave him two cobalt blue bottles of Samuel Adams Triple Bock. He drank one and didn’t like the “aggressive” flavors, forgot about the other one in his fridge for a year, then tried it and loved it: “It was really complex and softer.”

His favorite beers are those over 10 percent ABV, such as Dogfish’s Palo Santo Marron or 120 Minute IPA, that are aged “a few years.” And his enthusiasm for aging has caught on with fans. When Dogfish Head released the latest batch of 120 Minute, in mid-August, beer lovers lined up to pay $200 a case, with many telling Calagione they had cellaring plans. Dogfish’s Rehoboth brewpub and the three Dogfish Alehouses in the Washington area sell “reserve” bottles for those who’d like to try aging but don’t have the patience or the space to do it themselves.

At the brewery, “Sam’s Stash” — an area that’s fenced off and temperature-controlled — contains an estimated $250,000 worth of beer that’s being aged for quality-control purposes and for future dinners and tasting events. In the brewery’s early days, it couldn’t afford to do anything but sell everything it produced, but now, “every time a beer over 10 percent comes off the line,” Calagione says, “I take a pallet of bottles and kegs and put that in my stash.”


Stone’s Sysak, who has 2,600 bottles in his personal collection, shares Hancock’s reservations about cellaring IPAs and hoppy ales. But he says it can be done — just don’t expect them to taste the same. Arrogant Bastard, Stone’s aggressively hopped pale, still had nice caramel notes after a year, he says, “but the hops have dropped: That part of the beer is going to deteriorate.” On the other hand, 13-to-15-year-old versions of Stone’s Double Bastard are “drinking amazing,” Sysak says. “As they oxidize, they pick up flavors of caramel and toffee, which is good in a malty beer.”
Brewer Matt Brophy of Maryland’s Flying Dog Brewery says the way a beer transforms during aging can appeal to some drinkers but not others: “A lot of it is personal preference.” (From Flying Dog Brewery)

Those transformations make cellaring fun, though the results can be divisive.Flying Dog Brewery’s Horn Dog Barley Wine Style Ale, for example, has big, sweet notes of prune, fig and dates, but after aging, it takes on sherrylike flavors. “A lot of it is personal preference,” says brewer Matt Brophy.

Even for the professionals, aging can be a crapshoot. Brophy remembers the first time he tried the Fear, Flying Dog’s imperial pumpkin ale, after it had aged for a few years, wondering, “Is the spice going to continue to dominate, or is it going to level off over time?” The beer holds up surprisingly well, he says, with complex spice.

Sysak’s favorite experiment is Thomas Hardy’s Ale, an English barley wine produced once a year. “I’ve had successful bottles that are 30 years old,” he says. “It’s like a roller-coaster ride that goes from sherry to Madeira to a port and back to a sherry.”

Not all cellaring is intentional. Brophy has a personal cellar of 80 to 100 bottles, including Belgian ales and rarities from his brewery, but he admits that “about 20 percent” probably shouldn’t be aging. “People get a special bottle, usually a large-format bottle, as a gift, or when they’re visiting a brewery, and they think, ‘I’ll save this for a special occasion,’ but then the bottles just sit there,” he says.

In that case, you might as well open it: You never know what you’ll find inside.

Monday, October 26, 2015

Grand opening of U-Brew-U "Brew on Premise" Facility in Oconomowoc, WI

U-Brew University

Grand opening of U-Brew-U "Brew on Premise" Facility in Oconomowoc, WI. Featuring six Brew-Boss electric all-grain brewing systems (www.brew-boss.com) allowing you to brew your own beer from 5 to 15 gallon batches. Free "Learn to Brew" classes will be offered on Learn to Homebrew Day (November 7, 2015) as well as drawings for prizes. Beer sampling from local homebrewers and snacks will also be provided.

Sunday, October 25, 2015

15 scientifically proven reasons that explain why you should drink more beer

EBIAB www.brew-boss.com Brew Boss Electric Homebrew Equipment

1.

Virginia Tech researchers found that regular, moderate beer drinkers were 19% less likely to die during a given time period than people who never touch a drop.

Virginia Tech researchers found that regular, moderate beer drinkers were 19% less likely to die during a given time period than people who never touch a drop.

2


Beer is good for your kidneys. Seriously. Researchers in Finland have discovered that beer keeps your kidneys from developing kidney stones. Although it isn’t clear why, men who drank beer and had a higher magnesium intake during the study had as much as 40% reduced probability of getting kidney stones.

3


Beer has fiber in it, which helps with digestion and helps fill you up quickly, so you don’t go on the snack offensive. Also, more dietary fiber leads to lower risk of diabetes, heart disease and gut problems.

4.


Beer’s a source of B vitamins. The best source of B vitamins seem to be fermented things, and beer beats wine in that category by as much as 30%. The dark and stronger the brew, the better it is for your health. Beer also contains some much-coveted B12 and folate. But keep in mind that alcohol devalues B12 absorption, making beer an unreliable supplement.

5


It has antioxidants! Dark Trappist beers in particular tend to have a high number of antioxidants, part of which may indeed help save you from heart attacks. The verdict isn’t in on that one, but one thing is certain, it’s another excuse to grab a cold one.

6.


Hot beer served with a couple of teaspoons of honey makes for a great cold remedy. According to Japanese researches the hops in the beer, when heated, help fight viral infections like the common cold. The active compound itself (humulone) could combat pneumonia and bronchitis-causing viruses.

7.


Beer can help against Alzheimer’s. A phytochemical found in hops happens to fight cognitive diseases, keeping your brain sharp and healthy well into your years. Not only that, but a slight buzz has been shown to boost creativity.

8.


Beer can be a great post-workout drink. Spain discovered that beer helps hydrate better than a glass of water after a good workout. Testing this on students at Granada University, he also discovered that the carbonation and carbohydrates in beer leads to better post-workout recovery, due to the replenished calories.

9.


Beer has less calories than orange juice. A pint of Guinness gives the body less to burn than the equivalent amount of orange juice.

10.


Beer can help stave off cancer risks. Remember that chemical compound known as xanthohumol that keeps your mind sharp into old age? Well, that same compound may actually help you fight and inhibit cancer-causing enzymes.

11.


Beer can help fight cataracts. Antioxidant-rich beers (lagers, stouts, and other dark brews) help fight off cataracts and protect your eyes – in moderation. Researchers have determined that three or more drinks a day counteracts the benefits, putting you right back where you started.

12.


Among other things, beer is antimicrobial and assists in achieving better vaccine responses in the body. Too much alcohol however, offsets these gains.

13.


Beer helps combat gallstones. Alcohol and caffeine has led to a decrease in the development of gallstones, which is a mixture of bile, cholesterol and calcium.

14.


A study in the New England Journal of Medicine found that women who had one alcoholic drink a day were less likely to find their mental faculties declining as they grow older.

15.


A study at UCL found there wasn’t actually much scientific evidence behind the idea of beer giving drinkers the distinctive ‘beer belly’. The researchers wrote, ‘There is a common notion that beer drinkers are, on average, more ‘obese’ than either non-drinkers or drinkers of wine or spirits. The association between beer and obesity, if it exists, is probably weak.

Read more at http://thechive.com/2015/09/01/15-scientifically-proven-reasons-why-you-should-drink-more-beer-15-photos/#eFu3oEVlPaScxuVz.99

Friday, October 23, 2015

HOMEBREWING THE STONE 09.09.09 VERTICAL EPIC ALE

HOMEBREWING THE STONE 09.09.09 VERTICAL EPIC ALE


The idea of brewing a Belgian Imperial Porter was something that we had discussed a few times in the past few years, especially after taste panel sessions that had included Belgian Imperial Stouts and Belgian Black beers. Roasted malts and the spicy, fruity flavors from Belgian yeast strains combine surprisingly well, provided proper balance is maintained in the recipe. And we thought an Imperial Porter, with an intense chocolate malt character, might be a fun, and a bit different, version of a Belgian dark ale to try.

With the Stone 09.09.09 Vertical Epic Ale, we were also able to incorporate some ingredients and techniques that we had been exploring a bit with our pilot system and small batch special creation program, such as the use of vanilla beans, tangerine peel, and the French oak chip aging process.
The vanilla bean (used at a lower addition rate than what we use in the Stone Smoked Porter with Vanilla Bean) complements and actually enhances the chocolate flavors from the chocolate malt, and likewise, the French oak enhances the sensation of vanilla. Combined together with the other ingredients, the result is a multifaceted, delicious beer with several layers of depth and flavor.
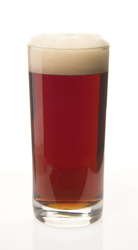
We hope you enjoy our latest beer (our 8th in the Vertical Epic series), and have as much fun brewing it as we did.


Here is the grain bill:

Pale Malt                                 73.1%
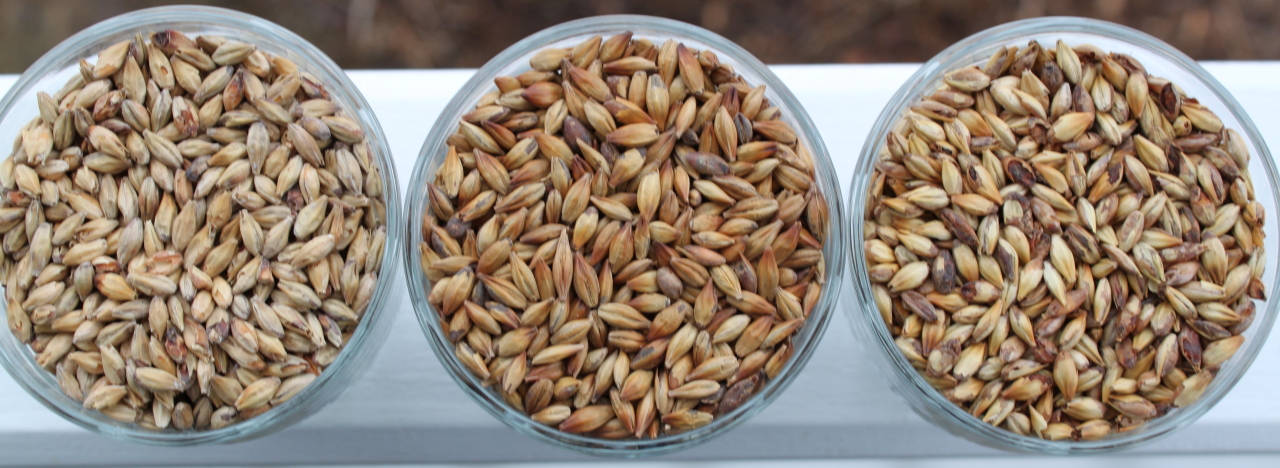
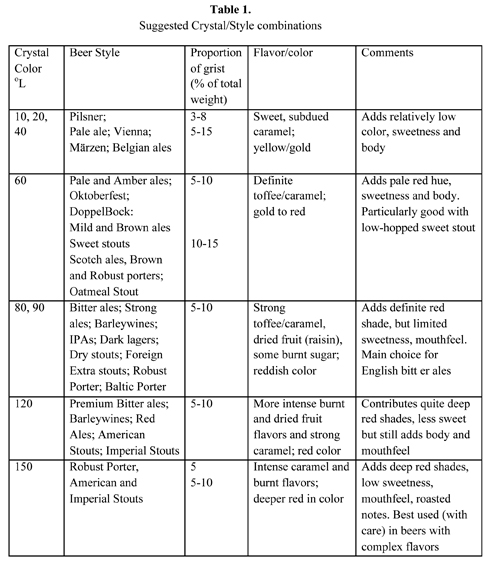
75-80°L Crystal Malt              10.4%
Chocolate Malt                       5.4%
Belgian Aromatic Malt           4.3%
Dark Candi Sugar                   3.4% (added to boil)
Black Malt                              1.7%
Carafa Malt                             1.7%

Again, I am only providing the all grain version of the recipe. I’ve never brewed with extracts, so I’m not the best person to attempt to convert this recipe to an extract one. If someone wants that information, I’d recommend consulting a local homebrew shop or a homebrewing web site or forum to get help in making the conversion.
The goal with this grain bill was to make a complex porter, but without so much dark malt that the yeast and spice flavors would get overwhelmed. In addition, we wanted the chocolate malt to be the dominant dark malt flavor, so we only used a low percentage of black malt, and added small amounts of dark candi sugar and Carafa malt to get some color and flavor complexity without overwhelming the chocolate notes.
Target OG: 20°P (1.080 SG).


Mashing:
Use a 45 minute conversion rest at 150°F. This helps provide a fairly fermentable wort. Lower temperatures and a longer conversion time rests help accentuate dryness of beer. With almost 15% crystal and aromatic malt, a conversion temperature in the normal porter range of 153-156°F might have made this beer too sweet.
If you can, raise your mash temperature up to 165°F to stop the enzymatic conversion of starches to sugars before lautering. If you cannot do that, cut your conversion rest to 20-30 minutes.
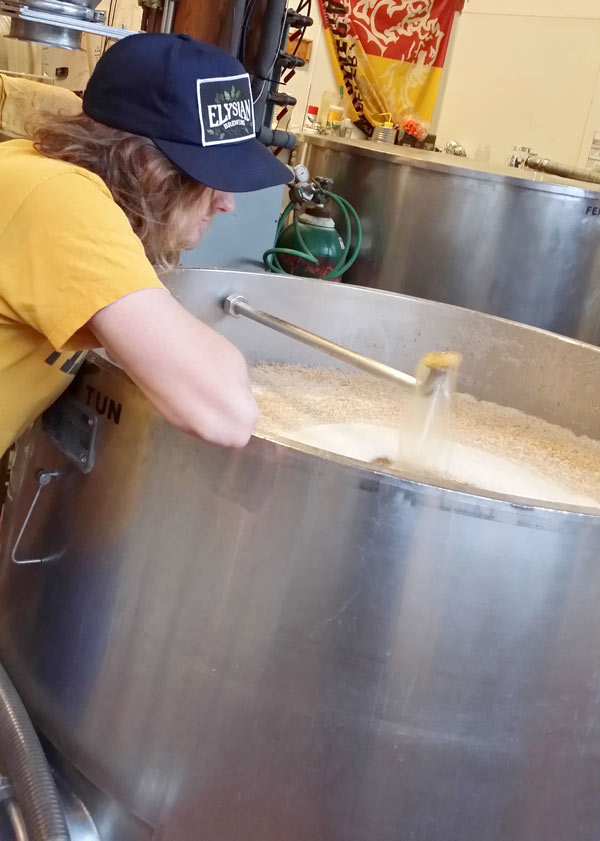
Lautering:
Recirculate your wort gently from the bottom over the top of the mash to deposit the fine particles of malt on the top of the grain and to “set” your bed. Avoid splashing the wort. The wort will be too dark to check clarity easily, so recirculate for 5-15 minutes, depending on your system, before diverting wort flow to your kettle/boiling vessel. If you have a refractometer, check your “first wort” (unsparged wort) gravity, it should be about 22-23°P (1.088-1.092 SG).
Start sparging in the lauter when the wort level is about ½” above the grain bed. Starting earlier will decrease your efficiency, because the water will dilute your first wort. Sparge water should be between 165°F and 170°F to maximize extraction, but avoid going over 170°F or you’ll extract harsh compounds from the malt husks.
Sparge until you hit your target boil volume or until your wort gravity being drawn-off reaches 3°P (1.012 SG), whichever comes first. Don’t lauter past 3°P, because when the sparged wort coming off the lauter is that low in sugar content, you risk extracting tannins and other harsh character from the malt husks.

Boil:

Here is the hop bill:
            4.5 grams per gallon Magnum hop pellets (14% AA)
            4.5 grams per gallon Perle hop pellets (10% alpha)
            All added at the start of boil. No other hop additions (this is a Belgian inspired beer, after all).

We typically boil our wort for 90 minutes. This is a good amount of time to get about 8-10% evaporation. During the boil, it’s good to:
1.      Add hops at the start. This will help knock down foam and maximize bitterness extraction. Depending on your boil parameters, you may want or need to add some portion of the hops before the boil actually starts to keep the foaming under control.
2.      Keep the boil rolling at a good clip. Don’t simmer, or you won’t volatilize Dimethyl Sulfide, a malt compound formed at temperatures above 180°F. Dimethyl Sulfide (DMS) tastes exactly like canned creamed corn, you’ll know this flavor when you taste it! A good rolling boil also ensures proper color and flavor development, good hop extraction, and proper trub formation. The rolling boil also helps prevent scorching of the wort where the heat source is at its most intense.
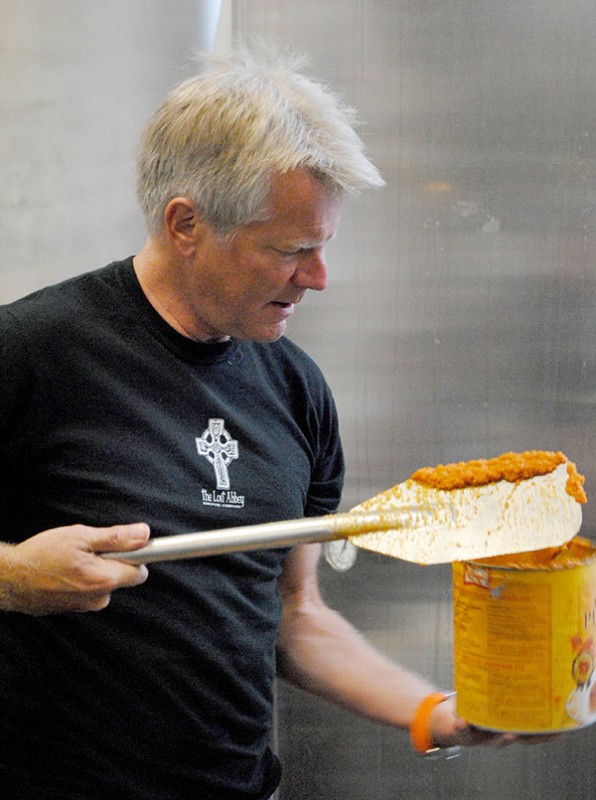
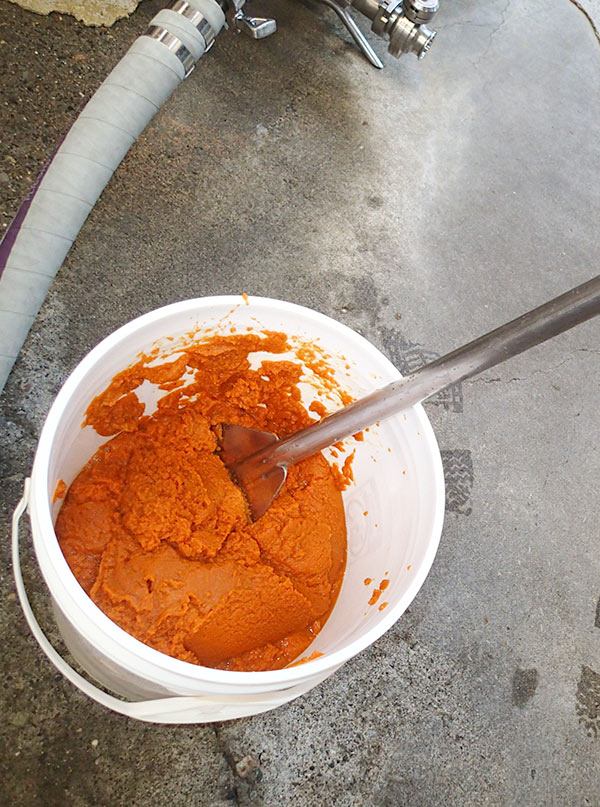
3.      Add the dark candi sugar. Pour it in after the boil starts or the sugar can settle on the bottom of the kettle and scorch as the heat increases. Burnt sugar is not a desirable beer flavor.

Whirlpool

Spice additions:
            6 grams per gallon dried tangerine peel
            0.5 grams per gallon vanilla bean.

We add the spices after the wort boil is complete to maximize flavor extraction. Adding them during the boil may result in many of the flavors being volatilized and lost with the steam. To prep the vanilla bean, slit the bean lengthwise, and scrape out the “meat” from the skin, and then chop the skins. Use all of the bean, skin included, to steep in the wort. For our brews we used a filter bag to hold the vanilla and the tangerine peel.

A note on vanilla beans:
Although there are many varieties of vanilla beans, in general, Bourbon and Tahitian vanilla beans are mostly used in food production. Bourbon vanilla beans are also commonly known as Madagascar vanilla beans because that is where most of them are grown, although the species apparently originated from Mexico. Bourbon beans are long and slender, have a creamy, strong vanilla flavor. Tahitian Vanilla Beans are plumper, shorter, and have a fruitier flavor. The flavors are different, so it’s fun to run trials with different beans. We used Madagascar (Bourbon) vanilla beans in the Stone 09.09.09 Vertical Epic Ale.
Regarding vanilla extract and vanilla flavor: Most vanilla flavorings are not created from vanilla beans, they are extracted from wood! Be careful if you want to use vanilla extract or flavor instead of whole vanilla beans in your beer. Make sure it is natural vanilla extracted from vanilla beans, not an artificial extract or flavor. And actually, vanilla beans are easy to find and use, so there’s no reason not to use real beans in your brew.

During the whirlpool step, the wort needs to be circulated to create a whirlpool. This will cause the proteinaceous trub flocs formed during the kettle boil to be pushed to the side of the vessel. Gravity will then take hold, the flocs will slide down the side of the vessel, and once they reach bottom, will gather in the center to form the trub pile. This is called “the Interrupted Centrifuge Principle”. If you stir tea leaves in a cup of tea you will see the same effect.  A good, cohesive trub pile is necessary to decant clear wort to your fermentor and avoid protein carryover, which otherwise could negatively impact flavor, or blind yeast cell walls and impair yeast growth and fermentation.

Fermentation

            Yeast Addition: Pitch a Belgian yeast strain, enough to get 20-25 million cells per milliliter (requires a starter)

After the trub has been separated from the wort, chill the wort using an immersion chiller or a heat exchanger to about 65-70°F. Add enough yeast to get a cell count of about 20-25 million cells per milliliter. We used a fairly high pitching rate (yeast addition rate) here, because we wanted to ferment at a lower temperature but still ensure the beer fermented out completely. This means that you will most likely have to build up your yeast culture at home using a starter. Otherwise, you may end up with a low pitching rate, which could results in a stuck/stalled fermentation. If your fermentation does stall out rousing (agitating the tank) to re-suspend the yeast is the best and easiest option. Adding more fermenting wort is the 2nd best option, adding new yeast is a last resort move.
We fermented the Stone 09.09.09 Vertical Epic Ale at 72°F to maximize fruity ester formation and reduce the clove/spicy flavor formations, which form at higher levels with warmer Belgian yeast fermentation temperatures (above 75°F). Again, we were concerned that too much clove flavor would clash with the other flavors in the beer.
The yeast we used in this beer was the Wyeast 3522 Ardennes strain. This yeast benefits from a high oxygenation rate, and will form a very thick krauesen head during the fermentation. It’s a nice yeast that produces a lot of fruit flavor.
The beer should ferment down close to 4°P (1.016 SG).


Aging:

            French Oak Chips: 4.5 grams per gallon

During aging, chill the beer down to about 35°F or so, and let it sit until the beer clarifies. This is the step where the French Oak chips are added. Place the chips in a filter bag with a small piece of stainless to weigh it down and keep it from floating. Sterilize the entire bag and contents by pouring hot (over 185°F) water over the bag and letting it sit submerged for 15 minutes. Then hang the bag in your fermentor until the whole bag is submerged. Start tasting your beer after 3 days and age as long as needed after that to get the intensity of French oak flavor you want.

A Note on Oak Chips: 
American Oak is white oak sourced primarily form the Midwest and Upper South states like Missouri, Ohio, Kentucky, and Virginia. In general, most people agree that American Oak has a more aggressive flavor with higher levels of vanillin, increased sweetness and stronger fruit flavors than French grown oak.
French Oak, which is grown in distinct regions such as Limousin, Nevers, Tracair, and Alliers, contributes a more “elegant” flavor that is a bit more delicate, and some feel makes for better long-term aging. The flavors contributed include vanillin, coconut, and clove spice. The regional differences are due primarily to the grain profiles and composition of the wood, although growing conditions, soil makeup, and toast levels of the wood can impact the flavors tremendously.
Here at Stone Brewing Co., we use American Oak in the OAKED Arrogant Bastard Ale, but in the Stone 09.09.09 Vertical Epic Ale, with its subtle spice and hop flavors, we decided to go with French Oak with a medium toast. We feel the flavors combine superbly with the Chocolate malt and the Madagascar vanilla bean.


Package the beer as normal. The Stone 09.09.09 Vertical Epic Ale is wonderful fresh, but with its malt backbone and the added complexities of the oak, vanilla bean and tangerine, it is well suited for aging to 12.12.12, or even beyond. Enjoy your brew, and don’t forget to send us some samples!


Wednesday, October 21, 2015

Spoilage: Advanced Brewing

adv web
Microorganisms can cause undesirable effects on beer in several ways, including undesirable changes in beer flavor and aroma. Growth of microorganisms on raw materials or in wort can produce changes that alter the normal fermentation pathways. Additionally, the growth of contaminants on raw materials or in wort can generate many different microbial metabolites that may be retained throughout the brewing process and affect the flavor and aroma of the finished beer.

Spoilage organism categories

The primary categories of organisms that can cause beer to spoil are bacteria and wild yeasts. Here is a look at these categories:
Bacteria
Beer is a hostile environment for most microorganisms. The ethanol concentration and relatively low pH in beer creates an environment that is not favorable for bacterial growth. The dissolved carbon dioxide concentration and very low dissolved oxygen concentration makes beer an almost exclusively anaerobic medium. Beer also contains dissolved hop compounds that are toxic to many bacteria. Only a few kinds of bacteria are able to grow under such inhospitable conditions and are able to spoil beer. Some types of bacteria can, however, grow rapidly in wort. Active yeast must be pitched into fresh wort as soon as possible to inhibit and "out-compete" undesired bacterial growth.
Bacteria may have many different shapes, but beer-spoiling bacteria generally are either round (cocci) or rod (bacilli) shaped. Bacteria can further be characterized by a staining procedure known as "Gram stain." Bacteria is considered to be either "Gram positive" or "Gram negative" depending on how they react to this stain. The way bacteria interact with the stain is related to the specific structure of the bacteria cell walls.
Gram-negative bacteria
Important kinds of Gram-negative bacteria are acetic acid bacteria, Zymomonas spp., Pectinatus spp., and various Enterobacteriaceae. Several members of this group not only interfere with the fermentation process or produce undesired by-products, but also have been reported to survive the fermentation process and to transfer into the finished product.
Acetic acid bacteria
These are Gram-negative, rod-shaped bacteria that produce acetic acid from ethanol. Acetobacter and Gluconobacter are two important kinds of acetic acid bacteria that are traditionally associated with brewing. Acetobacter can oxidize ethanol to CO2 and water via the hexose monophosphate pathway and TCA cycle. For Gluconobacter, the hexose monophosphate shunt is the most important route for sugar metabolism. The entire glycolytic and TCA cycles are not functional in Gluconobacter. These organisms cannot thrive in the highly anaerobic conditions of finished beer. Contamination with Acetobacter and Gluconobacter can only manifest in beers that contain some amount of oxygen as a result of defects in the manufacturing process.
Zymomonas
These are Gram-negative rods that occur as single cells, in pairs, chains, or filaments. The most distinctive characteristic of Zymomonas is the ability to convert glucose or fructose to ethanol and CO2 via the Entner-Doudoroff pathway. Ethanol only begins to inhibit the growth of Zymomonas at a concentration of around 8%. Zymomonas mobilis can be responsible for production of unacceptable levels of acetaldehyde and hydrogen sulfide in lager beer.
Enterobacteriaceae
One homebrewery contaminant in the bacteria family Enterobacteriaceae is Obesumbacterium proteus. It is a Gram-negative, rod shaped bacteria that is often found as a contaminant in the pitching yeast. It grows well in unhopped wort and is able to tolerate pH values ranging from 4.4 to 9.0. Obesumbacterium proteus is known to suppress the fermentation process and produces dimethyl sulfide, dimethyl disulfide, diacetyl and fusel oils. Beer contaminated with Obesumbacterium proteus may have a characteristic fruity or parsnip-like odor.
Gram-positive bacteria
Gram-positive bacteria are capable of a rapid growth rate, and they generally have a strong tolerance to high temperature and low pH conditions. Because of this, Gram-negative bacteria are generally considered to be the most threatening contaminants in the brewery. Gram-positive bacteria belonging to the genera Lactobacillus and Pediococcus are often called lactic acid bacteria because they produce lactic acid from simple sugars. Gram-positive bacteria are generally less able to resist the antiseptic effects of hop resins but this is not true for all varieties and there is significant variability.
Lactobacillus
There are several species of lactobacilli that have been isolated from beer, and these are major spoilage organisms within the beer industry. They are rod-shaped organisms and are resistant to hop bittering compounds. Lactobacillus can spoil beer by causing acidity, off-flavors and turbidity. Some of the lactobacilli produce diacetyl, which is responsible for a "buttery" flavor in beer. Although all lactobacilli produce lactic acid, the level of the acid accumulated in beer may not reach a concentration that is high enough to make a significant flavor impact on the final beer.
Pediococcus
Pediococcus damnosus is a very common spoilage organism found in breweries that produce lager beer. The organisms are usually found during the late fermentation or in the final beer. Spoilage by pediococci is similar to that caused by lactobacilli. Pediococci cause high acidity and buttery aroma due to the production of diacetyl. Pediococci also inhibit yeast growth, which results in decreased fermentation rates. Pediococcus can also produce thixotrophic polysaccharide slimes that cause "ropey" strands within beer. Pediococcus is often considered one of the most difficult types of bacteria to remove from an infected brewery.
Wild yeasts
Wild yeast can be defined as any yeast that a brewer did not intentionally introduce into a beer. Wild yeasts can produce a wide variety of undesired flavors in finished beer. These flavors include hydrogen sulfide (rotten egg), estery (fruity), acidic (sour), fatty acid, and phenolic or medicinal. Turbidity can also be produced by wild yeast strains that do not flocculate well. Wild yeast infection can also cause higher alcohol content with lower final gravity in the finished beer (if the infecting yeast is highly attenuative). Wild yeast can either be Saccharomyces or non-Saccharomyces.
Saccharomyces wild yeasts
Saccharomyces wild yeasts are fac-ultative anaerobes. Cross-contamination with another Saccharomyces cerevisiae strain can cause production of off-flavors and unusual fermen-tation performance. The strain Saccharomyces diastaticus has the ability to break down the dextrins which are not normally consumed by most brewing yeast strains. This results in overattenuated, thinner-bodied beers.
Non-Saccharomyces wild yeasts
There are many different genus and species of non-Saccharomyces yeast which can cause problems in beer. They tend to be aerobic organisms.
One common strain of these kinds of yeast are Brettanomyces. Brettanomyces produce acid, cidery, and clove/medicinal aromas and flavors. Other non-Saccharomyces wild yeast include Pichia, Candida and Hansenula. Pichia form films, haze and various unusual esters. Candida and Hansenula grow fast and form films. Pichia and Candida will also oxidize ethanol to acetic acid if aerobic conditions are present.
Non-Saccharomyces yeast are sometimes deliberately used by brewers to create a specific effect within beer. These yeasts can create different flavor/aromas to increase the unique character of a particular beer. For instance, Brettanomyces bruxellensis is often used to create the characteristic sour taste that is expected within Belgian lambic beers.
Molds
Molds are a type of non-chlorophyll-bearing plant. Molds are able to thrive in an environment with a temperature range of 77–86 °F (25–30 °C), but can also grow at slightly cooler or warmer temperatures. Molds are usually aerobic and can tolerate a fairly wide pH range, but most molds prefer an acidic pH. In breweries (home and professional) mold can thrive anywhere there is a little bit of moisture and a food source in open air. Molds may be encountered on damp walls and floors, inside less-than-clean bottles and kegs, or almost any place where beer residue may be present.
Conclusion
Microorganisms are everywhere, and they can find their way into the wort or beer at most any step in the brewing process. Although no pathogenic microorganisms can survive in beer, beer that is infected in a way not intended by the brewer will usually be quite unpleasant or even undrinkable. A good brewer must understand how to manage cleaning and sanitation practices in order to minimize the potential problems associated with unwanted microorganisms.

Monday, October 19, 2015

Crystal Malts: Techniques


In 1977, supplies of brewing ingredients and equipment were very limited compared to what is available today. This situation started to im-prove in 1978 when homebrewing was made legal on a federal basis, but it took a while before the situation im-proved substantially. Indeed, every time I returned to England on business I took with me a sample loop and some sterilized jars. Whenever I visited a brewery I would pick up a sample of their yeast (often directly from the fermenter), bring it back to the US and culture it up to use in my own brewing. Now, I can get all kinds of strains in ready to use packs from several suppliers.
Back then someone gave me what they said was some American crystal malt, without any further details that might have been useful such as Lovi-bond (°L). This crystal seemed to be somewhat different from the British types I had been used to, and I thought it might be a good idea to make a beer entirely from this crystal malt. I did so, keeping it quite simple with an OG around 1.040 and a modest hop rate; as I remember it fermented out reasonably well and I had thought my idea had worked. Then I bottled it, waited for it to condition and tasted it. Even now a description of the taste is beyond me; all I remember it that it had such a powerful and somewhat unpleasant flavor that I could not actually drink a whole glassful. I think I still have a few bottles under a pile of debris in my garage and maybe I'll summon up the courage to try one sometime!
Roasted products are virtually identical for the same color level (°L). I shall consider here only roasted, not kilned caramel malts so I'll just use the term crystal for the sake of simplicity. You will also have seen that there are a wide range of them available, and not all of them are suited for use in brewing all beers. The table on this page will give you some idea as to which crystal malt might be suitable for the popular beer styles.
crystal
This table is not meant to be definitive or exclusive, but merely reflects my opinions (although it is based on commercial brewing practice and style definitions where possible). The point is that these roasted malts (as the table indicates) add not only color and flavor, but also add body and mouthfeel, since a proportion of the extract they yield is unfermentable. This is perhaps the main reason why British commercial brewers favor their use in brewing their regular bitter ales. Many of these are brewed at less than 4% ABV, and might well taste somewhat thin without the addition of crystal malt to the grist. The red color of 80 °L and 90 °L crystal malts also gives bitters a copper hue, which brewers like as it gives the beer more visual appeal.
In short, crystal malts are a valuable tool for the brewer and can be used in a variety of ways. This is especially true if you are brewing to taste and are not particularly concerned about producing a beer that is not exactly to style. For example, if you wanted to brew something close to a Pilsner but with a little more color you might want to add some 60 °L crystal malt instead of any of the lower roasted options. But if you did, you would use less (say 1-3%) than the 3-8% recommended in the chart for 20 °L crystal so the beer is not unbalanced in terms of flavor.
From the way I set up the table you may think I was referring only to all-grain brewing, but it can be applied just as much to extract brewing. All the extract of crystal malt can be leached out by a simple steeping technique so that these malts are very well adapted to extract brewing. But malt extracts are really concentrated worts, which is to say that pound for pound they give a higher yield of brewing extract than does grain malt. In other words, for the same original gravity you would require less malt extract than you would grain. Therefore, if you base it on weight (as in the table), then you need a higher percentage of crystal malt for an extract brew than an all-grain one. For a simple example, 6 lbs. (2.7 kg) of extract syrup in a 5-gallon (19-L) brew would give an OG of (6 x 36)/5 = 1.043, while for the same OG from all-grain you would need 9 lbs. (4.1 kg) of pale malt. If you were aiming for a 10% addition rate for the all-grain beer, that comes to 0.9 lb. (0.41 kg) of, say, 70 °L crystal malt. But you need the same weight of crystal in 5 gallons for the same color and flavor effect; that comes to (0.9/6) x 100 = 15% of the weight of malt extract.
There is another wrinkle to be considered when adding crystal malt to an extract brew. This is that some extracts have been produced with a proportion of crystal malt, and you should allow for that when making further additions. Your supplier may well not be able to tell you how much crystal was used in making the extract, so what do you do then? Well, you likely do nothing; the manufacturer knows what he was trying to do and the chances are you won't improve on his efforts by just adding more crystal. You are better off taking a straight pale extract and steeping an amount of crystal malt in order to get the color and flavor you want.

Making your choice

The best approach is to think before you do. The first point is deciding what kind of beer you want to brew before you buy any grain or extract. If you want to make something true to style, then that will decide how much crystal you'll need to get in the right color and flavor range. If you want to make something entirely your own then the business becomes more complicated. That's because you want to get some balance between alcohol level, hop bittering rates, hop character, body, and the depth of color. In other words you probably wouldn't want to use so much of 90 °L crystal malt in a pale lager that it becomes a deep red and tastes of nothing but caramel. Nor would you want to add more than a dash of 150 °L crystal in a pale ale brew where you want hop flavor and aroma to be dominant, whereas you might use a bigger proportion in a bigger beer such as an imperial stout, where you are aiming for more body and complexity. In fact, it would take me a month or two to put together a chart showing relationships between all the possible beer styles, all the available crystal malts and all the possible addition rates! That was why I drew up the table on page 87 as a framework so someone with a limited knowledge of the possibilities of crystal malts would have a starting point to work from.
The above statements may sound a little wishy-washy and not be of much help to you, so perhaps an example may be more instructive.

Example: Welsh Archer's Bitter Ale

This is going to be a modest 5-gallon (19-L) all-grain beer, let's say with an OG of 1.040, finishing at 1.010 for an ABV of 4% and with only 28 IBU. Using our gravity points notation, we'll need (40 x 5)/24 = 8.3 lbs. (3.8 kg) of pale malt for that OG ("24" is the expected yield from 1 lb. pale malt at our 65% brewhouse efficiency).
Now we want to use crystal malt to give it some extra flavor and body, and more importantly to make it copper colored rather than pale gold in hue. We can easily do this by using one of the higher roasted crystal malts which contribute a red hue. Let's opt for one at 80 °L, which will do exactly that, and from the table we could use up to 10% of this for bitter ale. However, I would see that as too much because this is a soft, gentle, and not very bitter beer. So I would prefer to go with only 5% of the weight of pale malt, which is 0.42 lb. (0.19 kg). I'll round this up to 7 oz. (0.2 kg), which will actually be 5% of the total grain bill in this case; if we used other malts we would have to take these into account in this calculation. But note that we will get extract from the crystal malt of (7/16 x 22)/5 = 1.002, so our actual OG will be 1.042. So if we want 1.040, we need 1.038 from the pale malt. That means (38 x 5)/24 = 7.9 lbs. (3.6 kg) of pale malt.
But what will this crystal addition do to the color? Well 7.9 lbs. of pale malt at 2 °L will result in a beer at (roughly) (7.9 x 2)/5 = 3 °L. Adding 7 oz. of 80 °L crystal malt will add (7/16 x 80)/5 = 7 °L, for a finishing color of 10 °L malt color units (MCU). That's still relatively pale for bitter ale but is as much as we want for such a light beer; if I felt I wanted to use more crystal malt I would up it with the lighter-roasted 60 °L product. [Do note that these color calculations do not accurately give the color of the beer; they are very approximate but are convenient for comparative purposes].
So, the final recipe that I have come up with, if you want to try it at home, is:

Welsh Archer's Bitter Ale

(5 gallons/19 L, all-grain)
OG = 1.040 FG = 1.010
IBU = 28 SRM = 8 ABV = 4%
Ingredients
7.9 lbs. (3.6 kg) pale 2-row malt
7 oz. (0.2 kg) English dark crystal malt (80 °L)
7.5 AAU UK Fuggles hops (90 min.) (1.5 oz./42 g at 5% alpha acids)
1 tsp. Irish moss (15 min.)
White Labs WLP002 (English Ale), Wyeast 1968 (London ESB Ale), or Danstar Windsor Ale yeast.
Step by Step
This is a single-step infusion mash. Mash in the grains with 3 gallons (11 L) of water to reach 151–153 °F (66–67 °C) and hold for 60 minutes. Run off and sparge with hot liquor to collect 6.5 gallons (24.6 L) of wort. Boil 90 minutes, adding the hop addition at the beginning of the boil and adding the Irish moss with 15 minutes remaining. Run off and cool to around 68 °F (20 °C). Once cool, pitch the yeast and aerate thoroughly. Ferment at 65-68 °F (18-20 °C) until kräusen falls, then rack to secondary if you so desire. Follow standard kegging or bottling procedures.

Welsh Archer's Bitter Ale

(5 gallons/19 L, extract with grains)
OG = 1.040 FG = 1.010
IBU = 28 SRM = 8 ABV = 4%
Ingredients
5.3 lbs. (2.4 kg) pale liquid malt extract
7 oz. (0.2 kg) English dark crystal malt (80 °L)
7.5 AAU UK Fuggles hops (90 min.) (1.5 oz./42 g at 5% alpha acids)
1 tsp. Irish moss (15 min.)
White Labs WLP002 (English Ale), Wyeast 1968 (London ESB Ale), or Danstar Windsor Ale yeast.
Step by Step
Steep the grains (in a muslin bag) in 2 quarts (2 L) water at 150–160 °F (65–71 °C) for 20 minutes. Remove the bag and rinse with 2 quarts (2 L) hot water. Transfer the liquid to the boiler and top off to at least 3 gallons (11 L). Then slowly stir the malt extract into the wort. Bring to a boil. Add hops and then continue to boil 90 minutes, adding the Irish moss with 15 minutes remaining. Siphon wort from the trub and top up to 5 gallons (19 L). Cool the wort to around 68 °F (20 °C). Pitch with yeast and aerate thoroughly. Ferment at 65-68 °F (18-20 °C) until kräusen falls, then rack to secondary if you desire. Follow standard kegging or bottling procedures.

Saturday, October 17, 2015

5 Tips on Brewing Pumpkin Beers from Elysian Brewing Co.

pumpkin homebrewing tips


Elysian Brewing Co. loves their pumpkin beers. The Seattle-based brewery produces and bottles four pumpkin-themed beers annually—Night Owl pumpkin ale, The Great Pumpkin imperial pumpkin ale, Dark o’ the Moon pumpkin stout, and Punkuccino coffee pumpkin ale—as well as various other tap-room offerings that showcase the orange gourd. They also hold their annual event the Great Pumpkin Beer Festival, now in its tenth year.
We caught up with Elysian founder Dick Cantwell and head brewer Steve Luke to ask for some tips on brewing beer with pumpkin. Here’s what they shared.

1) Use pumpkin throughout the brewing process.

Using pumpkin in a pumpkin beer may seem too obvious for tip #1, but there are “pumpkin beers” out there utilizing only spices to trick the senses into perceiving pumpkin. Ideally, pumpkin should be evident in both flavor and mouthfeel.
For the most pumpkin-like profile, pumpkin can be added during the mash, boil and even in the fermenter. “For additions to both the kettle and fermenter, keep in mind that pumpkin has a lot of water—single-strength pumpkin is typically around 8 brix—and should be liquefied with wort rather than more water, since you don’t just want to plop it in un-thinned or have it negatively affect the your starting gravity,” says Cantwell. “You may need to use more malt to hit your target gravity.”
pumpkin homebrewing tips

2) Control your spice regimen and think outside the (spice) box.

When using spices in conjunction with pumpkin, pre-blended pumpkin pie mixes are available at stores, but for the most control you’ll want to add spices individually. Elysian uses what they call the “faithful 5″ which include cinnamon, nutmeg, allspice, ginger and clove. Sure the pre-blends can work, but to tailor the spice regimen to your specific recipes, pull a sample after fermentation as you near conditioning and try different spice ratios until you find what works well for your recipe.
“At Elysian, we’ve also used dozens of different spices in our pumpkin beers—vanilla, mace, dill, lavender, cumin, coriander, epazote, different chili varieties, etc.—but not all at once…that would be gross,” shares Luke.
Cantwell emphasizes thinking outside the spice box and exploring spices in world cuisines that use pumpkin, like certain Mexican and Indian dishes. Take the time to experiment with different spice additions prior to conditioning. You may be surprised what you’ll favor!

3) Experiment with other non-spice ingredients.

Pumpkin beers don’t require additions of cooking spices to add more depth and character. Other ingredients can be used to create spice-like qualities, like phenolic, fruity and clove-y yeasts as well as a gamut of flavor-commanding microorganisms.
Various fruits and vegetables can also compliment pumpkin, like sweet potatoes, yams, zucchini, squashes and even cucumber. Bigger pumpkin beers lend themselves to aging in barrels of all types.
“One of our favorite pumpkin beers, brewed by Silver City Brewing in Sliverdale, Wash., is made from pumpkins smoked on a steel drum smoker,” shares Cantwell.

4) Stray from the traditional pumpkin ale style.

pumpkin homebrewing tips
Elysian head brewer Steve Luke watches over the sparge of a mash with pumpkin.
Moderately hopped and spiced, amber-colored ales with a bit of maltiness tend to be the benchmark for the pumpkin beer style. However, pumpkin can be added to a much wider variety of beer styles with great success. It will not always be as easy as adding pumpkin to your favorite recipe, though. Consider what further additions are suggested to tie the pumpkin in with the style you pursue.
“Cucumber-pumpkin beer cries out for dill and Sorachi Ace, Saaz-laden pilsner for the spice and heat of ginger, chocolate pumpkin beer for orange or chilies or cinnamon,” says Cantwell. “This year we’re going to brew a pumpkin Sahti with juniper-infused brewing liquor and whole juniper branches in the mash.”

5) Serve your beer in a pumpkin.

You heard us right! Many commercial and home brewers, including Elysian, are taking pumpkin beers to the next level by serving them from an actual pumpkin. The process is fairly simple. First hollow out a pumpkin. Then take a welding torch and scorch the interior of the pumpkin until it is black. This helps mitigate the astringency of raw pumpkin, while the caramelization simulates the char of a bourbon barrel. After filling it with beer, seal it shut with beeswax to allow for flexibility since gourds swell and contract.
If you do pursue this “pumpkin keg,” Cantwell suggests kicking the keg within two days. A pumpkin is porous and the beer will begin to depreciate after a day or two.

Thursday, October 15, 2015

Calculating Water Usage


Calculating Water Usage
Because it typically comprises more than 90% of beer both by weight and by volume, it can be argued that no brewing ingredient is more important than water.  Such questions as how much water to use for mashing and sparging the grain, and boiling the wort are of great interest to brewers.

If you are using water that is filtered or adjusted for mineral content, you will want to know the total volume needed for a brewing session. The volume of water also impacts brewing equipment and system design because it is a major factor in determining the capacity of the vessels required. By keeping several concepts in mind — and using a few handy formulas —you should be able to calculate accurately the volumes of water needed, both overall and during each step of the brewing process.

All of the good comprehensive brewing software packages available have a brewing session water volume calculator that performs this task for you. It is also possible to construct a spreadsheet using the various formulas involved. However, even if you rely on the computer to do the routine calculations, an understanding of the underlying principles will make you a more knowledgeable brewer and might even improve your beer.

Beginning at the end

When calculating water quantity, it is helpful to begin by considering the final volume of beer you intend to brew. Recipes are usually expressed in round numbers, for example, 5.0 gallons (19 liters), and often they reflect the volume that is bottled or kegged. During fermentation, racking to other vessels and the bottling or kegging process, some beer is absorbed by hops or yeast, while an additional volume is evaporated or left behind in the equipment. After some experience, brewers come to know approximately how much wort is necessary in the fermenter in order to end up with a given volume of beer. I call this the “fermenter volume,” and to my mind, this is the real volume of a recipe. For 5.0–10 gallon (19–38 L) batches, typically this will be 1.0–4.0 quarts (0.9–3.8 L) larger than the published volume of the recipe.

Once experience has taught you the desired fermenter volume, you can work backwards to determine the total water volume needed, subtracting the various losses that occur during the brewing process. In reverse order, these will include many of the following:

•     Wort left in lines and equipment, such as a chiller or pump, between the brewing kettle and the fermenter
•     Wort absorbed by hop residue and protein break material in the kettle at the end of the boil
•     Evaporation losses during boiling of the wort in the kettle
•     Liquid left in lines and equipment between the mash tun and the kettle
•     Mash “dead space,” that is, liquid that is left in mashing and sparging vessels due to their design and geometry
•     Sparge water dead space, that is, water similarly left in the hot liquor tank or other sparge water vessel
•     Water absorbed by the grain in the mash tun

Of course these losses are offset by water additions, which typically will include at least some of the following, listed in order of earliest to latest:

•     Strike water, that is, the water initially mixed with the grain at the beginning of mashing
•     Any additional water infusions during mashing
•     Sparge water added to the mash in order to extract the sugars converted from the starches in the grain
•     Any water added to the kettle to achieve the target pre-boil wort volume
•     Any water added after the boil, either to the kettle or the fermenter, to achieve the target post-boil and fermenter volumes

Some of these values can be calculated from the recipe and brewing method, while a number of them are derived from the relationships among values, and still others are measured empirically based on the specifics of the equipment and brewing system. The last group includes the volume of liquid left in the various vessels, lines, chiller, pump, etc. Those values that depend on relationships are the boiling losses and any “top-off” water added to the kettle or fermenter. The remaining values, the volumes of strike water, water absorbed by the grain, any additional mash infusions and the sparge water, can be calculated from the recipe. I’ll provide those formulas shortly.

Trial and no error

Once you have extensive experience with a single brewing system, you should be able to estimate equipment losses (liquid left in vessels, lines, etc.) with a fair degree of accuracy. Even if you have a new system, however, or if you desire maximum accuracy, you can conduct a trial using ordinary water and measure the various volumes. The water should be at about the same temperature as is used during each stage of the brewing process, because at temperatures above 38 °F (4 °C), the volume of water or wort increases with the temperature — approximately 4% between 68 °F and 212 °F (20 °C and 100 °C).

For mashing and sparging purposes, it is very helpful to know the useful capacity of the mash tun and hot liquor tanks. Often this is not the same as the total capacity of a vessel. Dead space and other geometric considerations such as the space above the lid must be subtracted. The best way to determine the useful capacity is to measure the volume of water required to fill the vessel and then measure the volume of water drained.

Boiling losses depend on the heat source, the geometry of the kettle and the environmental conditions (mainly the temperature and any wind) during the boil. The value is typically expressed in terms of gallons (or quarts or liters) per hour. Again this can be measured during an actual brewing session, or you may wish to do a test boil with water. Measure and divide the actual volume loss by the total boil time in hours to calculate the value for a specific brewing session.

More difficult to measure is the liquid absorbed by hops and protein break material during the boil, but an estimated average value for all the recipes you brew is normally accurate enough for these purposes.

Mashing

The volume of strike water for the mash is a function of the amount of grain and the desired mash thickness. The mash thickness can vary with the recipe, the mash tun configuration, the volume of any additional mash water infusions, the sparge water volume and individual brewer preferences, but a value in the range of 1.0–1.5 quarts of water per pound of grain (2.1–3.1 liters per kilogram) is typical for homebrewers.

Therefore the formula for calculating the strike water volume is:
Strike water volume = weight of grain * desired mash thickness

For example, for a mash thickness of 1.25 qts./lb. (2.6 L/kg) and a grain bill calling for 10 lbs. (4.5 kg) of grain, the calculated strike water volume is 12.5 quarts (11.8 liters).

The water absorbed by the grain will vary with the specifics of the grain bill, the type of malt and adjuncts and their moisture content, but an average value of 0.50 quarts per pound (1.04 L/kg) has proven to be a very reasonable assumption in most cases. In the hypothetical recipe above (10 lbs. or 4.5 kg of grain), the volume of water absorbed is 5.0 quarts (4.7 L).

In order to ensure adequate capacity of vessels for mashing and sparging, it is useful to know the total volume of the mash. The following simple formula should be rather obvious:

Total mash volume = volume of water + volume of grain

Of course first it is necessary to know the volume that the grain displaces when mashed (which is different from its dry volume). Once again this depends on the specifics of the grain bill, but a value of 0.32 quarts per pound (0.67 L/kg) is a reasonable average. Therefore, in the example above, the mash volume is 12.5 + 3.2 = 15.7 quarts (14.8 L).

Sparging

Calculating the correct volume of sparge water is of particular importance because it greatly determines the wort pre-boil volume, which is critical to achieving the target original specific gravity. An old very general rule of thumb is to use approximately two quarts of sparge water per pound of grain (4.2 L/kg), but other factors such as the mash thickness and any additional water infusions can change this considerably.

It is becoming increasingly popular for homebrewers to batch sparge, that is, to add the sparge water in one or more batches, followed by stirring the mash, allowing it to settle and briefly recirculating the runoff until it clears before draining it into the boiling kettle. This can simplify and shorten the brewing session somewhat.

A useful value to know is the volume of first runnings that are drained from the mash tun prior to adding the sparge water. This is calculated using the following formula: Volume of first runnings = Strike water volume + volume of any other water added to the mash - volume of water absorbed by the grain - volume of liquid remaining in the bottom of the mash tun - volume of liquid remaining in lines or pump

In our example from the section on mashing earlier, and also using values of 1.0 quarts (0.9 L) for the liquid remaining in the mash tun and 0.25 quarts (0.2 L) for line losses, the calculated volume of the first runnings is 12.5 + 0 - 5.0 - 1.0 - 0.2 = 6.3 quarts (11.8 + 0 - 4.7 - 0.9 - 0.2 = 6.0 L).

Whether you employ continuous sparging or batch sparging, the total volume of sparge water is calculated from the target pre-boil volume by subtracting the volume of the first runnings. Therefore the formula is:

Total volume of sparge water = Target pre-boil volume - volume of first runnings

In our example, the target pre-boil volume may be 28.0 quarts (26.5 L) and the volume of first runnings is 6.3 quarts (6.0 L). Therefore the total volume of sparge water is 28.0 - 6.3 = 21.7 quarts (26.5 - 6.0 = 20.5 L). For the purposes of providing an adequate volume of sparge water, add to the calculated value the volume of any dead space in the hot liquor tank or sparge water vessel.

How many times?

If you batch sparge, in many cases the mash tun is not large enough for the entire volume of sparge water to be added in a single batch. Often more than one sparge water batch is required. The usual procedure is to divide the total sparge water required into equal batches based on the vessel’s useful capacity and the volume of the mash after the first runnings are drained. The formula for calculating the number of batches required is:

Number of sparge water batches = (Volume of sparge water - volume of sparge vessel dead space) / (sparge vessel useful capacity - volume of grain - volume of water absorbed by the grain)

Then round the result up to the next whole number.

In our example, we will assume a mash tun useful capacity of 24 quarts (22.7 L). Therefore the calculations are:

(21.7 - 1.0) / (24.0 - 3.2 - 5.0) = 1.3
or (20.5 - 0.9) / (22.7 - 3.0 - 4.7) = 1.3

Rounded up to the next whole number, the result is two sparge batches.

The formula for the volume of sparge water per batch is simply the volume of sparge water divided by the number of sparge batches, in our example 21.7 / 2 = 10.9 quarts (20.5 / 2 = 10.3 L).

Putting it all together

Armed with all this information, we are able to calculate the total volume of water required for a brewing session. Reviewing the list earlier in this article, we recall that the total water needed consists of the sum of the volumes of the strike water, any additional mash water infusions, the sparge water (including any sparge water vessel dead space), any water added to the kettle prior to the boil, and any water added to the kettle or fermenter after the boil. Expressed as a formula, it is:

Total volume of water needed = Volume of strike water + volume of any additional mash water infusions + volume of sparge water (including any sparge water vessel dead space) + any water added to the kettle pre-boil + any water added to the kettle or fermenter post-boil

Our hypothetical example had no additional mash water infusions, sparge water dead space, or water added to the kettle or fermenter either prior to or after the boil. This results in the calculation of the total water volume for the brew session as the simple addition of the strike water and the sparge water, or:

12.5 + 6.2 = 18.7 quarts
(11.8 + 6.0 = 17.8 L)

While the hypothetical calculations above have been expressed to a precision of  0.1 quart or liter, in real-world homebrewing situations you may find it necessary only to measure the volume of the actual water additions to the nearest whole unit. For the 5–10 gallon (19–38 L) batches of many homebrewers, this represents an accuracy of about 5% or less and is likely to produce meaningful and useful results.

Of course, many homebrewers detrmine their water needs by simple trial and error. The benefit of knowing how calculate water usage comes when you upgrade or modify your brewery, or buy or build a new one.