Monday, February 29, 2016

Happy Leap Day from Brew Boss!


Great way to celebrate Leap Day is with a #Homebrew!  Check out #BrewBoss Electric Homebrewing equipment to get started.  www.brew-boss.com  CHEERS!

Sunday, February 28, 2016

5 Beginner Tips for Beer Recipe Formulation

www.brew-boss.com Brew Boss Electric Homebrew Equipment


The art and science of formulating a beer recipe from scratch is an involved process. While we aren’t going to walk through all the steps since they could fill a book (in fact they do: Designing Great Beers), here are five tips to consider for those testing the waters of custom recipe formulation.

1. Find Inspiration

Without an end goal in mind, there is the risk of creating a kitchen-sink beer—and not one of those tasty ones, but the kind that is muddled and unfocused. Determine the inspiration behind your recipe and form a goal and stick with it.

Inspiration could come in the form of a classic style, interesting ingredient or your favorite commercial brew. Whatever it is, try to keep the goal at the front of your mind as you formulate the recipe. Your inspiration will factor greatly in decision making, especially if you establish targets for specifications like the original gravity, color, bitterness, etc.

2. Limit Ingredients

With a goal in mind, make a list of all the possible ingredients that could be used in your beer. This includes grains, hops, yeast, adjuncts and even different water types. You can use other recipes, BJCP style guidelines or brewing books to learn about typical ingredients for specific styles.

Take the time to dig into each ingredient a bit to know what it will contribute to the profile of the beer. If it sounds like something you’d want, write it down. Last, slim down your ingredient list to the bare essentials—the least amount of ingredients needed to achieve your goal. The old saying “less is more” can go a long way in making a great recipe. 

3. Tailor Recipe to Your System

Knowing your system and being able to anticipate its variables is invaluable when planning a beer recipe. Establish your limitations based on your equipment and process. Are you able to do full boils? If not, this will effect the quantity of your hop additions. Can you hold fermentation temperatures near freezing? If so, you can have a go at a lager recipe.

Homebrewers should also take detailed notes of their brew days, which can be referenced in the future in order to better predict the outcome of a beer. Use our homebrewing notes sheets to keep track of all your brew day specs on one convenient page. It’s much easier than trying to remember the finer details a few months down the line.

4. Consider Various Techniques

The beauty of homebrewing is the various techniques that can be adopted to fit your process and goals. If you are looking for a dry finish, you could try a highly attenuative yeast, adding simple sugars to the boil or mashing at lower temperatures. All of these will result in a similar effect, but through different means and typically under different circumstances. Consider things like pitching rates, mash steps and fermentation schedules, which can vary widely depending on your end goal.

5. Repeat

It’s understandable to want to try a new recipe every time you brew, but one of the best ways to hone in a recipe is to brew it over and over again, making minor tweaks in hopes of improvement. Bring your brew to homebrew club meetings or submit it into competitions to see how it is received. Take into consideration all feedback, and see how it may influence changes to the recipe. You can’t improve a recipe if you never try to make it again…rarely does it come out as perfect as you imagined the first time around!

Sources: Designing Great Beers by Ray Daniels; Brad Smith’s “Beer Recipe Design” seminar at the 2013 National Homebrewers Conference (conference seminarsavailable to members)

Friday, February 26, 2016

A Beginner's Guide to Belgian Beer Styles

#belgium #beer #brewbossbrewing Brew Boss Electric Homebrew Equipment www.brew-boss.com

Some of Belgium's finest. [Photographs: Mike Reis]

How can you not love a country known for its love of waffles, chocolate, French fries, and beer? Belgium is my version of Guns 'n' Roses' Paradise City, where the grass is green and the beers are plenty.

And not only are the beers of Belgium vast in quantity, they're vast in quality, diversity, and cultural importance. Every beer that we credit to the country's name seems to have a history and character that's independent of its neighbors on the shelf. If you're put off by intensely bitter IPAs or bland canned lagers, the Belgian beer section at your local bottle shop may be a good place to start your love affair with beer.

Here's a guide to get you started:

ABBEY ALES

When I think of Belgian beer, the image that comes to mind is that of an enrobed monk, tipsy off his own supply, hoisting a clunky chalice full of beer. Actually, it's pretty much just the St. Bernardus logo. The image may not be rooted in reality, but the abbey ales of Belgium are a great place to get started when you're exploring Belgian beer. I'm talking about dubbels, tripels, and quadrupels: the beers made famous by monastic brewers and their secular imitators. Let's dig into 'em a bit:

DUBBEL, QUADRUPEL, AND BELGIAN STRONG DARK ALE


So, the dubbel. The name means (wait for it) "double," in Dutch. But where does that name come from? What's being dubbeled? is there some type of "single" floating around there with a funny Dutch spelling?

Fine questions.

Here's the thing: historians can't seem to agree on where the dubbel/tripel/quadrupel naming comes from. There isn't an exact mathematical relationship between the styles as the names imply, and the "singel" remains an elusive beast that rarely leaves the walls of the few monasteries where it's made. What isclear is that the styles maintain a loose increase in strength between them. Dubbels are, as a whole, stronger than singels. Tripels are, as a whole, weaker than quadrupels.

Back to the singel. It's pretty tough to find unless you're hanging out in a monastery. It's also less clearly defined than its big brothers. The name singel is applied primarily to the generally pale, generally low-alcohol beers that are made by the monks in monastic breweries to keep for themselves. They don't want (at least in theory) to be too tipsy for their monky obligations, so a lower-alcohol beer is a must. Calling it "singel" just seems natural given its relative weakness to the more established dubbels and tripels, but as a style, it is less stringently quantified than either of those. I should note that a few secular breweries make these beers commercially, too, but they aren't common.

The dubbel is more clearly defined. Brown ales of different sizes, flavors, and production methodologies have been made in monasteries for a long time, but in 1926, the style took its modern form when the Westmalle monastery released a beer called Dubbel Bruin. The beer was a success and a wave of imitators solidified dubbel as a recognized style.

These are reddish brown-colored ales of moderate strength (think 6-8% ABV) that, nowadays, are made not just in monasteries, but by secular breweries around the world. Classically, they are made with an ingredient that you might not expect: heavily caramelized beet sugar. The sugar imparts much of the deep color characteristic to this style and lightens the beer in body, fermenting completely and creating a bunch of alcohol along with it. It also leaves behind a pleasant raisin-like flavor. The type of yeast used for fermentation is important as well, yielding a wide range of fruity, peppery, and spicy flavors that give the style a deep complexity and low level of residual sugar.

Quadrupels are basically just amped up versions of the dubbel—stronger in every way with identical ingredients producing more of the same flavors. We're talking big time plum, raisin, caramel, and pepper flavors alongside a noticeable alcoholic bite (these beers can veer upwards of 12% ABV). The quadrupel name isn't accepted by everyone and some prefer to stick with a less-specific catch-all: Belgian strong dark ale.

TRIPEL


The origin of the tripel is a matter of much debate, too. One thing is certain: like the dubbel, the modern tripel was popularized by the Westmalle monastery. Also like the dubbel, the tripel is brewed with a good portion of beet sugar included in the recipe, but this time, the sugar isn't caramelized. It still raises the alcohol level and lightens body, but it doesn't impart significant color—the beer's beautiful golden hue comes primarily from the use of lightly kilned malt. Expect a beer filled with apple, pear, citrus, or banana-like fruitiness, clove-like or peppery spice, and a drying but (ideally) subtle hit of alcohol on the finish. Slightly stronger than dubbel, tripel boasts a lofty ABV of around 7-10%, but remains dangerously drinkable.

FARMHOUSE ALES

Leaving the monastery, let's shift our gaze to the farmland of what is now Northern France and Northern Belgium. This area is the birthplace of the farmhouse ales, saison and bière de garde. As the name implies, these are beers rooted in pastoral living—brewed and consumed with the ebb and flow of the seasons.

SAISON AND BIÈRE DE GARDE


Saison (which means "season" in French, you'll get it in a minute) was born of necessity. The winter months are hard on farmers—you can't grow much and there just isn't a lot of money coming in. So what can you do? Well, if you've got leftover grain from the previous fall's harvest, you can make beer for the seasonal workers that will tend to your fields in the warmer months. Surplus grain gets used, your workers get some safe hydration, and after brewing, you can feed the spent grain to your livestock. It's the ol' win-win-win.

Bière de garde served a similar purpose. The name translates to "beer for keeping." These were beers designed to be stored—kept for the warmer months when brewing good beer was tough and farm life was hectic with obligations outside the brewhouse, but everyone was still thirsty.

Saison and bière de garde have similar histories, but stylistically, they are somewhat different. Saison is pale, highly-carbonated, and super-dry, defined by citrusy aromatics, an assertive peppery yeast character, and a level of floral, earthy hoppiness rarely seen in Belgium. But saisons aren't restricted to the Belgian borders&mash;American brewers and others around the world have embraced the style as well. In the past few years it's a style that's been tweaked, pushed around, and celebrated more than most in the US, with black, imperial (stronger), and heavily spiced variations finding their way to shelves. Even the Belgians have been known to make variations on the style that can be dark, spiced, or brewed with unusual grains.

Despite the stylistic breadth in what brewers call "saison," the beer world generally accepts one beer as the grand-daddy benchmark of the style as we know it today. Brasserie Dupont's Saison Dupont Vieille Provision, known simply as "Saison Dupont" by most, is a true classic in the beer world and serves as the model for many imitators. It's a dry, pale beer with a lively hop presence, some citrus and apple-like fruit flavor and a peppery, yeast-derived finishing bite.

Bière de garde is a bit more refined. It lacks the lithe energy of its pretty sister, trading it for maltiness and strength. Like saison, there's more diversity within the style than you might expect—you'll find bière de garde to be available in pale (labeled "blonde"), amber ("ambrée"), and brown ("brune") varieties, each with a different expression of malt flavor. Blonde versions tend to be doughy, honey-like, and lightly caramelly, ambrée examples emphasize that caramelization, and brune versions supplement the caramel with a toasty, more dense malt complexity. In all versions, the yeast is less prominent in flavor than in saison—bière de garde is fermented at cooler temperatures than most ales, which limits the fruitiness and spiciness that can come from warmer fermentations.


OTHER BELGIAN ALES


BELGIAN STRONG PALE ALE AND BELGIAN BLONDE


Belgian strong pale ale (also known as Belgian strong golden ale) is a more recent invention, credited to Belgian brewers Duvel Moortgat. The beer that started it all is known simply as Duvel (that's "devil" in Flemish) and it took its current bright golden form in the 1970s. Crisp, strong, and extremely highly carbonated, Duvel and its imitators are not totally dissimilar to the tripel style, but tend to be drier, lighter in color, and a bit more bitter. As a reference to the demonically-named pace-setter, many beers within this style are named with reference to hell and the underworld, like Russian River's Damnation, The Lost Abbey's Inferno, Het Anker's Lucifer, and others.

Belgian blonde (sometimes spelled blond) beers are slightly less strong than either Belgian strong pale ales or tripels at around 6 to 8% ABV. Often sweeter than Belgian strong pale ales, these tend to taste less bitter with more fruity flavors derived from fermentation. Both Belgian strong pale ales and blondes are usually made with the same sugar used for making tripels, so these are a bit lighter-bodied than you might expect given their strength.

BELGIAN PALE ALE


Given the name, it feels strange that Belgian pale ales don't have a lot in common Belgian strong pale ales. These actually more closely resemble English pale ales—amber to copper in color with a toasty malt quality and a moderate strength (around 4.5 to 6% ABV). Expect a fruity and peppery yeast aroma that's more subdued than most Belgian ales, with a mild earthy hoppiness that may poke through on the finish.

WITBIER


Witbier (also known as bière blanche or simply by its translated name, "white beer") has roots that can be traced back to the Middle Ages, but interest in the style waned around the turn of the 20th century amidst the rising popularity of pilsner and pale lagers. By the 1950s, nobody was making witbier commercially and it was considered to be extinct. Then a man named Pierre Celis stepped in, singlehandedly reviving the style at his brewery in Hoegaarden, Belgium.
That name Hoegaarden probably sounds familiar. Celis found wild success with his beer, and later sold the brewery to the company that would become Anheuser-Busch InBev. The beer has been sold worldwide ever since, spawning a resurgence in the style's popularity.

Brewed with unmalted wheat, coriander and orange peel, witbier is ultra-refreshing—tart, light in body, moderate in alcohol (think 4.5-5.5% ABV), and with a pleasant balance of citrusy and spicy flavors from the yeast used to ferment it.


SOUR ALES


LAMBIC AND GUEUZE

Though witbier has clawed its way out of obscurity, lambic has remained a product of rarity, hanging out on the fringes of the mainstream as an object of geeky desires. It is still produced by just a handful of companies—the lambic game isn't one you can just step into. The product's scarcity is necessitated by a time-consuming method of production that few fully understand and can require several years between kettle and shelf. Most lambic lovers also prescribe to the notion that it can only be produced in its region of origin: the area around Brussels.

Traditional lambic is funky stuff—fully dry and bracingly sour. To create this signature flavor, the brewer starts the lambic-making process more or less like he or she would any beer: by steeping grain in water and boiling the resulting liquid. From here, things get weird. Lambic is the result of something called 'spontaneous fermentation.' Instead of carefully regulating fermentation using lab-cultured yeasts and sanitized stainless steel vessels, the brewer ferments the beer using the wild yeast and bacteria that constantly float around us in the air.

After boiling, the still-hot liquid is left to cool in a shallow, kiddie pool-looking vessel called a coolship. Here, yeast and bacteria settle into the liquid (now called "wort") and begin to multiply. Then, the wort is transferred to oak barrels. Those floating organisms, along with those that live in the barrels, start to do their thing. Like any beer fermentation, sugars in the wort are consumed to produce alcohol, but the wild buggies in there also produce a bunch of sour and funky flavors not encountered in your everyday pint. That's what makes lambic so unusual.

But the name "lambic" covers a bit more than just a single type of beer. It's more commonly used to refer to all of the beer styles made from a spontaneously fermented lambic base. This includes not just that simple "lambic," also known as unblended lambic, but also gueuze, fruited lambic variants, and some other oddities.

Unblended lambic is rarely found outside of Belgium—it's uncarbonated and served almost exclusively on tap. Blended products are much more common.

Gueuze (this is a tough one to pronounce properly—most just say "gooze") is one of those. It's a blend of young and old lambics—pale, dry, and complex, with funky flavors that range from oaky, cheesy, and barnyard-like to lemony, honey-like, and briny. You might hate it (you'll probably love it).

Fruited lambics are just what they sound like: lambics with fruit added. You might have encountered some of these on the dusty shelves of your local corner store. Chances are, those dusty bottles have an unfermentable sweetener added. The beer inside is ultra-sweet and very low in alcohol (most are around 2.5% ABV). These can be decent beers for dessert pairings, but if you're looking for a beverage of depth and complexity, you'll want a more traditional example (hint: the word "oude" on the label is a tip-off that you're on the right track).

Traditional fruited lambics have the funky flavors of gueuze complemented by a heavy dose of bright, fresh flavor imparted by the fruit of choice. To make these beers, the fruit is usually jammed right into the barrel, kickstarting another fermentation that eats up all of the fruit's sugars leaving a dry finished beer. Much of the fruit's flavor is left behind, and the color of the beer can be dramatically affected by the fruit. Cherry lambics, known by the Dutch word for cherry, kriek, are the most common, but raspberry (framboise), grape, and stone fruit are commonly used as well.

Sadly, there are few producers of traditional lambic left in the world, but a surge in popularity in the American market for lambic has helped the ones that do exist to thrive. New producers are slowly learning the craft and bringing product to market, and not just as brewers. It's common practice for lambic producers (for example, Tilquin, Oud Beersel, and others) to buy wort from other breweries, fermenting, blending, and bottling the beer in their own name.

FLANDERS RED AND FLANDERS BROWN


Lambic isn't the only sour thing happening in Belgium. Flanders sour ales have a similarly tart thing going for them. These are beers indigenous to the northern half of Belgium and are available in two varieties: red and brown (AKA oud bruin).

Despite their Belgian origin, Flanders red ales likely drew their inspiration from the tart blended porters that once dominated the English beer market. Eugene Rodenbach, who is credited with the style's inception, brought knowledge of porter blending techniques back to Belgium after a stint studying brewing in England. At his family's Rodenbach Brewery, he created the torch-bearing examples of the style. Deep red in color, Rodenbach's sour ales are packed with berry, plum, and balsamic vinegar-like flavor, with acetic sourness coming from a bacterial fermentation in oak vessels.

Flanders brown ales are similar beers, but tend to be a bit maltier. Fruit flavors trend toward plums, figs, and dates more so than red berries and there tends to be a bit less vinegar-like sourness.

http://drinks.seriouseats.com/2014/03/guide-to-belgian-beer-styles-what-is-dubbel-quad-saison-wit-lambic-gueuze.html

Wednesday, February 24, 2016

Lagunitas Little Sumpin’ Sumpin’ Clone

#brewboss #homebrew Brew Boss Electric Homebrew Equipment www.brew-boss.com
lagunitas little sumpin

Jami Zainasheff, author, Brewing Network host, and professional brewer at Heretic Brewing Co., doesn’t buy the notion that the equipment homebrewers use versus the equipment professionals use makes a significant difference. He believes the only real difference is controlling fermentation. So when Amahl Turczyn made a clone of Lagunitas Little Sumpin’ Sumpin’, he was sure to keep Jamil’s wise words in mind.

Lagunitas’ Little Sumpin Sumpin is nothing short of delicious. It’s a truly a unique style that features a strong hop finish like an IPA but boasts nearly 50% wheat grain bill, giving this beer some smooth hefeweizen characteristics. All the hops starting with the letter “C” are used in this beer, but the bitterness still remains low enough not to wreck your palate.

It pours bright orange to copper in color, with grapefruit and orange aromas tingling your nose. After your first sip, you’ll experience some citrusy hops along with earthy hops before it smooths out in a creamy and slightly bitter finish. If you don’t like extremely hoppy beers, this recipe’s for you. So, after your beer’s finished, put your feet up and ask your loved-one to grab a Little Sumpin’ Sumpin’ from the fridge. Just make sure you say “please.”

Lagunitas Little Sumpin’ Sumpin’ Clone | American Pale Ale

INGREDIENTS

  • For 5.5 Gallons (20.82 L)
    • 7.0 lb (3.18 kg) two-row pale malt
    • 5.0 lb (2.27 kg) white wheat malt
    • 1.75 lb (0.79 kg) torrified wheat
    • 1.0 lb (0.45 kg) rice hulls (in mash, optional)
    • 3.0 oz (85 g) caramel wheat malt
    • 0.75 oz (21 g) Nugget, 13% a.a. (60 min)
    • 0.25 oz (7 g) Willamette, 5.5% a.a. (30 min)
    • 0.25 oz (7 g) Willamette, 5.5% a.a. (15 min)
    • 1.0 oz (28 g) Santiam, 6% a.a. (15 min)
    • 0.75 oz (21 g) Amarillo, 8.5% a.a. (dry hop 5 days)
    • 0.75 oz (21 g) Cascade, 5.5% a.a. (dry hop 5 days)
    • 0.75 oz (21 g) Centennial, 10% a.a. (dry hop 5 days)
    • 0.75 oz (21 g) Chinook, 13% a.a. (dry hop 5 days)
    • 0.75 oz (21 g) CTZ, 14% a.a. (dry hop 5 days)
    • Whirlfloc tablet (15 min)
    • White Labs WLP007 Dry English ale yeast

    SPECIFICATIONS

    • Original Gravity: 1.071
    • Final Gravity: 1.015
    • ABV: 7.5%
    • IBU: 40
    • SRM: 5

    DIRECTIONS

    To brew this Little Sumpin’ Sumpin’ clone, use 1 gram-per-gallon to treat distilled or RO water. Mash with rice hulls to aid with lautering if desired. Use a single infusion mash at 150°F (66°C), no mash out. Do a 90 minute boil and follow hop schedule.
    Primary fermentation at 67°F (19°C). Dry hop five days in primary.
    Filter if you have the means, fine with gelatin in secondary if you don’t.
    Drink as fresh as possible (~2-3 weeks after packaging) for maximum dry hop character.

    Extract Option

    Substitute 3.9 lb (1.77 kg) pale malt extract syrup for the two-row pale and 7 lb wheat malt extract syrup for the wheat malt, torrified wheat and caramel wheat. Note that extract recipe will be slightly darker (9 SRM) than all-grain version.
    http://www.homebrewersassociation.org/homebrew-recipe/lagunitas-little-sumpin-sumpin-clone/

    Monday, February 22, 2016

    Brewing with Specialty Grains

    #homebrew #brewboss Brew Boss Electric Homebrew Systems www.brew-boss.com


    You may want to try your hand at #brewing #recipes that also utilize specialty grains. This involves soaking malt that does not require mashing in your boil water prior to adding the malt extract.

    Why Brew Extract Recipes with Specialty Grains? 
    Tasty beer can be made exclusively with extract, but there can be issues with the freshness of ingredients. Liquid and dry malt extracts have less noticeable affects from aging than fresh ingredients, so it is possible to brew a beer entirely with extract, conduct your process perfectly, but still come out with an off-tasting product. Utilizing specialty grains will allow for more combinations of flavors and aromas, while taking some of the spotlight off of the extract. Brewing with specialty grains is also a great way for new brewers to become familiar with fresh ingredients and develop an understanding of which grains instill which qualities to certain styles of beer.

    Am I Mashing Yet? 
    Though sometimes confused, utilizing specialty grains is not the same as mashing. The concepts are similar—soak crushed malt in a specific amount of water, at a specific temperature, for a specific amount of time—but the biological processes differ, which cannot necessarily be seen with the naked eye. In short terms, the point of mashing is to create the right conditions for enzymes to convert grain starches into fermentable sugars. Specialty malts, like caramel and roasted malts, do not require a mashing step because their starches have been converted to sugars by heat when kilned. On the other hand, if you do not mash base malt, like pale or maris otter, the starches will not be converted to sugars and the yeast will have little to nothing to convert into CO2 and alcohol.

    Walk Me Through It Already! 
    Brewing with specialty grains only requires one additional step to the extract process that is covered in the beginner section. Essentially, you are steeping the specialty grains in 150° to 170° F (65.5°- 76.7° C) water for about 30 minutes prior to adding the malt extract. Most brewers use a grain bag to contain the specialty malt while steeping, much like a large tea bag. This makes it easier to remove the grains from the kettle when the steeping is done. As a tutorial, we will be using a recipe and set of procedures from Chapter 13 of John

    Palmer’s How To Brew.

    Port O’Palmer Porter 

    Ingredients for 5 U.S. gallons (18.92 L):

    • 6.6 lb (3 kg) | Pale malt extract (liquid) 
    • 0.5 lb (227 g) | Crystal 60°L malt
    • 0.5 lb (227 g) | Chocolate malt  0.25 (113 g) | Black Patent malt 
    • 0.5 oz (14 g) | Horizon hops (12% Alpha Acid) (60 minutes) 
    • 0.75 oz (21 g) | Willamette hops (5% Alpha Acid) (40 minutes) 
    • 0.5 oz (14 g) | Willamette hops (5% Alpha Acid) (20 minutes) 
    • London Ale liquid yeast 


    Specifications: Boil Gravity for 3 gallons: 1.047 (13.3 °P) OG for 5 gallons: 1.054 (11.7 °P) IBUs: 38

    Fermentation: Primary for 2 weeks at 65° F (18° C)

    Procedure:
    1. The only change from your regular extract brewing procedure is that you will be steeping the grain in the brew pot before you add the malt extract. For the best flavor results, the ratio of steeping water to grain should be less than 1 gallon per pound.
    2. Heat 1 gallon of water in the brew pot until it reaches 160° F (71.1°C) give or take 10° F (5.5°C)
    3. Immerse the grain bag in the pot for 30 minutes. The grain bag may be dunked and swirled like a teabag during this time to make sure all the grain is wetted. Moving it around will help to improve the yield, but don’t splash. Maintaining temperature during the steep is not vital.
    4. After 30 minutes, remove the grain bag from the pot, and let it drain to avoid dripping on the stove.
    5. Now you have a preliminary wort to which the malt extract is added. Stir in one can (3.3 lbs., 1.5 kg) of pale malt extract. Add more water to the pot to bring the wort volume up to 3 gallons (11.4 liters)
    6. Bring the wort to a boil, add hop additions as listed in the recipe.
    7. When the wort is finished boiling, add the remaining can of pale malt extract to the brew pot. Stir it in to make sure it is fully dissolved. After 10 minutes total time has elapsed, the additional extract is pasteurized, and you can proceed to cooling the wort, pouring it into the fermenter, pitching the yeast, etc.

    https://www.homebrewersassociation.org/wp-content/uploads/How-To-Specialty-Grains.pdf

    Saturday, February 20, 2016

    11 Mistakes Every New Homebrewer Makes

    http://www.themadfermentationist.com/2012/02/11-mistakes-every-new-homebrewer-makes.html

    Per "The Mad Fermentationist"

    Two fermentors of barleywine fermenting.Inspired by coaching one of my coworkers through his first batch of homebrew (an English bitter) to write up a list of the mistakes that many new homebrewers make. Several of these are things I did on early batches, while others I have tasted at homebrew at club meetings. Many of these issues stem from poor kit instructions, bad homebrew shop advice, and common sense that just doesn’t work out.

    1. Using the sanitizer that comes with a beer kit. This powdered sanitizer is slow and not especially effective. Instead get a no-rinse sanitizer like Star-San or Iodophor, which are faster and easier to use. Sanitize everything that touches your beer post-boil, and make sure it is carefully cleaned after each use (sanitizers are most effective on scrupulously-clean scratch-free surfaces). Keeping wild microbes out of your beer is the single most important step to brewing solid beer.

    2. Starting with a recipe that is strong or unusual. Brewing a big complex beer is lots of fun, but play it safe on your first batch and brew something simple. High alcohol beers require more yeast and time. Interesting adjuncts add complexity to the recipe and process. These are things you don’t want to deal with on your first batch, so keep it easy.

    3. Brewing with unfiltered, chlorine-containing tap water. If you are on a municipal water supply odds are that it contains either chlorine or chloramines. To remove them you can either charcoal filter or treat your water with metabisulfite, or alternatively use bottled water. One of the most common off-flavors I taste at homebrew club meetings is medicinal chlorophenol, which is formed by the combination of chlorine in the water or sanitizer and phenols from malt and yeast.

    4. Squeezing the grain bag after steeping. Steep your grains in a small amount of water (no more than three quarts per pound) and then rinse them by either pouring hot water over the grain bag or dipping the grain bag into a second pot of hot water.Edit: I've had a couple people dispute squeezing being an issue in the comments. I've tasted some tannin-y beer from new homebrewers, but maybe it was just from a high water to grain steeping ratio.

    A packet of T-58 dried Belgian ale yeast.5. Using liquid yeast. "Pitchable" liquid yeast cultures barely have enough cells to ferment a standard gravity beer on the day they are packaged, and their cells die quickly from there. A high quality 11.5 g package of dried yeast starts with as much as twice the cells as a fresh package of yeast from either Wyeast or White Labs, and retains high cell viability for much longer. While Fermentis, for example,claims a minimum of 6 billion cells per gram at packaging, the actual number tends to be much higher. Liquid yeast can produce great beers, but require a starter unless you are getting extremely fresh yeast and brewing a low-alcohol beer.

    6. Not aerating the wort adequately. It takes several minutes of shaking for the chilled wort to absorb the ideal amount of oxygen to allow the yeast to complete a healthy growth phase. The healthier your yeast cells are the cleaner and quicker they will complete the fermentation.

    7. Pitching when the side of the pot or fermentor feels “cool enough.” Use a sanitized thermometer to check the actual temperature of the wort before you add the yeast. Pitching when the wort is above 100 F is rare, but will kill the yeast. Ideally the temperature should be at or below your target fermentation temperature to allow the temperature to rise as the yeast grows and ferments. You can pre-chill the sanitized water you use to top-off after the boil to help bring the temperature down.

    8. Fermenting at too high of a temperature. Take note of the ambient temperature of the room the beer is fermenting in, but realize that at the peak of fermentation the yeast can raise the temperature of the beer by as much as 7 F. Fermenting too warm can cause the yeast to produce higher alcohols and excessive fruity flavors. Letting the ambient temperature rise towards the high end of the yeast's range as fermentation slows helps to ensure a clean well attenuated beer, but for most strains is unnecessary. If you are unable to control the fermentation temperature, then choose a yeast strain that fits the conditions.

    9. Racking to secondary. I know the instructions included in most kits call for transferring the beer from the primary fermentor to a secondary before bottling, but all this step accomplishes is introducing more risk of oxidation and wild yeast contamination. There is no risk of off flavors from autolysis (yeast death) at the homebrew scale in less than a month. At a commercial level the pressure and heat exerted on the yeast can cause problems quickly, but those conditions do not exist in a carboy or bucket.

    10. Relying on bubbles in the airlock to judge when fermentation is complete. Wait until fermentation has appeared finished for a couple of days before pulling a sample of wort to test the final gravity. There is no rush to bottle, and doing so before the final gravity is reached results in extra carbonation. Once fermentation is complete and the beer tastes good, you can move the fermentor somewhere cool to encourage the yeast to settle out for clearer beer in the bottle.

    11. Adding the entire five ounce package of priming sugar. In almost all cases this amount of sugar will over-carbonate the beer. Even for five gallons of beer this will produce too much carbonation for most styles and most brewers will end up with less than five gallons in the bottling bucket. Instead use apriming sugar calculator to tailor the weight of sugar you add to the actual volume of beer, the style of beer you are brewing, and the fermentation temperature.

    Thursday, February 18, 2016

    Brew A Partial Mash Beer

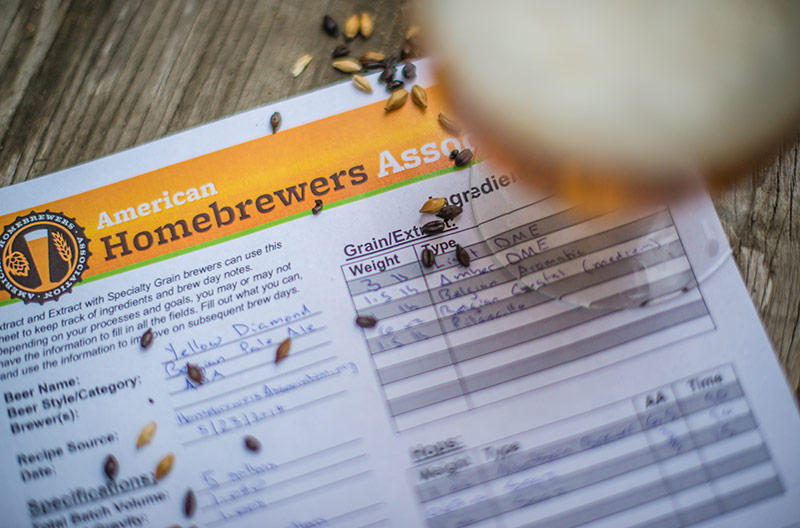
    #homebrew Brew Boss Electric Homebrew Equipment EBIAB www.brew-boss.com #thebeernation


    What Is A Partial Mash


    Essentially in partial #mashing you are getting a portion of the fermentable sugars for the wort from a mix of base and specialty grains. It is anything but difficult and requires only a little more time and attention to detail compared to steeping grains. The only extra piece of equipment which maybe required is a good thermometer. You may also consider adding a bigger brew kettle to hold the entire volume of wort, a strong nylon bag to hold the grains, a device to quickly chill your hot wort to pitching temperature, and an aquarium pump and aeration stone to add oxygen to the wort.


    Mashing (Partially)


    Mashing is a simple process, but one that is often made to seem overly complex in some homebrewing texts. The essence of mashing is simply soaking crushed grains in water. As the grains soak, the water dissolves the starch in the grains. Enzymes from the grain attack the starch and chop it up into its building blocks, sugars. Once the starch is fully converted, the sugars are rinsed from the spent grains.

    As far as starch-conversion goes, a partial mash works exactly like a full mash. However, since less grain is used in a partial mash, handling the soaking and rinsing of the grains is simpler and requires no special equipment beyond a mesh grain bag and a measuring cup. Performing a partial mash is very similar to steeping specialty grains. Gaining some experience with partial mashing often encourages brewers to go on to try making an all-grain beer.

    Why Partial Mash?


    So why perform a partial mash? That's a little harder to answer but lies in the type of grains a recipe may require when it was originally designed as an all-grain brew. If an all-grain recipe calls for a modest to high percentage of unmalted grains (examples: flaked grains or torrified grains) or non-steeping specialty grains (example: biscuit malt, aromatic malt, honey malt, etc…), or uses a base grain that does not have a malt extract equivalent (example: rauch malt, Vienna malt, mild malt, etc...), then it is a good candidate for making a partial mash.

    As already mentioned, in mashing the starch in the center of malted grains is broken down into its constituent sugars. By adding in some base grains with the unmalted or specialty grains, we get the enzymatic power to convert the starch into sugar, which the unmalted or specialty malt would be incapable of doing on its own. Here at BYO we always try to simplify all-grain recipes that have been submitted to an extract format for home brewers. Some all-grain recipes easily can be converted to extract only, some require the use of steeping grains like crystal or roasted malts, while some require performing a partial mash and some just really can't be converted at all.

    Performing a Partial Mash


    In a partial mash, the goas is to steep the grains in a volume of water sufficient to cover them completely, but not leave a lot of excess volume. For our partial mash stout we'll steep 1.5 pounds (0.68 kg) of pale malt, plus the equivalent amount of specialty grains, in 2 gallons (7.6 L) of water. This is a thinner mash than most full mashes, but that won't adversely affect our beer.

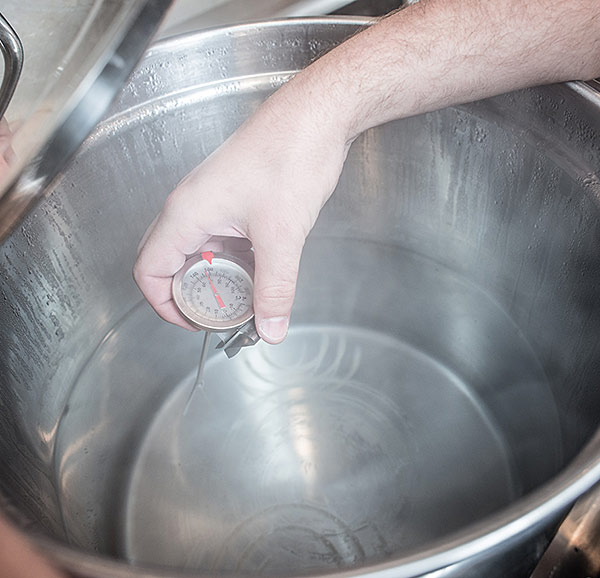
    To begin the partial mash, gather the crushed grains and place them in the nylon bag. Although we will be holding the temperature of the mash at 150 °F (66 °C), we need to heat the water to 160 °F (71 °C) to start. This is because the temperature of the mash will drop once the grains, which are at room temperature, are added to the liquid. Once the grain bag has been submerged for a couple minutes take the temperature of the water in the pot and you can add heat or cold water to adjust the temperature of the mash if needed. Try to hold the temperature as close to 150 °F (66 °C) as possible for 1 hour. If the pot you are mashing in is oven safe, you may consider placing the mash in your oven at "keep warm" or about 150 °F (66 °C).

    As you heat a pot, it takes time for the heat to travel through the metal and equilibrate. Thus, if you heat the mash continuously until the thermometer reads 150 °F (66 °C), then turn off the burner, the temperature will keep rising as heat from the pot is transferred to its contents. To avoid this, heat the mash in short bursts, stir while heating, and wait a couple of minutes before checking the temperature again. It's not going to hurt the beer if it takes you a little while to adjust the temperature, so be patient.

    Rinsing the Grains (Sparging)


    After an hour, take a large kitchen strainer and lift the bag out of the water. Let the liquid drain into your pot. If possible, balance the strainer over the pot. If you can't do this, have a friend hold it. Make sure that the grains are exposed before you begin rinsing them. Take a measuring cup and ladle hot water over the grains. The water will run through the grains rinsing out the sugar still trapped in the grain. Keep doing this for 5 minutes or so. The idea here is to rinse (sparge) as much of the sugars from the grains as possible. A good rule of thumb is to run an equal amount of rinsing water as you added initially to the mash, so 2 gallons (7.6 L) for our stout. 

    Full-Wort Boil (Optional)


    The remainder of the suggestions in this article are for those folks stepping up to full-wort boils as well as a solid recipe for 1st time (or 20th time) partial mash brewers. While not a necessity, we do highly recommend full-wort boils, not just for partial mash brewers, but for all homebrewers for the reasons listed below. For more reading and recipes on partial mash brewing, we recommend checking out these two great articles by Chris Colby, first this as well as this one.

    Reasons to Perform a Full-Wort Boil

    In your large brewpot — it should hold at least 8 gallons (30 L) of liquid — combine the wort from the partial mash with water to make 5.5 gallons (21 L). Bring this to a boil, then add the malt extract. Although our target is 5 gallons (19 L) of wort, we need more wort initially because some liquid will evaporate during the one-hour boil. The amount that evaporates is dependent on the amount of heat applied to the kettle. If you're boiling on the kitchen stove, the evaporation may be minimal; if you're using a propane burner, it may be considerable.

    Boiling 5 gallons (19 L) of wort is a large task for most home stoves. A gas stove can probably bring this volume of wort to a rolling boil. An electric stove may have problems developing more than a sustained simmer. Also, the amount of time it takes for the wort to come to a boil may be quite long. You may wish to begin heating the additional water while you are performing the partial mash. If your kitchen stove is having trouble boiling this volume, close the lid partially.

    Two benefits of boiling the entire wort are increased hop utilization and less wort darkening compared to boiling a concentrated wort. When brewing a beer using a full-wort boil, you need to add fewer hops to get the same level of hop bitterness. This is because more hop bitterness is extracted in more dilute worts. With a full-wort boil, you can also brew beers that are much lighter in color than beers brewed with from a concentrated wort. In thicker worts, the sugars carmelize much easier, darkening the wort. This difference in color won't be very visible in any darker colored beer though.

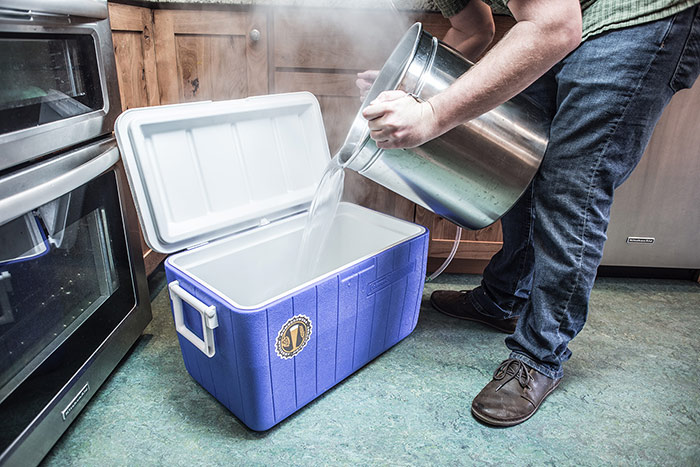
    Another change that a full-wort boil will bring is the inability to pour the wort directly into the fermenter. (Pouring boiling wort into a glass carboy, for example, could crack the glass.) With no cold water to dilute the wort and bring down the temperature, you will need to cool the wort first. Then, given the large volume, it's more convenient to simply siphon the wort to the fermenter.

    This drawback, however, has a hidden benefit. Since siphoning the wort to a fermenter leaves behind material on the bottom of the kettle, you don't need to keep your hops in a bag or tea ball. The hop debris will settle to the bottom of the kettle during cooling. The clear wort can then be siphoned off the hop material and hot break, the proteins, lipids and other compounds that coagulate in the boil.

    Cooling your Wort

    There are several ways to cool wort. One way is to place the kettle in a sink or bathtub full of cold water and ice. The drawback of this method is that you need to lift a large volume of near-boiling hot liquid. Needless to say, this can be a bit dangerous. You can avoid the potential hazard of spilling 5 gallons (19 L) of hot wort by chilling it on the stovetop with a submersible wort chiller.

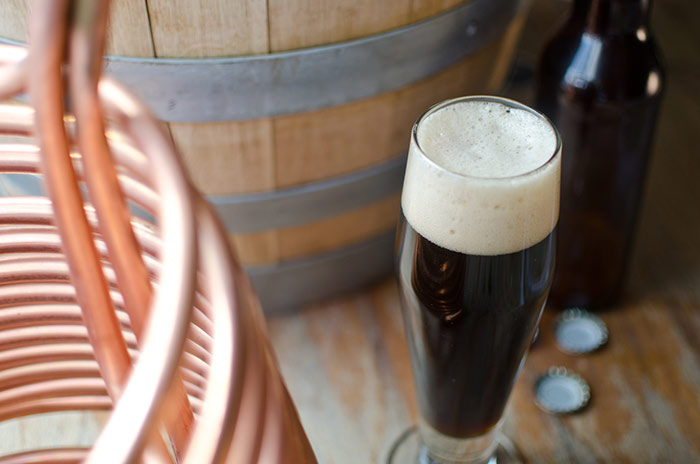
    A submersible wort chiller is a spiral of copper or stainless steel tubing. This tubing is submerged in the wort and cold water is run through it. Heat from the wort transfers to the cold water and is carried out. The speed of cooling and the eventual temperature the wort reaches depends on the temperature of the cooling water.

    You can speed chilling by gently whirlpooling the wort. If the submersible wort chiller is left undisturbed, the wort next to the copper coils will quickly cool. However, the wort farther away from the coils will cool much more slowly. The wort will move somewhat in that cold wort will sink and warmer wort will rise. But, starting a whirlpool will greatly enhance the amount of hot wort passing by the copper coils and greatly enhance your cooling rate.

    If you move the submersible wort chiller in a circular motion, you will start the wort moving. As the wort moves by the cool chiller, it cools. Hot wort is prone to hot-side aeration, so try not to agitate it unduly. Induce a slow, steady swirling motion by moving the wort chiller in a circle. Repeat this motion every five minutes.

    The wort chiller is usually sterilized by submersing it in the wort for the final 15 minutes of the boil. During this time, there is no water flowing through it. In fact, it's best not to connect the tubing until after you have turned off the heat to the kettle. A logistical note: Connecting the tubing to your sink faucet will probably require an adapter, since most wort chillers are threaded to screw onto a garden hose connector.

    Aerating the Wort

    Performing a full-wort boil necessitates one other change in your brewing procedure; you should aerate your wort once it is cool. When extract brewing, we simply add cold, aerated water to our concentrated wort to aerate it. Now we can't do that, because our wort is already at working strength. Adding water would dilute it.

    One of the simplest ways to aerate cooled wort is by using an aeration stone attached to an aquarium pump. Most aeration "stones" used in brewing are actually made of stainless steel. Air is pumped into the stone, where it is forced out through hundreds of tiny holes. Air from the aquarium pump should be filtered, so you are not pumping airborne microorganisms into your wort. Most homebrew shops sell aeration kits that include the stone and a HEPA filter. Since the aeration stone and the tubing leading to it will touch the wort, you must sanitize both before you aerate.

    You can aerate your wort while it is siphoning into your fermenter. Just put the aeration stone in the fermenter and run the aquarium pump as you are siphoning. By the time your fermenter is filled, the wort should have enough oxygen. If you'd like, you can run the pump for another five or ten minutes. However, keep an eye on the wort so the bubbles from the aeration stone don't make the wort foam over.

    Dry Irish Stout

    OG = 1.048 FG = 1.014
    IBU = 30 ABV = 4.6%

    Ingredients
    3.5 lbs. (1.6 kg) extra light dried malt extract
    1.5 lbs. (0.68 kg) pale ale malt (Maris Otter is preferred)
    1.5 lbs. (0.68 kg) flaked barley
    1 lb. (0.45 kg) roasted barley
    9 AAU Fuggles hops (60 min.)
    (2 oz./57 g of 4.5% alpha acids)
    Wyeast 1968 (Londong ESB Ale) or White Labs WLP002 (English Ale) or Safale S-04 yeast
    3/4 cup corn sugar for priming

    Step by Step
    If you opt to use one of the liquid strains, then 4 days before brew day make a 1-L yeast starter. Refrigerate yeast starter 1 day prior to brew day and decant the liquid just prior to pitching the yeast.

    On brewing day, heat 2 gallons of water to 160° F (71 °C). Steep the crushed pale ale malt and flaked barley for 45 minutes. Hold temperature at 150 °F (66 °C). Add the crushed roasted barley to the nylon bag and hold for 5 more minutes. Place grain bag in a kitchen strainer and rinse grains with approximately 2 gallon (7.6 L) hot water. Top off to 6 gallons (23 L) of wort and heat. Stir in malt extract (preferably while heat is turned off momentarily to avoid scorching) then bring wort to boil. Add the bittering hops and boil for 60 minutes. Turn off the heat then cool wort with wort chiller (or cold tub of water). Siphon cooled wort to fermenter. Aerate wort with aquarium pump, stone and filter, then pitch yeast. Ferment for one week at 68 °F (20 °C). You can then rack the beer to a secondary if you prefer, but this is an optional step. Two weeks after brew day test specific gravity with hydrometer for 3 straight days. If the specific gravity remains constant, go ahead and bottle, adding the priming sugar to your bottling bucket. After bottling, condition for 2 weeks, preferably in a slightly warmer than normal room. Your beer should now be fully carbonated and ready for you to enjoy. Cheers!

    https://byo.com/newbrew/partial-mash

    Tuesday, February 16, 2016

    Video: Swirl-Boss Homebrewing Whirlpool Device

    #Swirl-Boss #Homebrewing #Whirlpool Device by #BrewBoss
    Simple device attaches to your brew pump to whirlpool your wort prior to transferring to the fermenter. A specially milled "E" Nozzle directs jets along the kettle wall as well as inward at the optimum angle to produce the fastest rotational speed of the whirlpool. Clamps onto any brew kettle with stainless steel clamp. Adjust to a position just below the surface of the wort. Also aerates the wort for better yeast health.

    Available at www.brew-boss.com.

    http://www.brew-boss.com/category-s/125.htm


    Sunday, February 14, 2016

    Fill-Boss Automated #Bottle and #Growler filler for Beer and Wine

    Video Introduction to the #Fill-Boss automated bottle and growler filler for beer and wine made by Brew Boss for #homebrewers. Uses counter-pressure bottle filler technique to minimize foaming when filling carbonated beverages.


    BUY the Fill-Boss now at the Brew Boss website!

    http://www.brew-boss.com/category-s/157.htm


    https://www.youtube.com/watch?v=HbqD_TKQwtY


    Friday, February 12, 2016

    Enzymes in Beer: What’s Happening In the Mash

    #beer www.brew-boss.com Electric Homebrew Equipment #BIAB
    Enzymes in Beer

    As #homebrewers, we’re usually never satisfied until we know how things work. We constantly ask why and how something is done until we understand the basic concept. When you start brewing #all-grain, you hit a certain temperature to hit a specific characteristic because you were told to do so. You start picking up on words like alpha-amylase, beta-amylase, mash out and protein rest, and now you’re more curious than ever about what’s going on in the mash.

    Here we’ll discuss the #enzymes in beer, which convert the starch in malt into soluble sugars. By understanding and making enzymes work for you, an all-grain brewer can control a multitude of components in their beer. Here is a list of the attributes of a beer that can be controlled during the mashing process:

    • Aroma
    • Flavor
    • Body
    • Overall mouthfeel
    • Attenuation
    • Color
    • Alcohol content

    What Are Enzymes In Beer?


    Enzymes are proteins that are found practically everywhere—your saliva and digestive system, plant photosynthesis, and most importantly, your livers. They have an important role as a non-living biomolecule because they catalyze biochemical reactions. Each enzyme is made up of several thousand different amino acid chains which take on specific shapes suited for specific jobs. In other words, they make reactions occur quickly and at the temperatures of living organisms. They join molecules together, take large molecules apart and rearrange molecules into something different.

    Each biochemical reactions is catalyzed by a very specific enzyme. The molecule the enzyme acts on is called a substrate, and the enzyme is usually named after the substrate (i.e. Beta-Glucanase acts on Beta-Glucans). Just know that the enzyme’s shape is fragile and can be damaged by a multitude of factors, thereby rendering the enzyme unable to act as a catalyst. This is called denaturing the enzyme, and once it’s been damaged, it’s very difficult to renature it.

    The rate at which the chemical reaction occurs is affected by temperature, enzyme and substrate concentration and pH. Enzymes catalyze reactions more quickly as temperature increases in their specific range. But, they’re also denatured by heating above their specified range, and reach peak activity just before they are destroyed.


    Mashing Enzymes In Beer


    All the enzymes you’ll need for conversion are present in the final malt. The malting process develops enzymes that reduce starches and proteins during malting and mashing, which helps create better clarity, head retention and body.

    For homebrewers, we are concerned with the activity of two primary enzymes in beer: alpha- and beta-amylase.

    Alpha-amylase breaks down large, complex, insoluble starch molecules into smaller, soluble molecules for the beta-amylase. It is stable in hot, watery mashes and will convert starch to soluble sugars in a temperature range from 145°F to 158°F.

    Remember that the temperature range is important because as you reach higher temperatures, the denaturation process increases and enzymes are mostly gone within five minutes. Pouring grains into hotter “strike” water to account for temperature drops can cause problems, too. Exposure to hotter temperatures even for a few seconds can affect enzymatic activity, so make sure to get your temperature down as quickly as possible.

    Beta-amylase is the other mash enzyme capable of breaking down starches and creating soluble sugars. After the alpha-amylase enzymes create smaller soluble molecules, the beta-amylase enzymes create most of the fermentable sugars by breaking down starch to create maltose, glucose and maltose. These enzymes help create lighter bodies and more alcohol and are most active from 131°F-149°F. As the temperature approaches 149°F, these enzymes are operating extremely fast, but are also being denatured quickly. In short, if the mash is held at a temperature within the beta-amylase range, then a greater proportion of soluble sugars will be maltose and thereby be more fermentable.

    Temperature Rests in the Mash


    Mash temperatures play a very critical role in determining the body, fermentability and developing the aroma and flavor profile of your beer. Depending on the style of beer brewed and the type of malt and/or adjuncts used, a different mash temperature or a combination of temperatures and schedule may be best for the brewing beer.


    Influencing Factors on Denaturing Enzymes in Beer


    Alpha and beta-amylase act together to degrade starches to produce a range of soluble sugars in the wort. Below a certain temperature (149°F), alpha-amylase activity is low and so the large starch molecules remain insoluble because the enzyme is unable to break them up. Same goes for above a certain temperature (150° F), beta-amylase activity is hindered, limiting the amount of fermentable sugars for the wort.

    These temperature ranges are small, and leaves little room for a brewer to operate and influence the types of sugars that end up in the wort. A lower temperature results in a wort that is more fermentable but may yield slightly less, while a higher temperature will yield less fermentability but increased extract efficiency. Here are some important influencing factors on denaturing enzymes in beer.
    • Enzyme and substrate concentration
    • Temperature
    • pH

    Enzyme & Substrate Concentration


    Enzyme and substrate concentration is how concentrated your mash is, and mostly dependent on mash thickness. Although not a critical factor, mash thickness is still important to consider when you start mashing. A thick mash is anywhere between 1-1.25 quarts water/pound of grain.

    A thick mash gives a quicker starch conversion and is more beneficial for protein breakdown because it offers better protection for your enzymes (i.e. beta-amylase). It’s more suited for step mashes because enzymes are not denatured as fast by temperature increases. A thin mash is anywhere around 2 quarts water/pound of grain, which dilutes the concentration of enzymes and thereby gives them less protection, a slower conversion, but provides a more fermentable mash because the enzymes are not inhibited by a higher concentration of sugars.

    Temperature


    Each enzyme has an optimum temperature, the temperature at which the enzyme is most active. Once the temperature goes below or above the temperature range, you affect the productivity of that enzyme. Think about a cold morning. You’re lethargic and slow, but as it warms up you start to move faster and your energy improves. However, if it gets too hot, you start to slow down again. This is essentially how enzymes work. More specifically, the active site on the enzyme changes and the substrate that pairs with the enzyme will no longer fit and becomes inactive.

    pH


    Mash pH is another factor that affects the activity of various enzymes. It should fall within a range of about 5.2 to 5.5 for the primary enzyme activity. If you mash using distilled water, you’ll end up with a pH in between 5.8 and 6.0. Adding calcium ions to the water will cause the mash pH to drop down into the 5.5 to 5.6 range, with additional calcium ions dropping it further. You’ll want to use a pH strip to calibrate your water pH level as you mash.

    Key Take Aways
    • Although enzymes are fragile, they are reusable and generally affected by temperature and pH.
    • Enzymes have an optimum temperature and pH that they are most active.
    • Enzymes have a significant affect on finished beer and are also present in yeast cells.
    • Understand the primary mash enzymes (alpha and beta-amylase) and their optimal temperature and pH levels to achieve best results.
    • It’s important to understand the factors that denature enzymes.
    • Know what you want to accomplish before deciding your mash technique.

    Sources: “Making Enzymes Work For You” by Randy Scorby, BJCP Continuing Education Director and Grand Master II Judge, 2015 National Homebrewers Conference Seminar

    Thursday, February 11, 2016

    Brew-Boss Product Release: Stainless Steel Ripple Heating Element


    #Brew-Boss introduces it's newest product! We have developed a stainless steel #ripple heating element that has an integrated L6-30P plug and a 1.5 inch Triclamp ferrule. The element is ULWD, 5500 watts, 240 volts. We also have 120 volt 1500 watt foldback elements as well with teh same L6-30P and Triclamp ferrule. This element eliminates the issues when trying to build your own electric brewing system related to how to connect the wires to the element and properly enclose the connections and properly ground the element. This element solves all those problems. All you need to do is add an L6-30R receptacle on your controller and install a 1.5" triclamp ferrule on your kettle. Of course the Brew-Boss kettles and controllers are natural mates to this heater!


    Order yours today!
    http://www.brew-boss.com/ULWD-L6-30P-Stainless-Steel-Ripple-Heater-Element-p/htr-5500-ripple-l6-30p.htm


    www.brew-boss.com

    #electricbrewing #homebrew #brewboss

    Wednesday, February 10, 2016

    Understanding Water for Homebrewing


    Discussions about water can get complicated fast, especially if you aren’t familiar with hydrology. But there are a few basics that specifically apply to the homebrewer, which can set the foundation for further exploration into the realm of brewing water.

    Let’s take a look at the four key aspects of water that relate to homebrewing and how they affect the beer making (and drinking) process.

    pH


    pH is the measurement of acidity in water. The amount of concentrated hydrogen ions determines where a sample of water will fall on the 0-14 pH scale. A neutral reading (seven) indicates there is an even balance of hydrogen and hydroxide ions. Anything below seven treads into acidic territory, and above seven towards the base side of the scale.

    The affects of pH begin in the mash and follow through to the last sip of a pint. pH influences everything from enzymatic activity and fermentability to color and taste of beer, making it a crucial aspect of water. However, it is a common misconception that water must be a certain pH prior to brewing. While this is somewhat true, the real concern is achieving a certain pH in the mash and ultimately in the kettle. After all, mash pH directly affects kettle pH, and kettle pH ultimately impacts how the character of beer will be perceived on the palate.

    Ideally, mash pH should be in the range of 5.1-5.8 (5.2-5.5 being optimal). When lautering, it is key to ensure that the pH of the runoff is not above 5.8, since this is when astringent, lip-puckering tannins can make their way into the kettle. Many brewers who have issues with runoff pH being too high will use phosphoric acid to acidify the sparge water. The final beer should be in the 4.2-4.4 pH range to achieve optimal taste and stability. Brews above 4.5 will likely exhibit heavier, harsher character with a lacking freshness. Below 4.0 can start to create a thin drinking experience and even add an unintentional tartness.

    Hardness


    Chances are you’ve heard of “hard water” before, especially if you live in an area that has hard tap water. Hardness was originally developed to indicate how difficult it is to get soap to lather in the water sample, which is not all that useful when it comes to homebrewing beer. However, hardness can also be used as an indicator of the amount of calcium and magnesium ions in water.

    Hardness is categorized as either temporary or permanent. Temporary hardness is a signifier as to how much calcium carbonate is present, which can be reduced by boiling the water and allowing the calcium carbonate to precipitate out. Permanent hardness on the other hand is based on the amount of sulfates and chlorides present.

    While hard water might not be pleasant to drink, the calcium present is key to brewing, so it’s not typically a priority to reduce the hardness of brewing water.


    Alkalinity & Residual Alkalinity


    Alkalinity is a measurement of how much a water sample will resist a change in pH, otherwise known as water’s buffering capacity. Hydroxide, carbonate and bicarbonate ions primarily contribute to alkalinity, which undergo reactions with acidic substances that increase water’s pH value. On water reports, alkalinity is often times recorded as the amount of bicarbonate or calcium carbonate.

    Because much of the United States water sources have medium to high alkalinity, it can cause the mash pH to increase, which can cause mash efficiency issues and carry over into the final beer as an overall dullness and other unfavorable characteristics.

    The alkalinity remaining in solution after phosphates present in malt react with the calcium and magnesium water, which precipitates out insoluble salts lowering the pH, is termed residual alkalinity. In the end, it is largely the residual alkalinity and the acidity of the malts being mashed that will determine the mash of the pH and affect the outcome of the final beer.


    “Flavor” Ions


    Sometimes called stylistic ions, flavor ions are the most important when it comes to affecting beer character. Flavor ions include sodium, chloride and sulfate, while calcium and magnesium mainly affect hardness and carbonates and bicarbonates affect alkalinity. Together, all three groups affect pH and mash chemistry, which impact the flavor of the final beer.

    Calcium is arguably the most important ion for brewing. It affects enzymatic activity in the mash, protein coagulation during the boil and benefits yeast health. Clarity, flavor and stability of the final beer all rely on calcium. Ideally, the mash should have 50-200 ppm or calcium.

    Magnesium also affects mash pH, but to a lesser extent than calcium. It mainly enhances flavors and sourness when present at lower levels. 10-30 ppm of magnesium will help this flavor accentuation and act as a yeast nutrient, but as concentrations exceed 50 ppm, an unpleasant sour-bitterness and astringency can become apparent.

    Sodium also helps round out flavors, particularly accentuating malt sweetness, at an ideal concentration of 70-150 ppm. In higher concentrations (>200 ppm), sodium can add harsh salty-sour notes and potentially become toxic to the yeast.

    Chloride accentuates a fuller body and sweetness in beer, particularly in malt-forward styles. In appropriate quantities it will also improve stability and clarity, but in excess it can cause a harsh drinking experience.

    Sulfate, on the other hand, accentuates a dry crispness and hop bitterness in beer, particularly in hop-forward styles. If concentrations exceed appropriate amounts, a harsh, sulfury quality can be instilled and the hop bitterness can come across as harsh.

    Bicarbonate is the primary source of alkalinity in beer. Its role affects the pH, more specifically the ability to alter the pH, of wort and ultimately the final beer.

    Sources: Brewing Better Beer: Master Lessons for Advanced Homebrewers by Gordon Strong; The Oxford Companion to Beer by Garrett Oliver et al; Water: A Comprehensive Guide for Brewers by John Palmer and Colin Kaminski; “Water: The Role of Residual Alkalinity” by John Palmer (July/August 2008 Zymurgy)

    Monday, February 8, 2016

    How to Build a Hop Oast

    #beer #hops #brewboss www.brew-boss.com Electric Homebrew EquipmentDIY-hop-oast-featured


    Hop Oast

    One of the more substantial costs for homebrewers from batch to batch is hops, especially if you want to homebrew lots of American styles—IPA and Double IPA (and variants) in particular. Finding a way to keep costs down on hops isn’t as simple as re-pitching yeast or filling spray bottles full of Star-San. Though some brewers have supposedly dry hopped a beer and then put those hops into the kettle for bittering another brew, I’d recommend not doing this as you don’t know what kind of bittering you will get, and what do you do with the hops between brews to ensure they don’t spoil?

    We’d like to suggest another, more effective ways to save money on hops. I like to buy hops in bulk, but this can still be costly. So I decided to grow them. Check out past posts on and learn how to grow hops and harvest and prepare hops for brewing. This post explains how to build a Hop Oast to dry hops.


    Construction

    • Parts Needed: (around $30)
    • 7 pieces 2x4x8′ kiln-dried fir
    • 48″ x 7′ aluminum screen material roll
    • 3″ wood screws (56)
    • Staple gun
    • Box knife
    • Cordless drill

    Begin by cutting each board into 4 – 23″ pieces (keep the scraps). I just had the guy at Lowes do this for me. Take each of the pieces and begin screwing them together using two screws to each joint. Align each joint so that they are flush on top and bottom, and that the end of one board is flush with the side of the next at a 90° angle. Don’t go overboard to insure a perfect angle as it will self align when you make the last connection. Once you have all four corners drilled together, set the tray aside. Repeat this until all seven trays are built.


    After you have all seven trays built, set one aside. Place the others together two wide, and three tall on a flat surface. I did this on my driveway. Once they are flush and straight, roll the screen out over the top of them. The 48″ width should be a perfect fit across two trays, and the 7′ should easily cover the three trays up. Once you have the screen spread over, use the staple gun to attach it to the corners, then work your way around all of the trays along every side rail and every corner until each tray is fully attached to the screen.


    Now take your box knife and insert the blade between two trays through the screen and cut along the separation until all the trays are cut apart. You will have a little hangover from the edges, feel free to clean them up with your box knife, I just left mine for now (more important to get the hops dry when you build this after the bines have been cut down). It would be good to glue along the inside edge and allow it to dry to seal the trays from allowing hops to get stuck between the screen and box frame, and it will make cleaning easier after you are done with them.

    After they are separated, take the small scrap pieces and use them to raise a box fan off of the ground a few inches. This will give you air flow to go up and through your hops. You will want to pick a place where there will be some heat, air flow for the humidity to escape, and that is not in direct sunlight. I used my garage and put a space heater next to it to blow under the fan since we had a cold front hit when I got the hops picked. I didn’t let it run unattended. I only did this on the weekend while I was home as I did not trust the space heater to run while I wasn’t home or while asleep.

    Place the screenless tray on top of the box fan as a diamond for use as a base. If your box fan is large enough, you can stack it on top at the same angle as the box fan edges, but for mine, it worked perfect to turn it slightly so that it became a diamond to the square fan, creating an eight pointed star if outlined. This empty tray with no screen allows a little extra flow for the fan so it isn’t blowing directly against the screen and hop bed which may cause it to overheat.

    Function

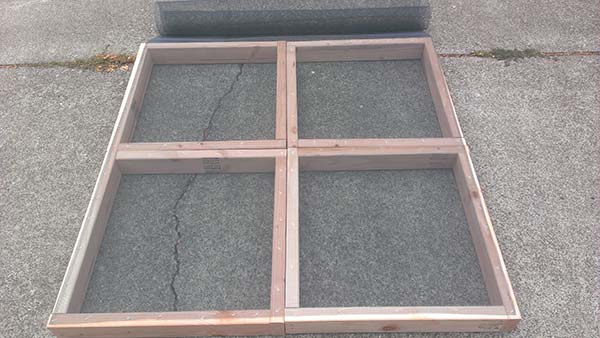
    At this point, you should pick your hops into sacks and weigh them. It is always more fun to have a helper. Place a single variety into a single (screened) tray. Once your tray is full (about 1/3 up the side), set it on top of the base tray over the fan so that the tray edges align perfectly over each other. Continue to pick your hops, fill your trays and stack them up. Leave one of the trays empty to the side. I used a piece of masking tape to mark each tray to know which variety was in which tray. Next year, I may just add a plastic sleeve to the side and make up cards with the names of the varieties I grow to sort them that way (it will look much nicer).

    Once your trays are filled with hops, place the last empty tray on top. This tray’s screen will keep things from falling into your hops, and keep the stray hop leaves in place to make clean up a little easier. At this point, turn on your fan to medium. Low will take longer, and high would be faster, but you don’t want to have it so high that you end up blowing any of the lupulin out of the hops.

    Leave the hops to dry for a few days, gently fluffing them up every 12 hours or so to ensure even drying. I also swapped trays out so that the bottom trays became middle trays, top became bottom and middle became top. I continued this rotation whenever I fluffed them. They say that the hops should be about 20 percent the weight they were when you picked them. If you got one pound of hops, you should have around 3-3.5oz of dried hops. Another telling sign is that when you take a hop cone and bend it in half the strig in the middle should snap clean. If if bends and moves back then they are still too moist.