Sunday, June 28, 2015

2015 Big Brew Recipe #3: Killer Kölsch


Light Hybrid Beer

INGREDIENTS

  • For 5 gallons (18.93 L)
    • 8.5 lbs (3.9 kg) Pilsner malt
    • 3.1 oz (88 g) Vienna malt
    • 3.1 oz (88 g) Caravienne® malt
    • 0.3 oz (9 g) Liberty whole hops, 4.5% a.a. (first wort hop)
    • 1.0 oz (28 g) German Hallertauer whole hops, 4.3% a.a. (30 min)
    • 0.3 oz (9 g) Crystal whole hops, 3.5% a.a. (5 min)
    • White Labs WLP029 German Ale/Kölsch or Wyeast 2565 German Kölsch
    • Reverse osmosis water treated with 1/4 tsp 10% phosphoric acid per 5 gallons
    • 1 tsp CaCl2 in the mash

    SPECIFICATIONS

    • Original Gravity: 1.046
    • Final Gravity: 1.011
    • ABV: 4.6%
    • IBU: 16
    • SRM: 3

    DIRECTIONS

    Mash rest steps:
    • 131°F (55°C) 10 minutes.
    • 145°F (63°C) 45 minutes.
    • 158°F (70°C) 20 minutes.
    • 168°F (76°C) 10 minutes mashout.
    Mash out at 168°F (76°C), with pre-boil wort volume of 6.5 gallons (25 L). Bring to a rolling boil for 90 minutes, add hops at specified intervals from end of boil. Chill wort to 58°F (14°C) and pitch yeast.
    Allow temp to rise to 68°F (20°C) after 4days. Lager for 2 months at 40°F (4°C).


    Extract Option

    Ingredients for 5 Gallons (18.93 L):
    • 6.5 lbs (3.0 kg) Liquid pilsen malt extract
    • 2.3 oz (65 g) Vienna malt
    • 2.3 oz (65 g) Caravienne® malt
    • 0.3 oz (9 g) Liberty whole hops, 4.5% a.a. (first wort hop)
    • 0.8 oz (23 g) German Hallertauer whole hops, 4.3% a.a. (30 min)
    • 0.3 oz (9 g) Crystal whole hops, 3.5% a.a. (5 min)
    • White Labs WLP029 German Ale/Kölsch or Wyeast 2565 German Kölsch
    • Reverse osmosis water treated with 1/4 tsp 10% phosphoric acid per 5 gallons
    Directions:
    Put 2 gallons (7.6 L) of water in the boil pot and heat to 160°F (71°C). While the water is heating, put the specialty grains (Caravienne malt and Vienna malt) into a grain bag and tie off the ends so the grains can't escape. Once the water has reached 150-170°F (65.6-76.7°C), immerse the grain bag in the water for 30 minutes. For more information on steeping speciality grains, visit the Intermediate section of Let's Brew on the AHA website.
    After 30 minutes, remove the grain bag and let it drip until it stops. Add malt extract to teh water and stir until totally dissolved. Bring to a rolling boil for 90 mintues, add hops at specified intervals from end of boil. Strain wort into sanitized fermentation vessel with 2-3 gallons (7.6-11.4 L) of pre-boiled and chilled water for a total volume of 5 gallons (18.93 L). Pitch yeast when wort temperature reaches 58°F (14°C), allowing to rise to 68°F (20°C) after 43 days to finish. Lager 2 months at 40°F (4°C).


    Friday, June 26, 2015

    An Introduction to Kegging Homebrew


    Say goodbye to bottling and hello to the wonderful world of kegging! We’re here to walk you through the basics of kegging your homebrew. It’s easier than you may think!

    Parts & Components


    Kegs: Homebrewers tend to use five-gallon stainless steel Cornelius (“Corny”) kegs, which come in two types differentiated by their fittings: ball-lock or pin-lock. While people have reasons to favor one over the other, choose one and stick with it so you don’t need to worry about different connectors and fittings.

    Connectors: Every keg has two connections, one for pushing in CO2 and the other for dispensing beer. Quick-disconnects are used for easy connection, which come in plastic or stainless steel. Pin lock gas and liquid connectors are noticeably different, but ball lock connectors can look nearly-identical, so consider buying different colors to quickly discern the gas connect from the beer connect.

    CO2 Tank: CO2 is the gas used to carbonate and push out the beer into your glass. Homebrewers tend to use five-pound tanks, which are easier to transport, but if you dispense a lot of beer and aren’t worried about mobility a 20-gallon tank can be filled for only a few dollars more. If you choose to buy a tank, be sure it is certified.

    Regulator: A full CO2 tank holds a pressure of 800 PSI, which is way more than necessary for carbonating and serving beer, so a regulator is used to provide safe levels of CO2. The regulator screws onto the CO2 tank and allows you to set the preferred PSI and monitor the pressure with a gauge.

    Faucet: A faucet or tap is needed to control the flow of beer when serving. The cheapest option is to get a picnic tap, or you can build some sort of kegerator or jockeybox with a tap-handle for more attractive serving.

    Tubing: Food-grade tubing is needed to connect the CO2 and faucet to the quick-disconnects.

    O-Rings: O-rings are rubber circles used to create a tight seal in areas like the hatch of the keg. If you bought used kegs, it is wise to replace all the O-rings, especially if they have stains or an aroma.

    Disassembly & Cleaning


    If purchasing brand new kegs and components, it may not be necessary to clean before using—but it never hurts! The best way to ensure everything is thoroughly clean is to completely disassemble the keg.

    Start by depressurizing the keg. If your keg has a pressure release valves, simply use this. If not, take a key or screwdriver and push down on the poppet of the gas-in fitting to allow gas to escape. Once this is done lift the bail of the hatch, lower it into the keg a few inches and remove. If the hatch doesn’t budge, that most likely means there is still pressure in the keg that needs to be released. Releasing all pressure is very important, and if ignored can cause injury.

    After removing the hatch, you will notice a large O-ring around its top side. Remove the O-ring. Next, unscrew the gas and liquid fittings on the top of the keg and remove the dip tubes beneath them. Each fitting and each tube will have a small O-ring (four in total not counting the hatch O-ring). If you notice the O-rings are dirty or have an aroma, replace them. If the dip tubes are plastic and there are stainless steel options for your type of keg, it is strongly encouraged upgrade.

    Once completely disassembled, the keg can be cleaned. First, rinse off any noticeable sediment inside the keg. Next, fill the keg with warm water and the appropriate amount of your preferred cleaner and throw in all the keg components. Allow the keg to soak for a few hours. If needed, use a carboy brush or something similar to get off any tedious stains or sediment.

    Empty the keg of the cleaning solution and replace all the fittings along with the O-rings, taking care that the fittings and tubes are replaced correctly. Again, fill the keg with warm water and cleaner, seal with the hatch, and set the keg upside down for a few hours to cleanse the top of the keg’s inside. Rinse thoroughly multiple times with hot water.

    Sanitation & Racking


    Once your beer is ready for serving and you have a clean keg, it’s time to prepare the keg and transfer the beer.

    First, sanitize the assembled keg thoroughly by filling it up with water and adding your preferred sanitizer. No-rinse sanitizer is recommended to avoid the need of an additional rinse step. Allow the keg to sit with the sanitizer solution for 10-20 minutes, then flip it upside down and let sit for 10-20 minutes to sanitize the top portion. Remove the hatch, empty the keg, and leave upside down to allow to drip-dry.

    Once the keg is sanitized, it is time to prepare for racking by purging the keg of oxygen, which could cause oxidation. Connect the CO2 tank to the gas-in fitting and set the regulator to 5 PSI. Turn on the CO2, allow gas to flow for five seconds or so, and then turn off the CO2. Because CO2 is heavier than oxygen, it will fall to the bottom of the keg, forming a protective layer against oxygen as the beer is racked

    After the initial purge, rack the beer into the keg and seal the hatch. Again, set the regulator to 5 PSI, turn on the CO2 to fill the keg’s head space, and turn off once you can no longer hear gas flowing. Open the pressure release valve to let the pressure out. Continue this process three or more times to purge remaining air from the headspace, and then shut off the CO2.

    Carbonation & Serving


    With the beer racked into the keg, it’s time to carbonate. Using the recipe or style guidelines, determine the ideal carbonation level, measured in volumes of CO2, for the style you are kegging. Generally speaking 2.0 volumes of CO2 will work if you are not sure where to start.

    With a target carbonation level in mind, next take the temperature of the beer in the keg. The colder the beer, the more easily CO2 is dissolved, so it will effect the desired level of pressure. Download a complimentary copy of “A Bottler’s Guide to Kegging” and use Table 1 to determine the ideal level of pressure (PSI) to achieve the target carbonation level at the beer’s current temperature.

    Now you’re ready to carbonate. Hook up the CO2 to the keg and set the regulator to the PSI determined using the table mentioned above. Turn on the CO2 tank and listen for the flow of gas. As the pressure reaches equilibrium the gas will begin to slow and eventually stop, and because the keg is upright there is only a small surface area of beer for the CO2 to dissolve.

    While you can fully carbonate a keg with this method over the course of a few days, a little agitation will go a long way and carbonate the beer faster. Some will roll the keg on the ground as it’s connected to the CO2 to encourage more gas to dissolve into solution, though this is not recommended if your regulator does not have a check valve. You can also simply shake and slosh the keg around upright.

    Now for the fun part, serving and enjoying! Attach the picnic faucet or tap handle to the beer-out connect. Then, simply depress the lever of the faucet and watch your beautifully carbonated beer flow. Proper dispensing will take into account variables like the length and diameter of the tubing, which is also discussed in “A Bottler’s Guide to Kegging.”

    Wednesday, June 24, 2015

    3 Advanced Homebrewing Tips


    1. Secondary Fermenter

    If you’re going to try your hand at a lager or “big” beer, you’ll likely have to use a secondary fermenter. Furthermore, hops, fruit, wood, etc., added during/after fermentation also usually require a secondary. Caution: Racking from primary to secondary introduces the risk of oxidation. You want to siphon to secondary with as little splashing as possible. The secondary should have as a little head space as possible to reduce contact with oxygen. A secondary can also aid in the clarification of beer.

    2. Kegging

    Bottling large quantities of homebrew can become quite a chore for some homebrewers, and kegging is the perfect solution. Instead of cleaning, filling and capping dozens of bottles and waiting an additional period of time for conditioning to complete, simply rack your beer once into a keg, add carbonation and be ready to drink your brew in a matter of days! Kegging also allows for more precise control of carbonation levels in comparrison to bottle conditioning.


    3. Temperature-Controlled Fermentation

    Fermentation management can make or break a homebrew. Even if your brew day went off without a hitch, you can turn a potentially great beer into something subpar by allowing fermentation temperatures to go unchecked. Advanced brewers often convert fridges or freezers into fermentation chambers. Pairing a converted fridge with a temperature controller allows one to simply program the desired temperature, and that’s it!

    Monday, June 22, 2015

    5 Beginner Homebrewing Tips

    Creating drinkable beer is as simple as making soup from a can or a pot of tea, but creating outstanding beer can require additional effort. The following five tips will help you easily improve extract brews without too much additional equipment, effort or expense. 

    1. Fresh Ingredients
    Homebrewing Beginner TipsThe importance of brewing with fresh ingredients cannot be overstated. The quality of homebrewed beer can only be as good as the quality of the ingredients going into the brew kettle.
    Because extract brewing consists of only malt extract (as far as fermentables), it is particularly important to find quality malt extract that’s not past its prime. Avoid the bag of brown hop pellets, a dusty kit or over-the-hill yeast. Try to find the freshest ingredients available.
    2. Chill Wort
    It is common practice to instruct new extract brewers to pour their hot wort into a fermenter filled with cold water to cool it down to yeast pitching temperatures. You will no doubt still have drinkable beer when fermentation is complete, but you run the risk of oxidation, which can manifest itself as unfavorable off-flavors in the final product.
    Instead, use an ice-bath to cool the hot wort down to about 70°F (21.1°C) before adding it to the cool water in the fermenter. This will reduce the chances of oxidation, and ultimately produce cleaner tasting beer.
    When chilling with an ice batch, be careful not to let any water (or anything else for that matter) into the boil kettle as it can cause contamination. When the steam stops coming off the kettle, you can put the cover on, which will help prevent anything from getting into the wort that shouldn’t.
    3. Tried-and-True Recipes
    After your first batch of beer, it’s tempting to start concocting your own recipes. There is nothing wrong with creating your own recipe—in fact it can be one of the most rewarding processes of homebrewing—but it can be very beneficial to brew a few tried-and-true recipes before branching out on your own. Using recipes from a book, an issue of Zymurgy magazine or a kit will ensure a recipe has potential to turn out drinkable. Tested recipes also allow the brewer to focus on mastering the processes of brewing beer at home.
    4. Late Extract Addition
    Some extract brewers advocate adding half the called for malt extract during the last ten minutes of the boil. This technique is said to decrease the darkening of the malt extract, which can darken beer and affect the overall taste. This is particularly beneficial when brewing light-colored styles, like pale ales or pilsners. Hop utilization (the bitterness derived from the hops) may be slightly higher if altering a recipe that calls for all the extract to be added at the beginning of the boil. If conducting a partial mash, all the extract can be added at the end to achieve a similar outcome.
    5. No-Rinse Sanitizer
    This may seem like a silly technique for creating better beer, but do not underestimate the importance of sanitizing and the ease of a no-rinse sanitizer. Getting in the habit of sanitizing everything that comes into the contact with the wort/beer after the boil is crucial in ensuring your homebrews don’t become contaminated. Using something like Star San allows you to soak everything that needs to be sanitized and then use it without having to thoroughly rinse, unlike bleach. No-rinse sanitizer + spray bottle = effortless sanitizing.

    Sunday, June 21, 2015

    Happy Father's Day!


    Relax this Father's Day and enjoy a home brew.  Brew Boss Electric Brewing Systems / www.brew-boss.com

    Saturday, June 20, 2015

    Hopping Your Homebrew


    It’s extremely common for most homebrewers to apply the wrong hopping technique to their style of beer. Knowing which technique to use for a particular style or desired flavor profile is part science, part art form, and part reading this blog post, “Hopping Your Homebrew.”

    Mash Hopping


    Mash hopping is simply the addition of hops directly to the mash tun itself. The hops is often placed on top of the grain bed and left to sit as the mash is sparged. Mash hopping is reported to provide a better overall balance and character to the beer, though it adds almost no bitterness.

    Mash hopping is seldom used today because it requires a fairly large amount of hops and adds very little in direct flavor.

    First Wort Hops


    First wort hops are hops added to the boil pot at the very start of the lautering process. Unlike mash hops, first wort hops remain in the boiler during the boil and therefore do contribute bitterness to the wort.

    Bittering Hops


    Bittering hops or boil hops are just that, bitter. Hops added for the bulk of the boil to add bitterness to the beer. Boiling hops releases the alpha acids that provide bitterness in your beer. The longer you boil your hops, the more bitterness you will add.

    Late Hop Additions


    Hops added in the last 5-15 minutes of the boil are called late hop additions. These hops are usually not added for bittering, though they do contribute a small amount of bitterness to the beer. The main purpose for late hop additions is to add aroma and aromatic hop oils to your beer.

    In addition to bittering compounds, hop cones from “aromatic” hop varieties contain volatile hop oils that provide the strong flowery aromatic flavor and scent desirable in many hoppy beer styles. Unfortunately most of these compounds boil off within 10-20 minutes of adding the hops.

    Late hop additions should always use “aromatic” hop varieties, and should be done within the last 10 minutes of the boil to preserve as many aromatic oils as possible.

    The Hop Back


    A hop back is a device containing hops used inline between the boiler and chiller to infuse fragile hop oils and aroma directly into the hot wort before it is cooled and transferred to the fermenter. While a hop back does not add any significant bitterness to the beer, it can add great aroma to your finished beer.

    Dry Hopping


    Dry hopping is the addition of hops after the beer has fermented. Hops are typically added in the secondary fermenter or keg and left for a period of several days to several weeks. Dry hopping is used to add a hoppy aroma to the beer, as no bitterness is added with this method.


    Thursday, June 18, 2015

    Homebrew to Style: Saison

    saison

    Homebrew to Style: Saison

    Saison is French for “season”, and generally Saisons are viewed as a summer / spring style. I do not agree with this and prefer the perhaps less accurate translation “drink all the time” for the term saison. I brew a saison every month, at least I have for the past several years.  What is a saison then?There has been a lot of dilution of the word “saison” in the past 10 years or so. As far as I can tell, people call a beer a “saison” if it is fermented with saison yeast. Generally though, saisons are medium gravity, light, effervescent beers that are mildly hopped. The purpose of a saison is to accent the characteristics of the yeast strain and whatever special ingredient you are throwing in there. Saison yeasts are more aromatic than say an American or English strain, so a saisonshould showcase those flavors.

    Standard Saison Guidelines:

    • Bitterness: 15 – 32 IBU
    • Traditional Hops (Saaz, East Kent Goldings (Belgian), Styrian Golding, Hallertauer)
    • Experimental Hops *mostly flavor/aroma* (El Dorado, Citra, Amarillo, Simcoe, Sorachi Ace, Mosaic)
    • Dry Hopping: Optional
    • SRM: 3 – 18 SRM
    • Saccharification Temp Range: 143 to 147
    • Additives: Spice blends may vary (if adding spices, bring down IBU to lower levels) (suggested: add last 10 min of boil)
    • Common spices (Coriander, Cumin, Bitter/Sweet Orange, Ginger, Grains of Paradise, Star Anise)
    • Starting Gravity: 1.042 – 1.064
    • Apparent Final Gravity: 1.0 P – 1.2 P (1.004 – 1.005)
    • Co2 Volume: Carbonation level of 2.5 to 3 volumes

    All Grain Recipe Saison Recipe:


    Below is a simple recipe and tips for brewing and fermenting a saison, this is base recipe to give you a general idea of the style.

    Malt Bill:
    • 8.5 lbs of pale malt (pilsner or 2-row)
    • 1 lb wheat malt
    • 0.5 lbs flaked oats
    • Hop Additions
    • Bitter: 1 ounce of Czech Saaz at 60 minutes
    • Flavor: .6 ounces of either (Saaz, Styrian Golding, Hallertauer) @ 15 minutes
    • Aroma: 1 oz blend of (20% Saaz, 50% East Kent Goldings, 30% Styrian Golding)
    • Apparent Final Gravity: 1.0 P – 1.2 P (1.004 – 1.005)
    • Saison Brewing Procedure

    Wort should be boiled for a full hour (or even 90 minutes if you are using pilsner malt as your base malt). Saisons can be naturally hazy, this one will be from the flaked oats but you still need to chill rapidly after boiling.

    Fermentation conditions: 
    Saisons are a great style for homebrewers because the yeasts can tolerate a wide range of temperatures. After you’ve chilled your wort to 65 F, pitch an appropriate amount of yeast. I typically use the Dupont saison yeast which is pretty aromatic and can ferment up to 90 F. The fermentation of a 1.050 to 1.055 wort should be completed by the Dupont strain (WLP565) in 7-10 days. Some people report that this yeast “stalls out”, doesn’t finish the fermentation. This isn’t my experience but if you are worried about that I’ve also used WLP566, it is similar to the Dupont strain but doesn’t reportedly have this problem.Overall notes and impressions: Saisons are a great style to accent a lot of different flavors. They are light and refreshing beers. This is just a starting out point but the nice strong yeast character and simplicity of the grain and malt bill provide a blank canvas to do all sorts of interesting things. I often throw in a late hop addition at 10 minutes or flame out to capture some great hop aromas. A few ounces of citra, amarillo, simcoe or mosaic at the end of the boil will really push this beer into something really special. Add spices at the end to experiment with different flavor profiles as well. Experimentation is the nature of homebrew and this is a great “base beer” to use. Need equipment to homebrew?  Try www.brew-boss.com.

    Tuesday, June 16, 2015

    Craft Beer and Food Pairings

    With the craft beer craze, there are many, many, many flavors of beer. So where does one start? Here is a simple guide to 10 popular beer styles and recommended food pairings to get you going. Of course, the possibilities are endless, and won’t it be fun discovering them?


    14-PCRT-Craft-Beer-Infographic

    http://www.buzzbinpadillacrt.com/eat-drink-and-be-merry-on-the-craft-beer-train-food-pairing-infographic/

    Sunday, June 14, 2015

    The Belgian Beer Colour Spectrum by Belgique


    The Belgian Beer Colour Spectrum by Belgique - Where do you lie? From white or blonde, through amber and gueze, to Trappist dark brown - there's a beer for everyone


    Friday, June 12, 2015

    EVERYTHING YOU'VE EVER WANTED TO KNOW ABOUT BARREL-AGED BEER


    It used to be that the only age bar owners were concerned with was 21, but nowadays every serious craft beer bar has at least one brew that's spent time in a wooden barrel before it's old enough to drink.
    To better understand how barrel-aging works, we consulted a pair of experts: the trend-setting Scottish brewers Innis & Gunn, who've been sneaking oak flavors into beers since 2003, and Austin, TX's young-gun experimentalists Jester King, who're known for using wood to make their fermentation go wild.
    Why barrel age?
    Innis & Gunn ages primarily to give their beer the flavor characteristics of wood, whereas Jester King uses the wood to affect the fermentation process. Hence, I&G chars their barrels heavily to allow the flavors to easily seep into the beer, while Jester King wants barrels to be as neutral as possible.

    What flavors result from aging?
    Oak's most prominent flavor is vanilla, but the barrel's previous contents have a big effect on the sloppy-second flavor characteristics. Bourbon barrels give off a toffee finish, gin has a more complex suite of botanicals, mezcal imparts more smoke and spice, and cedar spirals lend a piney aroma


    What type of wood do they use?
    The most typical barrel used for aging is American oak, which imparts flavor much faster than its French oak counterpart. Innis & Gunn has experimented with everything from Irish whiskey-infused oak (for the Irish Whiskey Cask Stout), to Canadian Black Cherrywood.

    Jester King primarily uses oak from a range of sources (mezcal barrels for Encendía farmhouse ale, Old Tom gin barrels for Viking Metal), but have also experimented with sherry barrels and cedar spirals. Other breweries, like Russian River, experiment with wine barrels ranging from Chardonnay to Pinot Noir.


    How long must the beer age?
    "You see flavor changes in a matter of hours," says Dougal Sharp, head brewer at Innis & Gunn. "But there are lots of variables that have an impact on the speed in which this chemical reaction takes place." Innis & Gunn uses charred casks to bring out vanilla and piney notes and for their Toasted Oak IPA they've built a special oak chip percolator in which the beer ages for 41 days. Jester King, on the other hand, usually leaves its beers in wood for several months, not for the flavor characteristics, but primarily for each vessel's unique fermentation properties. Every barrel is a funky ecosystem of bacteria fueled by an extra dose of oxygen let in by the porous wood, creating unpredictably delicious results.

    What the hell is going on in that photo?
    One of Jester King's secret weapons is spontaneous fermentation. They let the wort (the sugary liquid remains of the mash) sit out overnight, and by the morning, the yeast and bacteria in the air have made sweet love to the wort, priming it to be moved to a barrel for fermentation and maturation. Once it's in the barrel, it oozes a ton of krausen, which is basically a nascent form of the same foam you see at the top of a pint.


    What types of beer respond best to aging?
    Lighter-hopped beers, porters, and stouts respond best to aging. Generally, hops and wood don't get along well -- the citrus and vanilla flavors clash worse than plaid and polka dots, so it's a real trick that I&G have managed a Toasted Oak IPA that doesn't taste like a rotten Creamsicle. Jester King, on the other hand, barrels mostly sours, farmhouse ales, and wild yeast: beers whose flavors are largely derived from the unique fermentation variables.

    Is the aging process complete once it's bottled/kegged?
    Not necessarily. When bottled, the wood-aged effects of I&G's beers subside for about a month before reasserting themselves. Since Jester King's beers aren't filtered or pasteurized, they're still alive in the bottle and will slowly evolve over time. And of course the whole process isn't truly complete until the beer is in your stomach.

    Wednesday, June 10, 2015

    How the Beer Garden Came to Be


    The warm-weather institution has its roots in 16th-century Germany.


    Bad news: Starting tomorrow, you won’t be able to brew beer for about five months.

    That’s the deflating message that 16th-century Germans subject to the BavarianBrauordnung (beer regulations) would have received. Fortunately, great innovations are borne of extreme limitations. From the Brauordnung sprung one of the world’s most hallowed warm-weather institutions: the beer garden.

    The Brauordnung are often traced back to the year 1539, but Franz Hofer, who teaches German history at Cornell University and runs a beer blog, explained by email that the “decree limiting beer-brewing to the time between the feast of St. Michael [September 29] and that of St. George [April 23] wasn’t promulgated until 1553.” The decree came from Duke Albrecht V and applied only to Bavaria, the southeastern region that contains modern-day Munich.

    There were two rationales behind this regulation. The first was that major fires were common throughout Europe at the time and Bavaria’s traditional wooden “fachwerk” architecture burned easily. Authorities feared that the coal fires used to heat breweries’ kettles might cause summer conflagrations.

    The second reason, Hofer told me, was that Bavarians had discovered that fermenting lagers at cooler temperatures—between 39 and 55 degrees Fahrenheit—yielded a purer beer than ales brewed in warmer conditions. The Brauordnung, in fact, marked the point at which Germans started emphasizing lagers over ales.


    The government orders also encouraged breweries to expand pre-existing beer cellars and build new ones next to their factories along the Isar River. These cellars, which were typically about 40 feet deep, were used to store beer brewed during the winter so that people would have something to drink between the dry months of May and September. Down in these cellars, beer barrels were covered in ice; to further ensure cool temperatures, breweries planted broad-leafed chestnut trees above the cellars for shade. Gradually, breweries began to scatter gravel and place tables underneath the trees. These areas, in turn, became popular drinking spots.


    By the early 19th century, these watering holes had become so trendy that they were poaching patronage away from innkeepers and tavern owners. In response, innkeepers and tavern owners petitioned the authorities to revoke the breweries’ right to sell beer directly to the public. On January 4, 1812, Maximilian I, Bavaria’s first king, signed a compromise decree allowing brewers to continue selling beer but prohibited them from selling any food beyond bread. Thus was the biergarten, or beer garden, born.


    Since Maximilian’s decree didn’t preclude Bavarians from bringing their own food to the breweries, the gardens became popular spaces to picnic. Bavarian beer gardens were permitted to sell food to their patrons again in 1897, but by then showing up with food from home had become a tradition. According to Hofer, the Bayerische Biergartenverordnung, a law passed in 1999 governing the sociocultural character of beer gardens, “Permits patrons to bring their own food into beer gardens, something that sets current Bavarian beer gardens apart from their counterparts in other German regions and Germanic countries.”


    A beer garden in Vienna in 1902 (Wikimedia Commons)

    Today, many of the most popular beer gardens in Munich date to the early 18th century. Perhaps the most famous, Augustiner-Keller, opened in 1807, even before the 1812 decree, according to spokesperson Christian Vogler. Some of the tables there have been passed down through generations of customers, as have the stories associated with them. Vogler told me the legendary tale of one table belonging to the German writer Sigi Sommer, who would fill a leftover pickle bucket with charcoal, light it on fire, and place it under the table so that he could keep warm while drinking in the garden during the winter. One day, he had drinks with a priest, Prälat Betzwieser, who had a wooden leg. A few beers in, they realized that Betzwieser’s leg had caught fire beneath the table. “When he left he could not walk straight,” Vogler recalled, “and you cannot blame the beer for it.”

    It was a scene that Duke Albrecht V, in issuing some seemingly banal regulations back in the 16th century, probably never would have predicted.

    Monday, June 8, 2015

    Parti-Gyle Brewing – Two Beers from One Mash

    by Brad Smith

    Parti-Gyle brewing is a method for making more than one batch of beer from a single all grain mash. It offers tremendous flexibility since you can brew two beers of different gravities, and also add different hops and yeast to create distinct beers from one brewing session.

    History


    Parti-Gyle brewing is not a new method. The method goes back hundreds of years, and many modern sub-styles are examples of light and heavy versions made from a single mash. Examples include the various weights of English and Scotch Ale, various grades of Bock, and even variations of Trappist ales. In the 1700’s and 1800’s it was very common to create a strong beer from the first runnings of the mash and a lighter common beer from the second runnings of a mash.

    The Parti-Gyle Method

    The standard method for Parti-Gyle brewing is to make two beers from a single mash. Typically a fairly high gravity beer is made from the “first runnings” of the mash, and the second runnings are boiled separately to make a lighter beer. Often different hop additions, boil additions and yeast are used to create distinct styles from the two runnings depending on the brewer’s preference.

    Estimating the Gravity of Each Beer

    When designing a parti-gyle beer, one is usually concerned with gravity and color of the two beers being created. This is important for determining how much grain is required for each beer and also how much liquid to run through each to achieve a target boil gravity. The rule of thumb for an average mash is that 2/3 of the gravity potential is in the first 1/2 of the runnings. This is due to the fact that most of the high gravity wort comes in the first third of the lauter.

    One common parti-gyle split is 1/3 volume for the first runnings and 2/3 volume for the second which results in a first batch of beer that has twice the points that the second batch will have. So for example if the total mash had an estimated original gravity of 1.060, we would expect the first 1/3 to have a gravity of 1.090 and the second to have a gravity of half the points or 1.045.

    For a 50-50 split by volume, with half of the wort in each batch we get a roughly 58% of the gravity points in the first batch. So a 1.060 overall batch OG would translate to a 1.070 first runnings and 1.050 second runnings, with both of equal size.

    Estimating OG for Split Batches

    To perform these calculations yourself, start with the OG estimate of the mash runnings using conventional methods. This can be done using the method described here, except you use the mash efficiency and total lauter volume instead of the overall brewhouse efficiency and overall batch volume to get your mash OG estimate.

    Once you have the OG estimate for the overall batch, get the number of points by subtracting one and multiplying by 1000, so 1.060 becomes 60 points. Next we use the following to calculate the final number of points in this fraction:
    Number_points_ runnings = (Tot_points * Points_fraction / fractional_volume)
    So if we look at a 1.060 total gravity estimate with a 1/3-2/3 volume split which has half the points in each runnings we get 60 points, 0.5 as the points_fraction and 1/3 or 0.333 as the fractional volume:
    Number_points_runnings = (60 * 0.50 / 0.333) = 90 points or a gravity of 1.090
    The second runnings of 2/3 is:
    Number_points_runnings2 = (60*0.50 / 0.666) = 45 points or 1.045 gravity
    Using the same equation, you can come up with an accurate estimate for the gravity of each of the runnings based on the original gravity of the overall batch.

    Color Considerations

    It should be no surprise that the color of the two batches in a parti-gyle will be darker for the first runnings and lighter for the second in most cases. Calculating the actual color for a regular beer is described here, and is based on the Malt Color Units (MCUs) which are simply the sum of the pounds of malt times their color for all grains in a batch.

    Looking at the examples above – a 50-50 volume split has about 2/3 of the gravity in the first runnings and 1/3 in the second runnings. The malt color units follow, so about 2/3 of the MCUs will be in the first running and 1/3 in the second. So if you calculate the overall Malt Color Units for the total batch (sum of the pounds of malt times color of each malt), you can multiply it by 2/3 or 1/3 for each running and then apply the Morey equation to get the color estimate for each of the runnings.

    Here the OG_FRACTION refers to the 2/3-1/3 OG split so you would apply 2/3 to the first runnings and 1/3 to the second:
    SRM_color = 1.4922 * ((MCU * OG_FRACTION) ** 0.6859)
    Since the Morey equation is not linear, you will see a larger color difference for a parti-gyle beer when working with lighter beers. So for a very light beer and a 50-50 volume split, the first runnings will be almost twice as dark as the second runnings. However as the beer gets darker the difference will be smaller – to the point where the second runnings of a Stout beer might have no perceivable difference in color from the first.

    After the Mash

    Once you have mashed your parti-gyle beer and taken the two runnings, the rest of the brewing process is the same as with any other beer. Obviously the two runnings are boiled separately so you either need two boil pots and heat sources or a sterile way to store one of the runnings for a few hours while you boil the other.

    One of the great features of part-gyle brewing is the ability to change the character of the beer in the boil and fermentation. By adding different hop additions, yeast, spices or steeping additional grains prior to the boil (much like an extract brew) you can dramatically change the character of the two beers produced. With a little imagination you really can create two distinctly different beer styles from a single brewing session.

    For design purposes it is usually best to treat the two runnings as separate beers at this point, and the usual rules for estimating bitterness, final gravity and fermentation apply. The design possibilities are nearly endless. You could create a strong ale and bitter, a wheat bock and weizen, a brown and pale and many other combinations from a single mash.

    http://beersmith.com/blog/2011/10/07/parti-gyle-brewing-two-beers-from-one-mash/

    Sunday, June 7, 2015

    Counter-Flow Wort Chiller


    Exchillerator Max Counter Flow Wort Chilller Kit

    We don't believe there is a more efficient chiller made.  Simply pump your wort directly from the brew kettle through this chiller, and adjust the output valve to attain the proper pitching temperature.  Literally chills an entire batch in the time it takes to pump it out!

    • Easy to use
    • Fast Clean-Up
    • Inner tubing uses Co-Helical Design for Maximum chilling power
    • Uses PEX material to provide low energy loss to atmosphere
    • Removable temp gauge
    • 1/2" SS Tee, 1/2" SS Close Nipple, 1/2" SS ball valve, comes standard


    Buy Now:
    http://www.brew-boss.com/product-p/chiller-cf.htm


    www.brew-boss.com  Your Beer, Your Way!

    Saturday, June 6, 2015

    New to Home Brewing

        
    Boilingwortenhanced


    Brewing is the process of making beer — a fermented, alcoholic beverage made from grains. The most commonly used grain for brewing is barley, but there are others (including wheat, rye, oats and sorghum). Brewing is similar in some ways to making wine, which is a fermented alcoholic beverage made from fruits (most often grapes) or mead, which is fermented honey. However, the brewing process has its own unique elements as well.

    You can think of beer as a beverage made from (essentially) four ingredients using four main steps. The ingredients in beer are malt, hops, yeast and water and the four steps are malting, mashing, boiling and fermenting.

    The Four Ingredients

    Malt:
    Malt is a grain that has been prepared for brewing (by a process called, not surprisingly, malting). Malted barley is the most common base grain used in beer, but malted wheat is also prevalent. In some beers, unmalted ingredients — including corn and rice — are used. Malt provides the sugar that the yeast consume during the brewing process and therefore determines the strength of the beer. More malt equals stronger beer. Most homebrewers, or professional brewers for that matter, do not malt their own grains. They simply purchase malt produced by maltsters or they use malt extract, a more highly processed form of malt.

    Hops: Hops provide the bitterness to balance the sweetness in beer. Compared to malt, hops are added in small quantities to beer, even in the most bitter IPAs. Most homebrewers use pelletized hops in their brewing as this is a convenient form to store and use.

    Yeast: Yeast converts the unfermented beer (called wort) that brewers make on brewing day into beer. They consume sugars from the malt and convert them to alcohol and carbon dioxide. Alcohol is, of course, what gives beer its "kick" and carbon dioxide is what gives beer its fizz.
    Water: Most beers are over 90% water by volume. And, quite a bit of water is used in the brewing process that does not end up in beer. A basic (although not infallible) rule of thumb in homebrewing is, if your water tastes good, it's suitable for brewing. If your tap water doesn't taste good, try using bottled spring water instead.

    The Four Steps

    Malting: As mentioned before, malting is usually done by maltsters. However, malting begins the process of converting raw materials into beer and we'd be remiss if we didn't mention it. In malting, naturally-occurring enzymes in the grains are activated so they can be used for the next step, malting. Then, the grains are dried by heating (called kilning). Kilning dries the grains, which allows them to be stored for long periods of time, and also develops malt flavors and aromas that get extracted in the brewing process.

    Mashing: In mashing, malted grains are soaked in hot water. In the process, the starch molecules in the grains are dissolved in the hot liquid and the enzymes (activated by the maltster) chop the large starch molecules into smaller molecules of sugar. The main sugar produced in the process of mashing is maltose. Malt sugars from the mash are what fuel the yeast cells during fermentation.
    For homebrewers who brew with extract, this process has been done for them. Malt extract is made from malted grains that have been mashed. The resulting liquid is then condensed into syrup or dried into a powder.

    Boiling (and Cooling): The solution of water, malt sugars and other substances from the malt is called wort (or unfermented beer). Before wort can be fermented, it must be boiled. Boiling sanitizes the wort and helps to make the finished beer a more stable product. During the boil, the hops are added to the wort and bitter compounds are extracted from them. After the boiling, the wort is cooled so that yeast can be added.

    Fermenting (and Conditioning): Once the wort is cooled, yeast is added to it. After a short time in which the yeast acclimate to the wort, fermentation begins. For homebrewers making average-strength ales, fermentation will last from a few days to a week. For brewers making stronger beers or lagers, fermentation can last longer, up to months. After the beer has fully fermented (and sometimes conditioned for awhile), it is ready to be bottled (or kegged) and served.

    Homebrewing Equipment

    In order to make homebrew, you will need a small amount of specialized equipment. Most homebrew shops sell starter kits, consisting of a bucket fermenter and some other basic equipment, starting at around $60 (US). The more complex the brewing method the more equipment you will tend to need. You will also need a large pot to boil your wort in. A 5-gallon (19 L) stainless steel pot is a great one to start brewing in and these can be found starting at around $40 (US) in many homebrew shops.

    Items You Will Need
    You will need a few items that you might not already have in your kitchen. You can find these items at your local homebrew shop or in a catalog or www.Brew-Boss.com :
    • Stainless steel brewkettle. Anything less than four gallons will be frustrating due to boilovers or scorching. You will want a top for it if possible. This is a good thrift-store item.
    • Five-gallon (19 L) glass or plastic carboy and five-gallon/19 L (or larger) food-grade plastic bucket, or two plastic buckets. You will use these as a fermenter and bottling vessel. If you choose a carboy, you'll need a #7 drilled rubber stopper; if you go for two buckets, you'll need a lid for one of them with a hole drilled for the airlock.
    • An airlock. This allows carbon dioxide produced during fermentation to escape from your fermenter.
    • A racking cane (rigid plastic) and 6 feet of vinyl siphon hose that fits over the end of the cane.
    • Two cases of clean, non-twist-top beer bottles.
    • A bottle capper and a package of crown caps.
    • Malted grains, dried malt extract or liquid malt extract (depending on your brewing method and recipe).
    • Hops Choose pellets or "leaf" (whole flower) hops, but pick those that are as green as possible. Yellowed hops might be old or losing some flavor.
    • A package of ale yeast. Dry yeast, rather than a liquid culture, is fine for a first batch, or you can use liquid yeast if you prefer.
    • 2/3 cup of dextrose, also known as corn sugar, to use at bottling time.
    • Homebrew-friendly cleaning and sanitizing chemicals.
    Around your kitchen you might find a few other items that will make your mission more fun or easier: a measuring cup, a large spoon for stirring, a large funnel (if fermenting in a carboy), and a large strainer (if using leaf hops).

    Cleaning and sanitizing
    There are many kinds of brewers, from extract brewers making their beer in 5-gallon (19-L) buckets to commercial brewers making their beer in multi-story fermenters. The skills these brewers need and the procedures they use vary substantially. However, there are two skills that every brewer needs, no matter what size brewery they brew in: cleaning and sanitizing.

    Cleaning and sanitizing your brewing equipment is the first step listed in the procedure on brew day. Your brewing equipment needs to be as clean and as free from biological growth as possible. The only organism you want growing in your fermenter is yeast. Growth of other organisms in wort can spoil the resulting beer. Contaminated beer may turn out sour or develop other off flavors. It can smell like baby diapers. In addition, the beer may gush when opened or your bottles may explode.

    To clean your equipment, you'll need a special solution that's made for brewing equipment. TSP (tri-sodium phosphate) and PBW (Powder Brewery Wash) are two good cleaners to use in your homebrewery. Make up the solution, grab a scrub brush and clean all the surfaces you can reach. Run your cleaning solution through your racking cane and fermentation lock. After cleaning, rinse the equipment. When you're done, visually inspect your equipment, especially those surfaces that will contact the wort. If you see any dirt or residue, repeat your cleaning procedures. Don't rely on your sanitizer to take care of any surfaces that are not spotless — it doesn't work that way. You'll need your equipment to be as clean as possible for the sanitizer to be effective.

    To sanitize, soak any equipment that will touch wort in sanitizing solution. There are a few homebrew-friendly sanitizers to choose from, including iodophor. Make a solution with iodophor by combining 1 ounce in 5 gallons of water. Be sure to run sanitizing solution through your racking cane and fermentation lock and let it sit there for the same amount of time your bucket is soaking. When you're done, rinse the equipment with clean water.

    The final step is prevention. Don't take this the wrong way, but you may be the biggest threat to your beer! Every day, you pick up bacteria and yeasts from every surface you touch. You transfer these microorganisms to every surface you touch subsequently. On brew day, you handle malt extract and grains. You may also touch brewing equipment that wasn't completely cleaned after your last brewing session. All these things may be harboring strains of bacteria or yeasts that can live in your wort.
    So don't touch any surface that will touch wort (the inside of buckets, submerged parts of racking canes). In addition, wash your hands often while brewing. When you're done, clean your brewing equipment thoroughly and wipe down all surfaces that may have gotten spattered, like your kitchen counters and stovetop.

    A Word About Troubleshooting

    If your first batch is not the best beer you have ever had, there are generally only two possible reasons:

    Contamination. If a microorganism other than your brewer's yeast got in your batch you will likely know it. Vinegar flavor, mud puddle, locker room/dirty socks, or compost pile odors are classic signs of contamination. (These contaminators won't kill you, but they might make you sad or discouraged if you have to dump out all that hard work.) Analyze your routine. If you can figure out the source of contamination, fix it and try again. Sanitization does get easier as you brew more.

    Not what you expected. There are many nuances you can add as you gain brewing experience, among them: specialty grains, boiling of a larger wort volume (and add less water to the fermenter), more complex hopping, efficient wort cooling, liquid yeast cultures, dry hopping, and all-grain brewing, wherein you start from grain instead of extract. A simple improvement is to add a "secondary fermentation" step: When fermentation has finished, transfer the beer to another carboy for two weeks or so. This can give you clearer, cleaner beer.

    These additional procedures offer more options, more ways to tweak your product. Good brewing notes and more attention to details will allow you to customize your flavors, too.

    Very faint sherry-like or cardboardy flavors should not discourage you, because they are fixable; as you get more comfortable brewing, handle hot wort and finished beer very gently. Aeration (splashing, spraying, bubbling) of hot wort or of finished beer can lead to oxidation and produce those flavors. The only time you should aerate actively is when your freshly brewed wort has cooled, so siphon gently, stir primings carefully, and so forth. If you have not reached perfection in your routine, you'll still have the ability to make great beer. Don't worry if your siphon hose bubbles when you're filling a bottle, but think about ways to reduce the bubbles next time.

    http://byo.com/newbrew/your-first-home-brew

    Thursday, June 4, 2015

    Carbonation Priming Chart

    The amount of carbonation in bottle-conditioned homebrew is dependent on two things — the residual level of carbon dioxide after fermentation and the amount of carbonation obtained from the priming sugar.

    To get the level of carbonation you desire in your homebrew, choose a level of carbonation (from Section A) and subtract the amount of residual carbonation in your beer after fermentation (from Section B). This is the amount of carbonation you to add via priming sugar. The amount of carbonation produced by three different priming agents (anhydrous glucose, glucose monohydrate and sucrose) in 5 gallons (19 L) of beer is given in Section C.

    For example, let's say you fermented an American pale ale at 68 °F (20 °C) and plan to carbonate it with corn sugar (glucose monohydrate). From Section A below, you decide that you want your carbonation level to be 2.4 volumes of CO2. From Section B, you see that you should have 0.85 volumes of CO2 in your beer after fermentation at 68 °F (20 °C). Subtracting 0.85 from 2.4 gives you 1.55 volumes of CO2, the amount of carbonation required from the priming sugar. From Section C, you see that adding 4.5 oz. (128 g) yields 1.53 volumes of CO2, which is pretty close.

    Section A: Levels of Carbonation in Various Beer Styles


    Tuesday, June 2, 2015

    Brew-Boss Homebrew System Brew Session Highlights


    Brew-Boss Brewing Session Highlights. Takes you through the entire process of brewing with the Brew-Boss electric homebrew system. The COFI mash infusion system was used for this batch.


    www.brew-boss.com

    Brew Your Beer, Your Way!

    Making Homebrew Jelly

    Author:  Glenn BurnSilver & Betsy Parks
     
    jelly jam 2Beer for breakfast? What was once a fun jest, now becomes reality — and we're not talking Funky Buddah's Maple Bacon Coffee Porter either — as beer jellies fill a growing market niche.
    "There are all kinds of ways to use beer jelly besides spreading it on toast in the morning," says Walter Warner, Co-founder (with wife Nancy) of Vermont-based Potlicker Kitchen, maker of a growing lineup of jellies made from beer. "That is probably one of the things (jelly users) will be the least likely to do."
    With a range of flavors, including Oatmeal Stout, Apricot Ale and Blood Orange IPA, the options for using these beer-based condiments are endless — from barbecue glazes to gooey sauces to pancake toppings. Yet despite the obvious yumminess and practicality of these jellies, the idea to create jelly from beer came to Walter and Nancy almost by accident — or maybe more out of desperation. In 2010 these former archeologists bought a old one-room schoolhouse in Bethel, Vermont with a giant blackberry patch out back.
    Nancy, who was already interested in food preservation through her archeological studies, took up canning as a "hobby" (read: obsession), starting with locally purchased strawberries, and later the blackberries, before moving on to other fruits seasonally available at local farmers markets. Once winter set in, the fruit ran out and Nancy began looking for other foods — like coffee or wine — to turn into jelly.
    "We never run out of wine and we never run out of beer," Warner explains. "Nancy had a wine jelly recipe, but she thought, 'If I can make jelly out of wine, I can make jelly out of beer.'"
    Nancy worked though a variety of formulas, all adapted from available wine jelly recipes. There was a lengthy period of trial and error with "a lot of long nights and wasted beer," Warner says, before the perfect recipe came into being.
    "She came up with something that actually worked," he says, not sounding too surprised by his wife's determination. "It took a couple weeks to get
    it right."
    By late 2012 Nancy was, with Walter's encouragement, setting up at Saturday farmers markets and based on the initial interest and strong sales — plus the fact the pair were "working around the clock" to keep up with growing demand — she knew beer jelly was a hot product.
    "That's how it started," Warner adds simply.

    Truly Homebrewed

    Nancy and Walter's earliest jelly creations were made with homebrew, and more specifically, the leftover beer found at the bottom of the carboy during bottling. Nancy used whatever a homebrewer-friend could provide, starting with vanilla porter and a brown ale.
    As Potlicker's beer jelly began gaining popularity, their homebrewing friend couldn't keep up with their demand and the pair had little choice but to make the switch to making jelly with commercially produced craft beer, including Wolaver's Oatmeal Stout, Otter Creek Black IPA and Long Trail Ale, as well as other regional Vermont brews.

    "We made it in the kitchen of the school house and were working almost around the clock at the end of 2012," Warner recalls. "It moved along from homebrew to commercially available beers because we could always get those. That way we weren't restricted to waiting for homebrew."
    This created some new challenges (which we'll discuss later in the story), but it didn't take long to discover the simple truth that using better beer makes better beer jelly. IPAs, pale ales — beers with strong floral hop characteristics, as well as beers with maltier profiles work best. Flavorful brews such as Magic Hat #9 and Northshire Sicilian Blood Orange IPA worked a lot better for Potlicker than other average commercial offerings.

    "It's beer, it's sugar and it's pectin, (so) your run of the mill beer doesn't make good jelly. Your Budweisers and Coronas, and even Guinness, are not going to make a tasty jelly. That's just beer-flavored jelly," Warner says. "The (beers with) more flavor really come through and make better jelly."

    Some of the beers used at Potlicker Kitchen, including seasonal offerings, include: Wolaver's Oatmeal Stout, Otter Creek Black IPA, Long Trail Ale, Harpoon's IPA, UFO White, Pumpkin Ale and Chocolate Stout, The Alchemist's Heady Topper Double IPA, Magic Hat #9, Northshire's Chocolate Stout and Sicilian Blood Orange IPA, and Foley Brothers Ginger Wheat. They also sometimes make jelly with New Hampshire's Smuttynose Porter.
    With the exception of Potlicker's Hefeweizen with Orange Beer Jelly, nothing additional is added to the beer jellies. The beer flavors in these quality brews are more than enough to impart fruity and other flavor characteristics, Warner explains.

    Experimental Process

    Once Nancy set her mind to making beer jelly, even though, at that time, there wasn't any competition for this product, she was still determined to make the best jelly possible. There were a number of challenges as well as some discoveries — good and bad — the latter frequently made the hard way (to which homebrewers can surely relate).
    "When we first started we really didn't know what we were doing," Walter admitted. "It was all just a
    big experiment."
    For starters, once the conversion to bottled beer was in place, the pair initially poured the brew into pitchers the night prior to canning and set them in the fridge to allow the carbonation to "settle out." Soon, however, they discovered that carbonation was not a factor to be worried about.
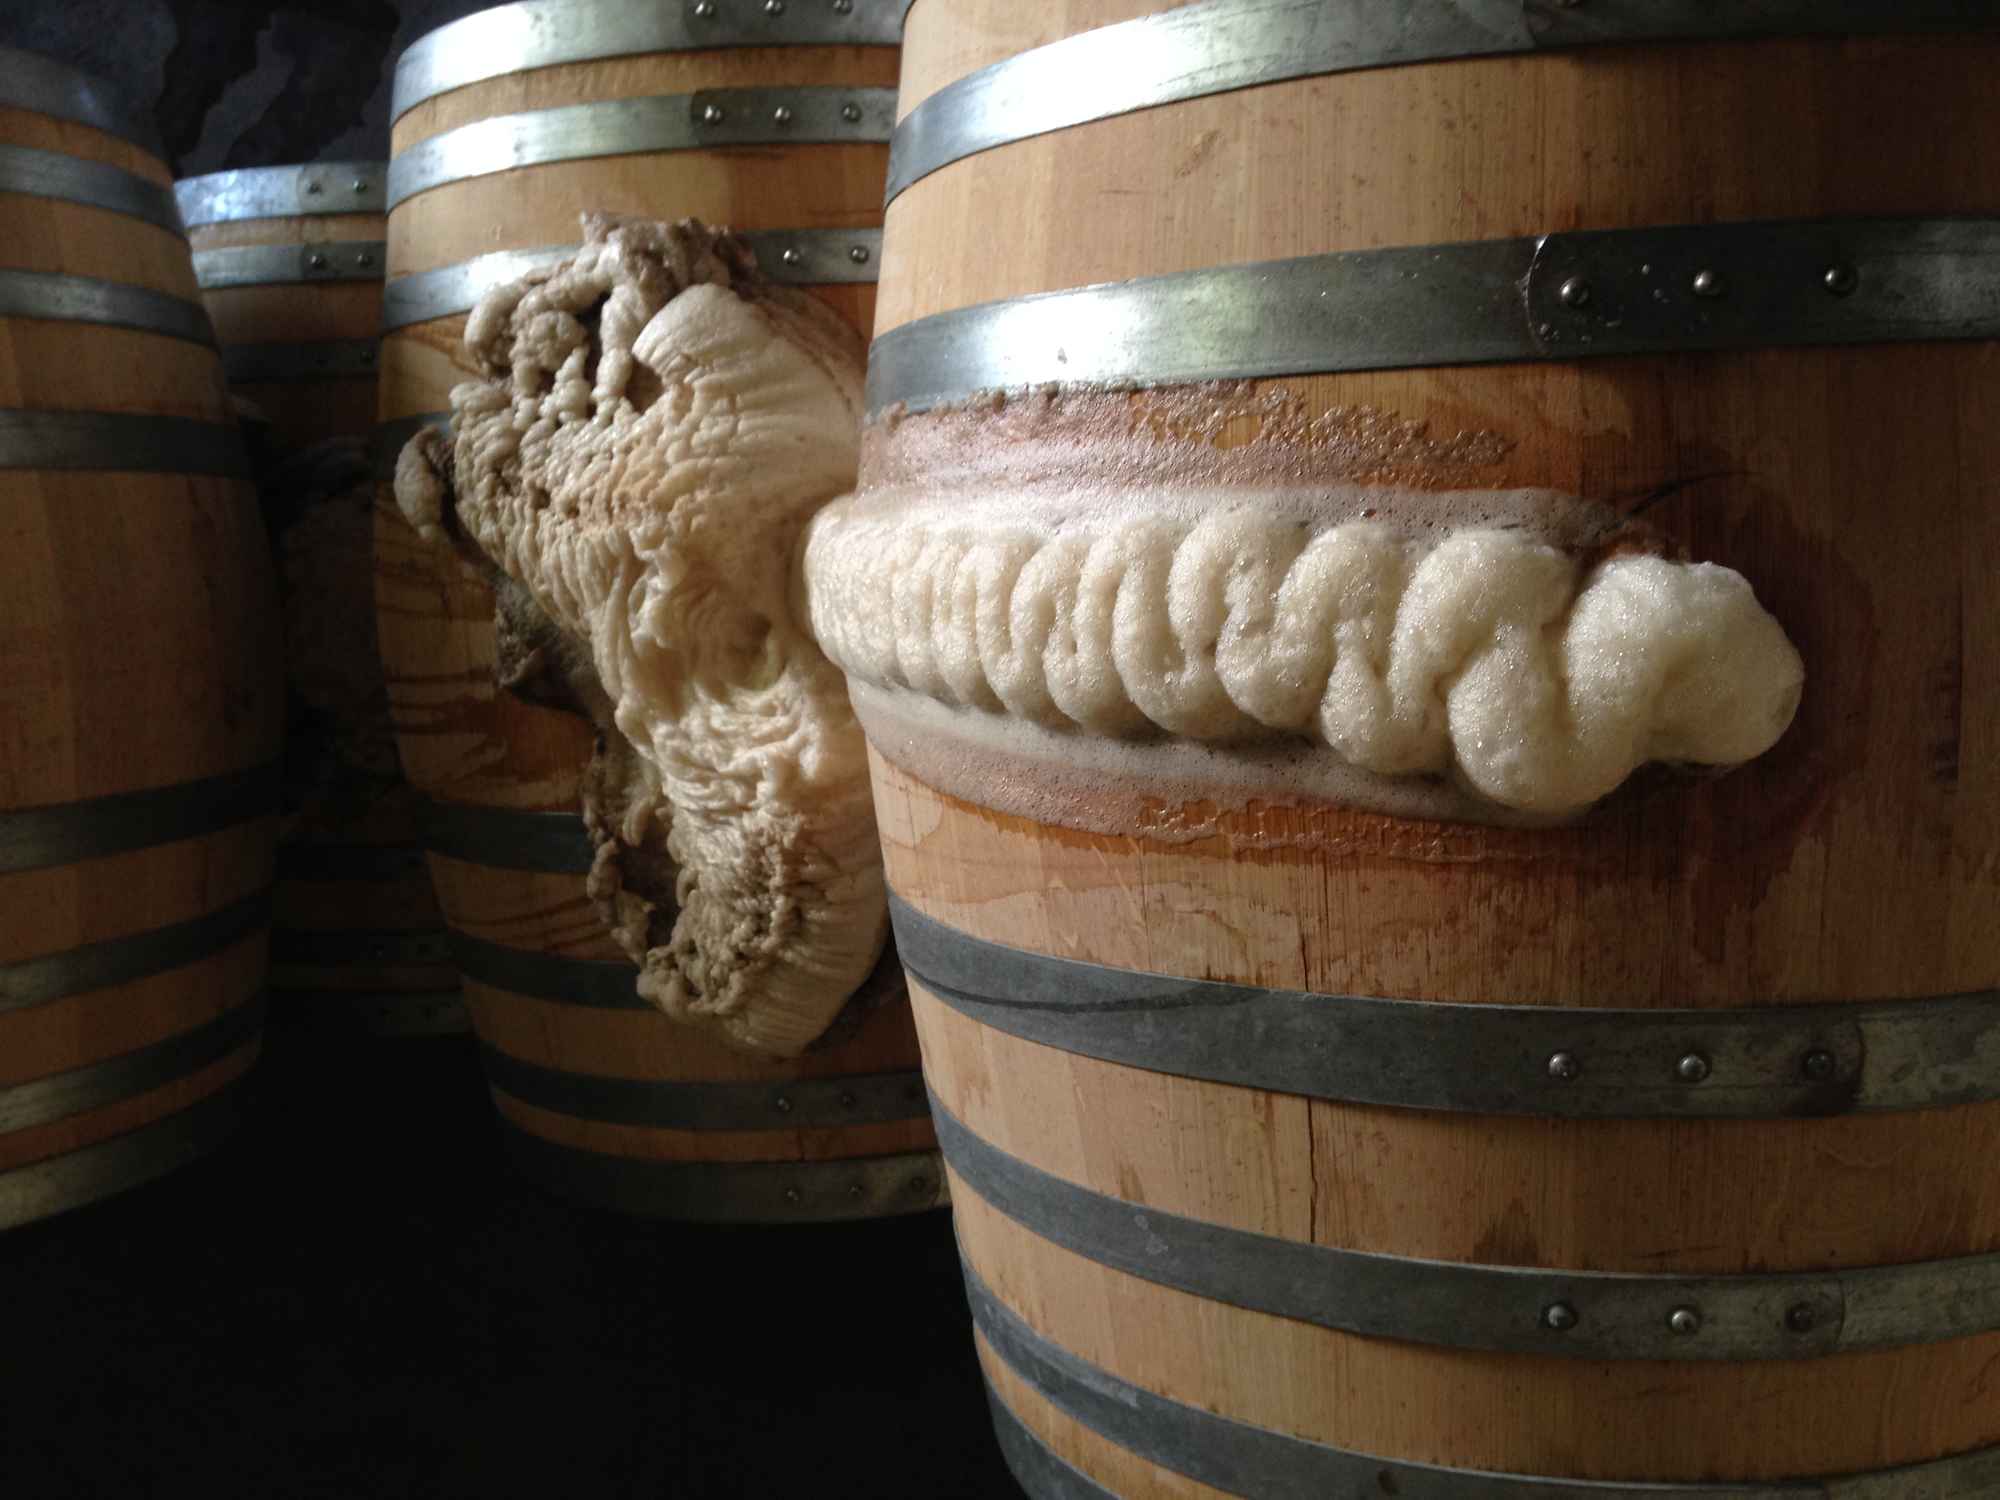
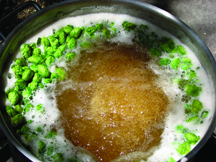
    Similarly, during the boiling process the beer tends to foam up. They used commercial anti-foaming additives for a while until that too was considered needless. The solution: Each gallon and a half batch (the pair originally used four bottles of beer to create eight to 10 bottles of jelly) is split into two 40-quart stainless steel pots. The foam stops about an inch shy of the lip.
    Warner also says that much of the experimentation went into determining the exact proportions of each ingredient to use — numbers he would not divulge — so that each jelly sets up properly and wouldn't be too runny. Your own individual homebrews may behave differently, so use a pectin calculator, like the one online at Ball® Canning at http://www.freshpreserving.com/tools/pectin-calculator, to do the math.

    "We like to say that instead of using grape juice or 'kid' juice, we use 'adult' juice, which is beer. It's just like any other jelly recipe except we're using beer instead of fruit juice," he says. "It's pretty straightforward. Start off with the beer. Then add the pectin and then the sugar. First, the beer goes into a boil. You bring down the boil, add the pectin, and bring back to a boil. Lower it again and add the sugar and boil once again."

    One difference, Nancy said in a separate interview, is that she uses commercial pectin. This helps the jelly thicken properly, something the average hobby beer jelly maker might otherwise struggle with. "You can't get the jelly to firm up enough with store-bought pectin," she explains, suggesting the use of a high-pectin apple cider to promote thickening.

    Getting back to the idea of beer for breakfast, those desiring to spread their beer jellies on the morning toast have little worry of arriving at work buzzed. The cooking process removes almost all of the alcohol, leaving less than half a percent of alcohol per jar.

    "It's a sweet tasting jelly with the beer background flavor," Walter confirms. "It comes to a boil three times, and that reduces the alcohol."

    Now, everyone can raise a toast (or piece of toast) to that!

    Canning Jelly

    The canning method used for preserving the beer jellies in this story is the "water bath" method. Water bath canning is a good method to use when canning high-acid foods (pH < 4.6) like jelly and also salsa, chutney, relish, tomatoes, etc.). The other most popular canning technique is known as "pressure canning." This method is better used for canning vegetables, meat poultry or seafood as it heats the contents of the jar to 240 °F (116 °C) to eliminate the risk of foodborne illness. In the photo to the right, the pot in the top left shows pressure canning (in a pressure cooker), while the pot in the lower right shows a water bath.

    To perform the water bath method of canning, you will need:
    • A large saucepan or stock pot that can accommodate all your canning jars and let water boil with a lid on
    • Canning jars with lids and bands
    • A wooden or non-reactive spoon for stirring
    • A ladle or funnel for transferring the jelly into the jars
    • An optional jar lifter (as the jars will be hot when you go to fill)

    Before you start canning, inspect your canning jars for any nicks or cracks. Even if the jars are new it's a good idea to check them over. A cracked jar can break during the canning process and cause injury and ruin your batch of jelly; a nicked rim can prevent you from getting a proper seal between the jar and the lid.

    1. Fill your pot halfway with water and place your jars in the pot. Fill the jars with water from the saucepan to keep them from floating. There are waterbath canning pots that work great for this, which have a wire rack for holding the jars in place and away from the bottom of the pot but owning a special pot is not necessary. If you don't have a special canning pot, simply put a small baking rack on the bottom of the pot under the jars (a homebrewing false bottom works well). Heat the water and jars to a simmer with the lid on and keep them hot until you're ready to fill the jars with your jelly.

    2.  Prepare your product to be canned (in this case, your
    homebrew jelly).

    3. When you're ready to transfer the jelly, take a hot jar out of the water bath. This is when a jar lifter comes in handy; high-heat brewing gloves work well, too. Pour the water in the jar back into the pot and fill the jar with your jelly, leaving about 1⁄4 of an inch of headspace. Repeat for each remaining jar.

    4. Place the lids on the jars, making sure the rims make contact with the sealing agent on the lids. Screw the bands onto each jar until they are moderately tight.

    5. Place the closed jars back into the pot of water, put the lid on the pot and bring it to a boil for the processing time listed in the recipe. When the processing time is up, turn off the heat and open the lid. Let the jars sit for a few minutes to acclimate to the air temperature.

    6. Take the jars out of the pot and leave them to rest overnight. The next morning, check the seals on the lids: They should not pop up and down when you push on them in the middle, and if you remove the band and try to take off the lid you should feel some resistance.

    For more about the water bath method (and other canning processes), visit the Ball® Canning website:
    http://www.freshpreserving.com/tools/waterbath-canning or http://www.freshpreserving.com/getting-started

    Homebrew Jelly Recipe

    Potlicker Kitchen's Nancy Warner scaled down her commercial beer jelly recipe for Brew Your Own, making it perfectly simple for homebrewers and canners alike.
    "This jelly is a little different from our signature beer jelly because it uses apple cider," she says, which as mentioned in the story will help the jelly set up if you can't get your hands on some commercial pectin. The natural pectin present in apple cider helps the beer to properly gel into beer jelly. Liquid pectin is easy to work with and adds "a clarity" to the overall flavor.
    "I do not recommend making this as a low sugar jelly or using calcium-based pectin like Pamona's Pectin," Warner cautions. "Reducing the quantity of sugar will affect the quality of the gel and the alternative pectins will change the overall flavor."

    Nancy Warner's Beer Jelly quick tips:

    Prepare to make your jelly by having all of your equipment and ingredients ready to go and laid out in your work space. You will need six clean 8-oz. glass canning jars and a pot for a hot water bath. See the sidebar on page 50 for the water bath canning process. Before you start making jelly, place your jars in the pot of water and bring it to a simmer. Allow the jars to rest in the hot water until you are ready to use them. Rinse the lids and bands with warm water and set them aside.
    In addition to your canning jars and equipment, you will need a large saucepan. As we've already established, jelly has higher acid, so use a non-reactive pan — like stainless steel or enamel — for this recipe. A reactive pan, like aluminum, may leech a metallic flavor into your jelly.
    Choose a very tall or large pot as beer jelly will foam up more than the average jelly.
    To use homebrew in this recipe, strain any sediment from the wort or beer using a cheesecloth to make sure your jelly is clear.
    To test your jelly for completion, familiarize yourself with a spoon test. A spoon test is performed by dipping a spoon into the boiling jelly, removing it and observing the thickness of the jelly left on the back of the spoon. When the liquid has turned to jelly (at about 221 °F/105 °C or 65 °Brix) the liquid will not drip off the spoon so much as it will sheet off. The drips will begin to spread sideways into a sheet of jelly that will slip off the spoon. There is a great illustration of this (with other good jelly info) on the USDA website at http://nchfp.uga.edu/publications/usda/GUIDE%207%20Home%20Can.pdf
    Ingredients
    3 cups (2 12-oz. bottles) flat beer (stronger flavored beers — porters, stouts, IPAs — work best)
    3⁄4 cups apple cider
    4 cups granulated white sugar
    1 box (6 oz.) Sure-Jell liquid pectin
    Step by step
    In your large sauce pot (a small stock pot also works well), combine the beer, apple cider and sugar over high heat and stir with a (non reactive) wooden or stainless steel spoon until the sugar dissolves. When the liquid comes to a boil add the pectin. Return the mixture to a boil and cook on high heat for 2 minutes. Test for gel by using a spoon test (see tips and link above). When your jelly has passed the spoon test to your liking, remove the hot jelly from the stove, allow to rest for 2–4 minutes and (optionally*) skim the foam off with a spoon. Ladle the hot jelly into sterilized canning jars, leaving about a 1⁄4 inch of headspace, seal with a lid, and process in a hot water bath for 7 minutes. See the water bath canning instructions in the sidebar on page 50. Allow jars to cool undisturbed overnight. Serve with cheese, over meats and on toast.
    *Jelly foam may be poured into jars for that full pint-of-beer effect.

    http://byo.com/stories/issue/item/3202-making-homebrew-jelly