Brewers Association
2015 Beer Style Guidelines
February 18, 2015
GERMAN ORIGIN ALE STYLES
German-Style
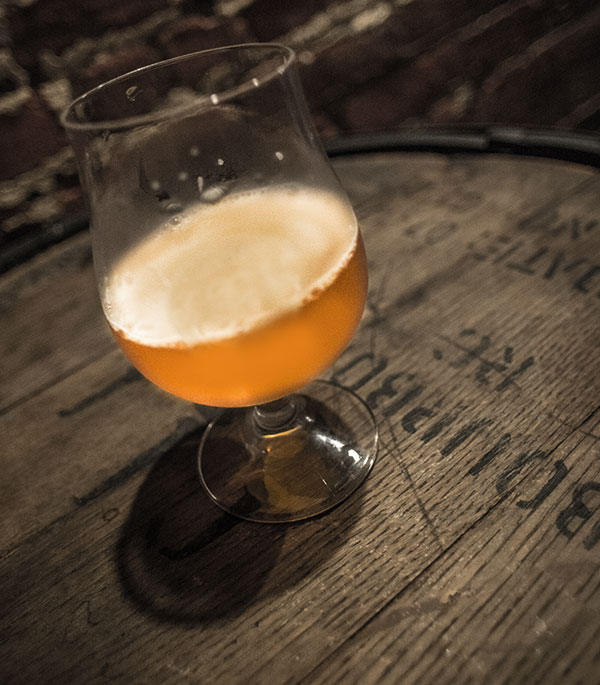
Kölsch
German-Style
Kölschs are straw to gold. Chill haze should be absent. Good, dense head
retention is desirable. Fruity-ester aroma should be minimally perceived, if at
all. Light pear-apple-Riesling wine-like fruitiness may be apparent, but is not
necessary for this style. Hop aroma is low and if evident should express noble
hop character. Malt character is a very low to low with soft sweetness. Caramel
character should not be evident. Hop flavor is low and if evident should
express noble hop character. Hop bitterness is medium. Fruity-ester flavors
should be minimally perceived, if at all. Light pear-apple-Riesling wine-like
fruitiness may be apparent, but is not necessary for this style. Diacetyl
should not be perceived. Wheat can be used in brewing this beer. Kölsch is
fermented at warmer temperatures compared to typical lager temperatures but at
lower temperatures than most English and Belgian ales, then aged at cold
temperatures (German ale or alt-style beer). Ale yeast is used for
fermentation, though lager yeast is sometimes used in the bottle or final cold
conditioning process. Body is light to medium-light; it is slightly dry on the
palate, yet crisp. Original Gravity (ºPlato) 1.042 -1.048 (10.5 -11.9) ●
Apparent Extract/Final Gravity (ºPlato) 1.006 -1.010
(1.5 -2.6) ●
Alcohol by Weight (Volume) 3.80% -4.20% (4.80% -5.30%) ● Bitterness
(IBU) 18 -28 ● Color SRM (EBC) 3 -6 (6 -12)
German-Style
Altbier
German-Style Altbiers are copper to dark brown ales,
originally from the Düsseldorf area. No chill haze should be perceived. A
variety of malts including wheat may be used to produce medium-low to medium
malt aroma. Fruity-ester aroma can be low. No diacetyl aroma should be
perceived. Hop aroma is low to medium. A variety of malts including wheat may
be used to produce medium-low to medium level malty flavor. Hop flavor is low
to medium. Hop bitterness is medium to very high (although the 25 to 35 IBU
range is more normal for the majority of Altbiers from Düsseldorf).
Fruity-ester flavors can be low. No diacetyl should be perceived. The overall
impression is clean, crisp, and flavorful often with a dry finish. Body is
medium. Original Gravity (ºPlato) 1.044 -1.052 (11 -12.9) ● Apparent
Extract/Final Gravity (ºPlato) 1.008 -1.014 (2.1 -3.6) ● Alcohol by
Weight (Volume) 3.60% -4.40% (4.60% -5.60%) ● Bitterness (IBU) 25
-52 ● Color SRM (EBC) 11 -19 (22 -38)
Kellerbier
or Zwickelbier Ale
Kellerbier
or Zwickelbier Ales are the color of the underlying German ale style.
Appearance may or may not be clear, so may appear slightly hazy to moderately cloudy.
Exhibiting a small amount of yeast haze is acceptable. These beers are
unfiltered, but may be naturally clear due to settling of yeast during aging.
Head retention may not be optimal. Kellerbier Ales are unfiltered German-style
Altbier and Kölsch. Aromas typical of the underlying beer style are present.
Fruity-ester levels should align with the filtered version, but may be
perceived at slightly higher or lower levels due to age and presence of yeast.
Yeast aroma is desirable, yet should be low to medium without overpowering the
balance and character of malt and hops. Low to moderately low levels of
yeast-generated sulfur-containing compounds should be apparent in aroma, and
low levels of acetaldehyde or other volatiles normally removed during fermentation
may or may not be apparent. Hop aroma is sometimes suppressed by the presence
of yeast, depending on style. Malt character will vary with style (see
individual style descriptions). Hop flavor is sometimes suppressed by the
presence of yeast, depending on style. Hop bitterness is sometimes suppressed
by the presence of yeast, depending on style. Yeast flavor is desirable, yet
should be low to medium without overpowering the balance and character of malt
and hops. Low to moderately low levels of yeast-generated sulfur containing
compounds should be apparent in flavor, and low levels of acetaldehyde or other
volatiles normally removed during fermentation may or may not be apparent. The
sulfur and acetaldehyde characters should contribute positively to the beer
drinking experience. These unfiltered German-style ales are packaged and/or
served intentionally with low to moderate amounts of yeast. Products may be
filtered and again dosed with yeast in the package, manifesting themselves as
bottle conditioned beers or unfiltered beer with yeast present. During
registration brewers may specify pouring instructions, choosing normal pouring,
quiet pouring or intentional rousing of yeast. Entries will be presented during
judging as specified by entering brewer. Body is variable with style. A
statement by the brewer explaining the underlying classic German ale style is
essential for accurate assessment in competitions.
Original Gravity (ºPlato) Varies with style (Varies with style) ● Apparent
Extract/Final Gravity (ºPlato) Varies with style (Varies with style) ● Alcohol
by Weight (Volume) Varies with style (Varies with style) ● Bitterness
(IBU) Varies with style ● Color SRM (EBC) Varies with style (Varies
with style)
Berliner-Style
Weisse
Berliner Weissbiers are straw to pale, the lightest of all the German
wheat beers. Appearance may be hazy or cloudy from yeast or chill haze.
Fruity-ester aroma will be evident at low to medium levels. No diacetyl should
be perceived. Hop aroma is not perceived. Malt sweetness is absent. Hop flavor
is not perceived. Hop bitterness is not existent to very low. The unique
combination of yeast and lactic acid bacteria fermentation yields a beer that
is acidic and highly attenuated. Fruity-ester flavors will be evident at low to
medium levels. No Brettanomyces character or diacetyl should be
perceived. Berliners are sometimes served with sweet fruit or herbal syrups.
Carbonation is high. Body is very low. At competition, subcategories for
unfruited and fruited or flavored versions of the style could be created. For
unfruited versions, brewer would indicate that no fruit or flavor has been
added. Fruited or flavored entries would be accompanied by a very brief
description of the fruit/flavor used by the brewer. Original Gravity
(ºPlato) 1.028 -1.032 (7.1 -8) ● Apparent Extract/Final Gravity (ºPlato)
1.004 -1.006 (1 1.5) ● Alcohol by Weight (Volume) 2.20% -2.70%
(2.80% -3.40%) ● Bitterness (IBU) 3-6 ● Color SRM (EBC) 2 -4 (4
-8)
Leipzig-Style
Gose
Leipzig-Style Goses are straw to medium amber.
Appearance is cloudy/hazy with yeast character, may have evidence of continued
fermentation activity. Lemony or other citrus-like aromas are often present.
Some versions may have the spicy aroma character of added coriander at low to
medium levels. Horsey, leathery or earthy aromas contributed by Brettanomyces
yeasts may be evident but have a very low profile, as this beer is not
excessively aged. Hop aroma is not perceived. Malt sweetness is not perceived
to very low. They typically contain malted barley and unmalted wheat, with some
traditional varieties containing oats. Hop flavor is not perceived. Hop
bitterness is not perceived. Lemony or other citrus-like flavors are often
present. Some versions may have the spicy flavor character of added coriander
on the palate at low to medium levels. Salt (table salt) character is also
traditional in low amounts. Horsey, leathery or earthy flavors contributed by Brettanomyces
yeasts may be evident but have a very low profile, as this beer is not
excessively aged. Traditional examples of Gose are spontaneously fermented,
similarly to Belgian-style Gueuze/Lambic beers, and should exhibit complexity
of acidic, flavor and aroma contributed by introduction of wild yeast and
bacteria into the fermentation. Low to medium lactic acid character is evident
in all examples as sharp, refreshing sourness. A primary difference between
Belgian Gueuze and German Gose is that Gose is served at a much younger age.
Gose is typically enjoyed fresh and carbonated. Overall complexity of flavors
and aromas sought while maintaining a balance between acidity, yeast-enhanced
spice and refreshment is ideal. Body is low to medium-low. At competitions,
brewers might provide supplemental information such as whether coriander, salt
and/or Brettanomyces is used and/or other information about the brewing
process. Original Gravity (ºPlato) 1.036 -1.056 (9 -13.8) ● Apparent
Extract/Final Gravity (ºPlato) 1.008 -1.012 (2.1 3.1) ● Alcohol by
Weight (Volume) 3.50% -4.30% (4.40% -5.40%) ● Bitterness (IBU) 10
-15 ● Color SRM (EBC) 3 -9 (6 -18)
Contemporary
Gose
Contemporary
Goses are straw to medium amber, or, may take on the hue of added fruits or
other ingredients if present. Appearance is cloudy/hazy with yeast character, and
may have evidence of continued fermentation activity. A wide variety of herbal,
spice, floral or fruity aromas other than found in traditional Leipzig-Style
Gose are present, in harmony with other aromas. Horsey, leathery or earthy
aromas contributed by Brettanomyces yeasts may be evident but have a
very low profile, as this beer is not excessively aged. Hop aroma is not
perceived. Malt sweetness is not perceived to very low. They typically contain
malted barley and unmalted wheat, with some traditional varieties containing
oats. Hop flavor is not perceived. Hop bitterness is not perceived. A wide
variety of herbal, spice, floral or fruity flavors other than found in
traditional Leipzig-Style Gose, are present in harmony with the overall flavor
profile. Salt (table salt) character is traditional in low amounts, but may
vary from absent to present in Contemporary Gose. Horsey, leathery or earthy
flavors contributed by Brettanomyces yeasts may be evident but have a
very low profile, as this beer is not excessively aged. Contemporary Gose may
be fermented with pure beer yeast strains, or with yeast mixed with bacteria.
Contemporary Gose may be spontaneously fermented, similarly to Belgian-style
gueuze/lambic beers, and should exhibit complexity of acidic, flavor and aroma
contributed by introduction of wild yeast and bacteria into the fermentation.
Low to medium lactic acid character is evident in all examples as sharp,
refreshing sourness. A primary difference between Belgian Gueuze and Gose is
that Gose is served at a much younger age. Gose is typically enjoyed fresh and
carbonated. Overall complexity of flavors and aromas sought while maintaining a
balance between acidity, yeast-enhanced spice and refreshment is ideal. Body is
low to medium-low. At competitions, brewers might provide supplemental
information which can include any herbs, spices, fruit or other added
ingredients, and/or information about the brewing process.
Original Gravity (ºPlato) 1.036 -1.056 (9 -13.8) ● Apparent Extract/Final
Gravity (ºPlato) 1.008 -1.012 (2.1 3.1) ● Alcohol by Weight (Volume) 3.50%
-4.30% (4.40% -5.40%) ● Bitterness (IBU) 10 -15 ● Color SRM (EBC) 3
-9 (6 -18)
South
German-Style Hefeweizen
South
German-Style Hefeweizens are straw to amber. Because yeast is present appearance
may appropriately be very cloudy. The aroma of a German Hefeweizen is decidedly
fruity and phenolic. The phenolic characteristics are often described as
clove-like, nutmeg-like, mildly smoke-like or even vanilla-like. Banana-like
ester aroma should be present at low to medium-high levels. Hop aroma is not
perceived to very low. Malt sweetness is very low to medium-low. Hop flavor is
not perceived to very low. Hop bitterness is very low. These beers are made
with at least 50 percent malted wheat. No diacetyl should be perceived. The
flavor of a Weissbier with yeast is decidedly fruity and phenolic. The phenolic
characteristics are often described as clove-like, nutmeg-like, mildly
smoke-like or even vanilla-like. Banana-like ester flavor should be present at
low to medium-high levels. Hefeweizen is very highly carbonated. These beers
are typically roused during pouring and because yeast is present, the beer will
have yeast flavor and a characteristically fuller mouthfeel. Body is medium to
full. During competition, entries will be roused unless instructed otherwise
by the entering brewer. Original Gravity (ºPlato) 1.047 -1.056 (11.7
-13.8) ● Apparent Extract/Final Gravity (ºPlato) 1.008 -1.016
(2.1 -4.1) ●
Alcohol by Weight (Volume) 3.90% -4.40% (4.90% -5.60%) ● Bitterness
(IBU) 10 -15 ● Color SRM (EBC) 3 -9 (6 -18)
South
German-Style Kristal Weizen
South
German-Style Kristal Weizens are straw to amber. Appearance is clear with no
chill haze present. Because the beer has been filtered, yeast is not present.
The aroma is very similar to Hefeweizen; the phenolic characteristics are often
described as clove-like or nutmeg-like and can be smoky or even vanilla-like.
Banana-like ester aroma is often present. Hop aroma is not perceived to very
low. Malt sweetness is very low to medium-low. Hop flavor is not perceived to
very low. Hop bitterness is very low. These beers are made with at least 50
percent malted wheat. No diacetyl should be perceived. The flavor is very
similar to Hefeweizen with the caveat that fruity and phenolic characters are
not combined with the yeasty flavor and fuller-bodied mouthfeel of yeast. The
phenolic characteristics are often described as clove-like or nutmeg-like and
can be smoky or even vanilla-like. Banana-like ester flavor is often present.
Kristal Weizen is well attenuated and very highly carbonated. The beer will
have no flavor of yeast and a cleaner, drier mouthfeel than counterparts served
with yeast. Body is medium to full. Original Gravity (ºPlato) 1.047
-1.056 (11.7 -13.8) ● Apparent Extract/Final Gravity (ºPlato) 1.008
-1.016
(2.1 -4.1) ●
Alcohol by Weight (Volume) 3.90% -4.40% (4.90% -5.60%) ● Bitterness
(IBU) 10 -15 ● Color SRM (EBC) 3 -9 (6 -18)
German-Style
Leichtes Weizen
German-Style
Leichtes Weizens are straw to copper-amber. If served with yeast appearance may
appropriately be very cloudy. The phenolic and estery aromas typical of
Weissbiers are more subdued in Leichtes Weizen. No diacetyl aroma should be
perceived. Hop aroma is not perceived to very low. Malt sweetness is very low
to medium-low. Hop flavor is not perceived to very low. Hop bitterness is very
low. These beers are made with at least 50 percent wheat malt. The phenolic and
estery flavors typical of Weissbiers are more subdued in Leichtes Weizen. The
overall flavor profile is less complex than Hefeweizen due to decreased alcohol
content and there is less yeasty flavor present. No diacetyl should be
perceived. The German word leicht means light, and as such these beers are
light versions of Hefeweizen. These beers are often roused during pouring, and
when yeast is present the beer will have yeast flavor and a characteristically
fuller mouthfeel. Body is low with diminished mouth feel relative to
Hefeweizen. During competition, entries will be roused unless instructed
otherwise by the entering brewer.
Original Gravity (ºPlato) 1.028 -1.044 (7.1 -11) ● Apparent Extract/Final
Gravity (ºPlato) 1.004 -1.008 (1 2.1) ● Alcohol by Weight (Volume) 2.00%
-2.80% (2.50% -3.50%) ● Bitterness (IBU) 10 -15 ● Color SRM (EBC) 3.5
-15 (7 -30)
South
German-Style Bernsteinfarbenes Weizen
South
German-Style Bernsteinfarbenes Weizens are amber to light brown; the German
word bernsteinfarben means amber colored. If served with yeast appearance may
appropriately be very cloudy. The phenolic and estery aromas typical of
Weissbiers are more subdued in Bernsteinfarbenes Weissbier. No diacetyl aroma
should be perceived. Hop aroma is not perceived. Distinct sweet maltiness and
caramel or bready character from the use of medium colored malts characterize
this beer style. Hop flavor is not perceived. Hop bitterness is low. These
beers are made with at least 50 percent malted wheat. The phenolic and estery
flavors of this Weissbier should be evident but subdued. Bernsteinfarbenes
Weissbier should be well attenuated and very highly carbonated. No diacetyl
should be perceived. These beers are typically roused during pouring and
because yeast is present, the beer will have yeast flavor and a characteristically
fuller mouthfeel. Body is medium to full. During competition, entries will
be roused unless instructed otherwise by the entering brewer. Original
Gravity (ºPlato) 1.048 -1.056 (11.9 -13.8) ● Apparent Extract/Final
Gravity (ºPlato) 1.008 -1.016
(2.1 -4.1) ●
Alcohol by Weight (Volume) 3.80% -4.30% (4.80% -5.40%) ● Bitterness
(IBU) 10 -15 ● Color SRM (EBC) 9 -13 (18 -26)
South
German-Style Dunkel Weizen
South
German-Style Dunkel Weizens are copper-brown to very dark. If served with yeast
appearance may appropriately be very cloudy. The phenolic and estery aromas
typical of Weissbiers are more subdued in Dunkel Weissbier. No diacetyl aroma
should be perceived. Hop aroma is not perceived. Distinct sweet maltiness and a
chocolate-like character from roasted malt characterize this beer style.
Usually dark barley malts are used in conjunction with dark cara or color
malts. Hop flavor is not perceived. Hop bitterness is low. These beers are made
with at least 50 percent malted wheat. The phenolic and estery flavors of
Dunkel Weissbier should be evident but subdued. Dunkel Weissbier should be well
attenuated and very highly carbonated. No diacetyl should be perceived. These beers
are typically roused during pouring and because yeast is present, the beer will
have yeast flavor and a characteristically fuller mouthfeel. Body is medium to
full. During competition, entries will be roused unless instructed otherwise
by the entering brewer. Original Gravity (ºPlato) 1.048 -1.056 (11.9
-13.8) ● Apparent Extract/Final Gravity (ºPlato) 1.008 -1.016
(2.1 -4.1) ●
Alcohol by Weight (Volume) 3.80% -4.30% (4.80% -5.40%) ● Bitterness
(IBU) 10 -15 ● Color SRM (EBC) 10 -25 (20 -50)
South German-Style
Weizenbock
South
German-Style Weizenbocks are gold to very dark. If served with yeast appearance
may appropriately be very cloudy. Balanced clove-like phenolic and fruity-ester
banana elements produce a well-rounded aroma. If dark, a mild roast malt
character should emerge to a lesser degree in the aroma. No diacetyl aroma
should be perceived. Hop aroma is not perceived. Medium malty sweetness is
present. If dark, a mild roast malt flavor should emerge. Hop flavor is not
perceived. Hop bitterness is low. Balanced clove-like phenolic and fruity-ester
banana-like elements produce a well-rounded flavor. Carbonation is high. No
diacetyl should be perceived. These beers are typically roused during pouring
and because yeast is present, the beer will have yeast flavor and a
characteristically fuller mouthfeel. Body is medium to full. During
competition, entries will be roused unless instructed otherwise by the entering
brewer. Original Gravity (ºPlato) 1.066 -1.080 (16.1 -19.3) ● Apparent
Extract/Final Gravity (ºPlato) 1.016 -1.028
(4.1 -7.1) ●
Alcohol by Weight (Volume) 5.50% -7.50% (7.00% -9.50%) ● Bitterness
(IBU) 15 -35 ● Color SRM (EBC) 4.5 -30 (9 -60)
German-Style
Rye Ale
German-Style Rye Ales are pale to very dark, with
darker versions running dark amber to dark brown. Chill haze is acceptable in
versions packaged and served without yeast. In versions served with yeast,
appearance may range from hazy to very cloudy. Low to medium banana–like
fruity-ester aroma is typical; phenolic, clove-like aromas should also be
perceived. In darker versions malt aromas can optionally include low roasted
malt characters evident as cocoa/chocolate or caramel, and/or aromatic
toffee-like, caramel, or biscuit-like characters. Diacetyl aroma should not be
perceived. No yeast aroma should be evident in versions without yeast. Low to
medium yeast aroma should not overpower the balance and character of rye and
barley malt and hops in versions with yeast. Hop aroma is not perceived. Malt
sweetness will vary from low to medium. In darker versions malt flavor can
optionally include low roasted malt characters evident as cocoa/chocolate or
caramel, and/or aromatic toffee-like, caramel, or biscuit-like characters. Low
level roast malt astringency acceptable when balanced with low to medium level
malt sweetness. Versions packaged and served without yeast will not have yeast
flavor or fuller mouthfeel caused by yeast. Versions packaged and served with
yeast will have low to medium yeast flavor and a characteristically fuller mouthfeel,
which should not overpower the balance and character of rye and barley malt and
hops. Hop flavor is not perceived. Hop bitterness is very low to low. Grist
should include at least 30 percent rye malt. Low banana-like fruity-ester
flavor is typical; phenolic, clove-like characteristics should also be
perceived. Diacetyl flavor should not be perceived. Body is low to medium. At
competition beers will be poured as instructed by entering brewer. During
registration brewer may specify pouring instructions, choosing normal pouring,
quiet pouring or intentional rousing of yeast. Original Gravity (ºPlato)
1.047 -1.056 (11.7 -13.8) ● Apparent Extract/Final Gravity (ºPlato) 1.008
1.016 (2.1 -4.1) ● Alcohol by Weight (Volume) 3.90%
-4.40% (4.90% -5.60%) ● Bitterness (IBU) 10 -15 ● Color SRM (EBC) 4
-25 (8 -50)
Bamberg-Style
Weiss Rauchbier
Bamberg-Style
Weiss Rauchbiers are a range of color from pale to chestnut brown. Because
yeast is present appearance may appropriately be very cloudy. Smoky malt
character ranging from low to high should be present in the aroma. The aroma of
a Weissbier with yeast is decidedly fruity and phenolic. The phenolic
characteristics are often described as clove-like, nutmeg-like, mildly
smoke-like or even vanilla-like. Banana-like ester aroma is often present at
low to medium-high levels. Hop aroma is not perceived. In darker versions a
detectable degree of roast malt may be present without being robust. Smoky malt
flavor ranging from low to high is present. Smoke character is not harshly
phenolic, but rather very smooth, almost rendering a perception of mild
sweetness. Hop flavor is not perceived. Hop bitterness is low. These beers are
made with at least 50 percent malted wheat. No diacetyl should be perceived.
The flavor of a Weissbier is decidedly fruity and phenolic. The phenolic
characteristics are often described as clove-like or nutmeg-like and can be
smoky or even vanilla-like. Banana-like esters are often present. Weissbier is
well attenuated and very highly carbonated. These beers are typically roused
during pouring and because yeast is present, the beer will have yeast flavor
and a characteristically fuller mouthfeel. Body is medium to full. During
competition, entries will be roused unless instructed otherwise by the entering
brewer. Original Gravity (ºPlato) 1.047 -1.056 (11.7 -13.8) ● Apparent
Extract/Final Gravity (ºPlato) 1.008 -1.016
(2.1 -4.1) ●
Alcohol by Weight (Volume) 3.90% -4.40% (4.90% -5.60%) ● Bitterness
(IBU) 10 -15 ● Color SRM (EBC) 4 -18 (8 -36)

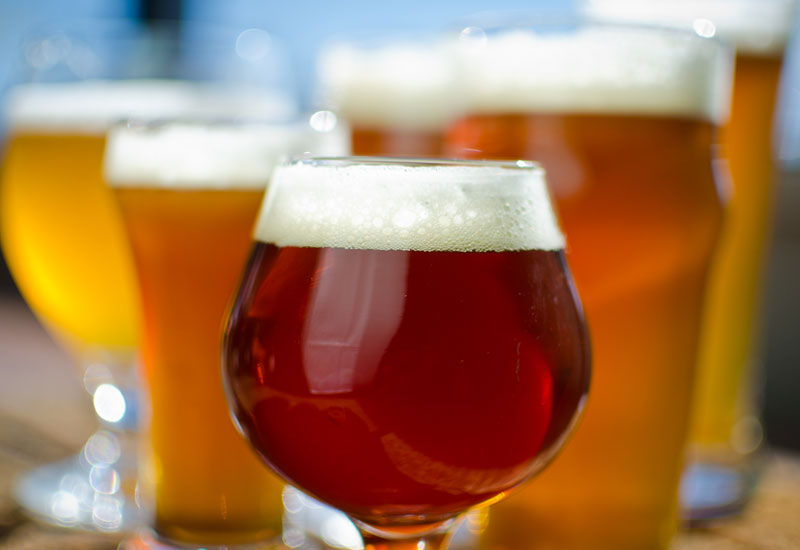
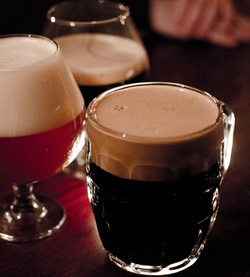 When people talk of nitro, it’s a reference to the type of gas used in the carbonation process. It means the difference between the creamier nitrogen beers (N2) and their lively, prickly CO2 counterparts. A typical nitrogenated beer contains about 70 percent nitrogen and 30 percent carbon dioxide.
 The brewery first released a bottled nitro version of Milk Stout to the public at the 2011 Great American Beer Festival. Sullivan and others pointed out that many breweries offer the same beer on both types of taps side by side. The difference between the two is vast, with the nitro beer taking on a creamy texture and more evenly distributed flavors while the CO2 beer is more aggressive on the tongue and aroma forward.