Tuesday, October 13, 2015

Electric HomeBrewing Benefits


Electric Brewing Benefits:

- More economical - 1/5 the cost of propane
- Safer - No carbon monoxide or risk of explosion
- Efficient - 100% of BTUs transferred to wort
- Accurate - Holds temperatures +/- 1 degree
- Faster - 3½ hours for 10 gallon batch including clean-up
- Quiet - No obnoxious “roar” of the burner
- Convenient - Brew indoors in a sanitary environment

• Tablet application provides:
- Simple - press “Start” and follow the prompts
- Convenient process monitoring and control
- Graphical Interface with Speech Prompts
- Saving and recalling brew steps & parameters
- Automatic or manual control

Automatic Hops-Boss hops feeder option that dispenses hops automatically.

• All Food/Brewery Grade Components

• Great Value - Affordable

• First time home brewers can brew all grain perfectly the first time!


If you are unfamiliar with the Brew-Boss® home brew system www.brew-boss.com, it is an all electric home brewing system that allows home brewers to brew extract or all-grain recipes with complete and accurate automatic control of temperature and timing. Automated control provides consistent results every time. No other system available offers this level of automated brew control. It actually talks you through the brew process.

Sunday, October 11, 2015

Beer is Good

Start homebrewing today with the Brew Boss Electric Home Brew System! www.brew-boss.com


Brew-Boss Features and Benefits

• Brew-Boss controller automates all temperature, timing, & pump control.

• Electronic process control provides consistent results batch after batch.

• Available with Mesh Bag or the New COFI Filter System

• User defined steps configurable to nearly any brew process.

• Brew all-grain batches in 3½ hours including clean-up!

• Complete systems and conversion kits available.

• Supports Conventional or Brew-in-a-Bag (BIAB) brewing methods.

Friday, October 9, 2015

Whale Fossil Used To Brew Beer

This craft beer takes the idea of ‘natural ingredients’ to a whole new level, as a fossil enthusiast and microbiologist have teamed up to produce a brew made with yeast scraped from a 35 million-year-old whale bone.


Fossil-beer

The beer, named Bone Dusters Paleo Ale, is a Belgian-style citrusy pour that is the result of combined passions between two friends; one an amateur palaeontologist and the other a microbiologist.

It is reported on NPR.com that fossil-hunter Jason Osborne of Paleo Quest – a non-profit palaeontology group – got the idea of using ancient sources for yeast-gathering while he was nursing a pint and inspecting his latest discoveries.

“I thought, even though this is dead, there’s got to be things living on it,” he told NPR.

What he discovered was that a wild yeast subspecies, which the pair named Saccharomyces cerevisiae var protectus, was indeed living on his fossil, and that it could be used to ferment the ingredients required to create a pre-historic pint.

Microbiologist Jason Akerboom says that the yeast is probably not nearly as old as the fossil it was scraped from, but he believes that it came from the swamp that the bones were found in.

It is reported that Osborne and Akerboom are not the first to craft a prehistoric brew. In a feat that resembles the blockbuster movie Jurassic Park, Raul Cano extracted yeast from the stomach of a 45-million-year-old fly entrapped in fossilised amber to create his own beer.

Cano, a microbiologist who now operates Fossil Fuels Brewing Co. (which employs Ackerboom), raises some skepticism over the origins of the yeast.

He thinks that the yeast is most likely the product of outside contamination.

But he praises the team’s accomplishment. “Regardless of whether it came from a whale bone, or someone’s fingernail, I think it’s amazing.”

On the topic of strange beer creations, we recently reported on an Icelandic beer smoked with sheep dung making its way to the US.

Wednesday, October 7, 2015

RECIPE: Spent Grain Mississippi Mud Brownies / Spent Grain Flour

The grain that's left over after the sparge is 100% edible!

Recipe: Spent Grain Mississippi Mud Brownies

We can go on for hours describing how much we love Mississippi Mud brownies: how the oodles of chocolate and marshmallow strands spread gooey-ly as you tear them apart, how chewing on one is like swimming in a bath of rich chocolate and pecans, how...we're guessing you get the picture?

Well, our spent grain Mississippi Mud brownies are like those brownies, but even better. In addition to being soft and indulgent almost to the point of chocoholic excess, adding Spent Grain Flour to the recipe gives them the perfect amount of chewiness as well as a warm nuttiness absolutely perfect complement for the pecan topping. These brownies are so chocolatey, nutty, and delicious that you'll be whipping them up every brew day.

WHAT YOU NEED

  • 4 ounces unsweetened chocolate, chopped
  • 4 ounces bittersweet chocolate, chopped
  • 1 1/2 sticks of butter, cubed
  • 4 eggs, beaten
  • 2 cups sugar
  • 3/4 cup all-purpose flour
  • 1/2 cup Spent Grain Flour (See Below)
  • 1/2 teaspoon baking powder
  • 1/2 teaspoon salt
  • 1 1/2 cups pecans, coarsely chopped and toasted
  • 3 cups mini marshmallows

WHAT YOU DO

  1. Preheat oven to 325 degrees F.
  2. In a double-boiler melt chocolate and butter stirring until smooth. Remove from heat and let cool slightly.
  3. In batches, fold in beaten eggs (being careful not to cook the eggs).
  4. In a separate bowl, combine sugar, flours, baking powder and salt. In batches, fold dry ingredients into chocolate mixture.
  5. Pour batter into a well-buttered baking pan. Spread out evenly with a spatula. Scatter pecans and marshmallows over the top.
  6. Bake 30-35 minutes. Let cool completely in pan before cutting. Enjoy!
Turn your leftover brewing grains into a nutty spent grain flour to use in baking and more
You may have realized by now that we really like spent grain. Brewing everyday means we're always thinking of new things to do with our favorite leftover (see: Spent Grain Chef). Whether you're making wafflescheddar crackerspretzel rolls, or handmade pasta, spent grain flour can add a complex warmth and nuttiness to some of your tried and true dishes. Here's how to make it.

    WHAT YOU DO

  1. Set your oven to the lowest setting possible. For most ovens this is 170-200 degrees Fahrenheit.
  2. Spread out your spent grain on a clean, ungreased sheet pan in a thin 1/4 inch layer.
  3. Place in oven and let dry for approximately 7 hours. Alternately, a food dehydrator works as well.
  4. 4 hours into drying, pull out barley and toss to mix with a spoon.
  5. Drying time may vary depending on your environment or oven. Your barley is dry when you feel absolutely no moisture remaining.
  6. Using a coffee or spice grinder, process dried spent grain until it becomes a fine flour.
  7. Store your spent grain flour in an airtight jar or plastic container in your pantry.

Monday, October 5, 2015

5 Basic Beer Brewing Terms You Should Know


Have you bought your Brew Boss Electric System yet (www.brew-boss.com)? You know that brewing is full of jargon to describe very specific stages of the beer making process. We've collected our top 5 basics below -- try tossing these around next time you visit your local bottle shop.

1. Mash - This is just a mix of grains (mostly malted barley and wheat) and water. It looks like porridge, or oatmeal, or...well, mash. After it's simmered, you mash out by bringing it to a certain temperature (this is called mashing out). Then you're on to the next fancy word.

2. Sparge - The process of circulating water through the mash to strain out all the fermentable sugars from the grain is called the sparge. After this step you end up with a dark-colored liquid and a bunch of wet grain, both of which have special names.

3. Wort - It's prounced "wert," and it refers to the unyeasted liquid that will become your beer. Wort tastes kind of like a very sweet tea -- those sugars are what the yeast will digest into alcohol during the two-week fermenting period.

4. Spent grain - The grain that's left over after the sparge is 100% edible! The Brooklyn Brew Shop has plenty of delicious recipes forspent grain, from pasta to tortillas and from cheddar scones to rugelach!

5. Pitch - After adding hops during the boil (it adds that tangy, bitter flavor you love in IPAs), the wort is thoroughly cooled and poured into its fermenting container. Now you're ready to pitch the yeast, which is just an elaborate way of saying "stir in the yeast."Now the beer is ready for its ferment, during which the yeast will eat up those sugars you strained from the grain in the sparge and make alcohol. When the fermenting is done, the beer is poured into bottles and sealed so that it develops carbonation. And when that is done, it's time to throw a party!

Beer brewing is no more difficult (and way more fun!) than a high-school science experiment when you have the right vocabulary on your side. Go forth, and brew!


Saturday, October 3, 2015

Hefeweizen Recipe

Brewer: Keith Koval
Style: Hefeweizen
Competition results: First place in the German wheat and rye beer/weizen category of Homebrew Alley 6 (2012) 
All-grain recipe, 5-gallon batch size
Original gravity: 1.046
Final gravity: 1.010
Bitterness: 13 IBU
Alcohol by volume: 4.8 percent
5 pounds German pilsner
5 pounds wheat malt
.25 ounces Hallertuaer Mittelfrüh hops pellets (3 percent AA), 90 minutes
.75 ounces Hallertuaer Mittelfrüh hops pellet (3 percent AA), 60 minutes
WLP380 Hefeweizen IV ale yeast
Use distilled water with 1 g CaCl per gallon in the mash and add 1 g CaCl per gallon of sparge water directly to the boil. Mash for 10 minutes at 113 degrees F, 10 minutes at 122 F, 60 minutes at 149 F, and 10 minutes at 168 F. Boil for 90 minutes.  
Fermentation: Make 1 liter of starter wort and aerate it on a stir plate. Add oxygen in-line as the wort was transferred from the chiller to the carboy. Pitch yeast at 58 F. Allow fermentation to rise to 62 F for the first three days. Raise temperature to 65 F for four more days. Then raise to 68 F to clean up any off flavors. Drop temperature to 34 F for three days to crash yeast, proteins, and tannins. Keg and carbonate to 4 volumes CO2.
Brewer's notes: This is a very simple recipe that relies on fermentation-derived flavors and proper mouth feel to achieve the best result. The step mash procedure I used was developed via trial and error over a number of batches. The ferulic acid rest increases the clove character of the beer, while the protein and the low saccharification-rest temp creates a highly fermentable wort with a creamy mouthfeel. Carbonating to 3.5 to 4 volumes is necessary for this beer to be true to style and enhances the mouthfeel and refreshing nature of the beer.
Brewer: Keith Koval
Style: Hefeweizen

Competition results: First place in the German wheat and rye beer/weizen category of Homebrew

Alley 6 (2012)
All-grain recipe, 5-gallon batch size
Original gravity: 1.046
Final gravity: 1.010
Bitterness: 13 IBU
Alcohol by volume: 4.8 percent
5 pounds German pilsner
5 pounds wheat malt
.25 ounces Hallertuaer Mittelfrüh hops pellets (3 percent AA), 90 minutes
.75 ounces Hallertuaer Mittelfrüh hops pellet (3 percent AA), 60 minutes
WLP380 Hefeweizen IV ale yeast

Use distilled water with 1 g CaCl per gallon in the mash and add 1 g CaCl per gallon of sparge water directly to the boil. Mash for 10 minutes at 113 degrees F, 10 minutes at 122 F, 60 minutes at 149 F, and 10 minutes at 168 F. Boil for 90 minutes.

Fermentation: Make 1 liter of starter wort and aerate it on a stir plate. Add oxygen in-line as the wort was transferred from the chiller to the carboy. Pitch yeast at 58 F. Allow fermentation to rise to 62 F for the first three days. Raise temperature to 65 F for four more days. Then raise to 68 F to clean up any off flavors. Drop temperature to 34 F for three days to crash yeast, proteins, and tannins. Keg and carbonate to 4 volumes CO2.

Brewer's notes: This is a very simple recipe that relies on fermentation-derived flavors and proper mouth feel to achieve the best result. The step mash procedure I used was developed via trial and error over a number of batches. The ferulic acid rest increases the clove character of the beer, while the protein and the low saccharification-rest temp creates a highly fermentable wort with a creamy mouthfeel. Carbonating to 3.5 to 4 volumes is necessary for this beer to be true to style and enhances the mouthfeel and refreshing nature of the beer.

  - PopularMechanics.com

Thursday, October 1, 2015

How to Brew an Excellent Pumpkin Ale - Some Tried and True Tips

Yes, it's that time of year again - when it seems like half of the homebrewing population is debating the best way to brew a good pumpkin ale (often with little to no firsthand experience on the subject), while the other half is suggesting that the first step to enjoying a pumpkin ale is to pour it into the closest drain. And of course, craft beer outlets everywhere are inundated with pumpkin offerings of varying quality, which likely encourages the trend even more.

Rather than take a side on that debate, the following article is presented as some tried and true suggestions to follow if you find yourself wanting to brew a pumpkin ale. After all, if you're going to do one of these beers, do yourself (and anyone you share the beer with) a favor, and make a good one!

Interestingly, it seems that many brewers are adamantly opposed to using actual pumpkin flesh in their beers, feeling that doing so doesn't really offer anything to the beer and just makes a mess. Instead, they rely on their spice mix to invoke that signature pumpkin beer flavor.


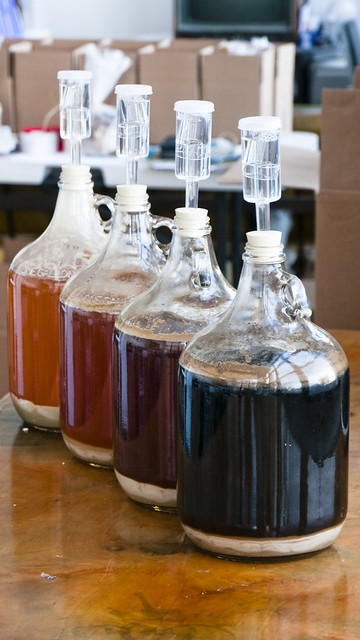
Pumpkin ale - image courtesy of Google image search


As an avowed advocate of using actual pumpkin in pumpkin ales, I have to say that the idea that actual pumpkin contributes nothing isn't true at all. Once I first brewed my pumpkin ale, I spent the next five years perfecting the recipe, and have brewed it every year for the past fifteen years. I notice a very significant difference between pumpkin ales with actual pumpkin and those without it; you just have to know how to treat the pumpkin right.


A few tips for anyone interested, both generally about brewing pumpkin ales, and specifically about how to get the best flavor our of real pumpkin:

1. Always use pie pumpkins. I have found that a large majority of people who insist that using real pumpkin doesn't add anything to a pumpkin ale don't use the right pumpkins. Most varieties of pumpkins -- and particularly the standard jack-o'-lantern pumpkins that are everywhere in the fall -- have almost nothing in the way of any desirable flavor or sugars. Pie pumpkins, on the other hand, have been bred for culinary uses. They're sweet, and spicy, and a little nutty. They have more in common with butternut squash than they do with jack-o'-lantern pumpkins. If you can't get them, then there really is no point to using real pumpkin.

2. Use fresh pumpkin. This one isn't a concern for flavor, but it makes a huge difference logistically. Pumpkin puree is gloppy, gluey, sticky stuff. It's great if you're making a pie, but tossing it in your mash or your boil is a nightmare. You have to wait longer to start your beer if you're using whole pumpkins, but it's more than worth it in my mind.

3. If you want some 'gourdy' flavor in addition to the flavor of cooked pumpkin and pumpkin pie, start with pumpkin in your mash. Cube about a pound or two into roughly one inch sections, par-boil it, and toss it in at dough-in. Personally I don't use this method, but people who enjoy the raw pumpkin flavor should do so.

4. I prepare my pumpkin for the boil by cubing it (again, roughly in one inch sections) and baking it until it is well browned. Usually this takes about an hour at 375° F, tossing the pan every fifteen minutes or so for even caramelization. After it's browned, I toss it with a mix of brown sugar, a little bit of water, and some spices, and put it back into the oven for about ten minutes. It's almost like you're making caramel corn. After that, I toss the pumpkin into the kettle at the start of the boil and let it go for the full hour. Some people insist that this is a bad idea because it will give you cloudy beer -- and you should only use pumpkin in the mash to get the starches converted -- but I've never found this to be true.

5. The spices. This is incredibly important. Most of the changes I made while I was still developing my recipe involved getting the balance of spices right, both in the actual spice blend and in how much to add to the beer. I like a spicy pumpkin ale; I add a tablespoon of my spice mix at burnout. This is more than most people use, and if you've never brewed a pumpkin ale before, you may want to start with less. You can always brew a spice tea and add it when you bottle or keg if you find that you want more spice character.

6. Secondary. People do it all the time with fruits, but they never think to add pumpkin in secondary. I've only heard of a handful of other people doing this, but if you really want to see the benefits of using real pumpkin instead of just pumpkin pie spices, you need to do this. Take two to three pounds of finely cubed (roughly half inch pieces) pumpkin, caramelized as before in the oven, then candied with some molasses and maple syrup in a pan on the stove. Leave it in the fermentor for about a week, then transfer straight to the bottle or keg.

7. One more thing. Keep your IBUs down. I've seen pumpkin ale recipes stretching into the 30-40 IBUs range, which is way too high in my experience. My recipe sits at 13 IBUs, as I've found that when you go much over 15 or so, the hops start to clash with the spices.

My personal pumpkin ale recipe follows below. The site's formatting means that you'll need to view the recipe page for full details on the spice blend, the mash temps, and the other recipe details.


Batch Size (gallons) 5
Efficiency 75%
Recipe type All Grain
Style 21A. Spice, Herb, or Vegetable Beer
Original Gravity 1.057
Final Gravity 1.014
ABV 5.64% (basic) / 5.64% (advanced) [what's this?]
IBU 13
Color 14 SRM
Boil Time 60 min

Yeast Wyeast 1056 (American Ale)

Fermentables
Name Amt Pct SRM
Pale Malt, Maris Otter 8 lbs 84.2% 3
Biscuit Malt 1 lb 10.5% 23
Munich Malt 8 oz 5.3% 9

Hops
Name Amt Time Alpha IBU
Fuggles (Boil) 1 oz 60 4.5% 13

for complete recipe (with details like mash and fermentation temps), click here