Friday, February 12, 2016

Enzymes in Beer: What’s Happening In the Mash

#beer www.brew-boss.com Electric Homebrew Equipment #BIAB
Enzymes in Beer

As #homebrewers, we’re usually never satisfied until we know how things work. We constantly ask why and how something is done until we understand the basic concept. When you start brewing #all-grain, you hit a certain temperature to hit a specific characteristic because you were told to do so. You start picking up on words like alpha-amylase, beta-amylase, mash out and protein rest, and now you’re more curious than ever about what’s going on in the mash.

Here we’ll discuss the #enzymes in beer, which convert the starch in malt into soluble sugars. By understanding and making enzymes work for you, an all-grain brewer can control a multitude of components in their beer. Here is a list of the attributes of a beer that can be controlled during the mashing process:

  • Aroma
  • Flavor
  • Body
  • Overall mouthfeel
  • Attenuation
  • Color
  • Alcohol content

What Are Enzymes In Beer?


Enzymes are proteins that are found practically everywhere—your saliva and digestive system, plant photosynthesis, and most importantly, your livers. They have an important role as a non-living biomolecule because they catalyze biochemical reactions. Each enzyme is made up of several thousand different amino acid chains which take on specific shapes suited for specific jobs. In other words, they make reactions occur quickly and at the temperatures of living organisms. They join molecules together, take large molecules apart and rearrange molecules into something different.

Each biochemical reactions is catalyzed by a very specific enzyme. The molecule the enzyme acts on is called a substrate, and the enzyme is usually named after the substrate (i.e. Beta-Glucanase acts on Beta-Glucans). Just know that the enzyme’s shape is fragile and can be damaged by a multitude of factors, thereby rendering the enzyme unable to act as a catalyst. This is called denaturing the enzyme, and once it’s been damaged, it’s very difficult to renature it.

The rate at which the chemical reaction occurs is affected by temperature, enzyme and substrate concentration and pH. Enzymes catalyze reactions more quickly as temperature increases in their specific range. But, they’re also denatured by heating above their specified range, and reach peak activity just before they are destroyed.


Mashing Enzymes In Beer


All the enzymes you’ll need for conversion are present in the final malt. The malting process develops enzymes that reduce starches and proteins during malting and mashing, which helps create better clarity, head retention and body.

For homebrewers, we are concerned with the activity of two primary enzymes in beer: alpha- and beta-amylase.

Alpha-amylase breaks down large, complex, insoluble starch molecules into smaller, soluble molecules for the beta-amylase. It is stable in hot, watery mashes and will convert starch to soluble sugars in a temperature range from 145°F to 158°F.

Remember that the temperature range is important because as you reach higher temperatures, the denaturation process increases and enzymes are mostly gone within five minutes. Pouring grains into hotter “strike” water to account for temperature drops can cause problems, too. Exposure to hotter temperatures even for a few seconds can affect enzymatic activity, so make sure to get your temperature down as quickly as possible.

Beta-amylase is the other mash enzyme capable of breaking down starches and creating soluble sugars. After the alpha-amylase enzymes create smaller soluble molecules, the beta-amylase enzymes create most of the fermentable sugars by breaking down starch to create maltose, glucose and maltose. These enzymes help create lighter bodies and more alcohol and are most active from 131°F-149°F. As the temperature approaches 149°F, these enzymes are operating extremely fast, but are also being denatured quickly. In short, if the mash is held at a temperature within the beta-amylase range, then a greater proportion of soluble sugars will be maltose and thereby be more fermentable.

Temperature Rests in the Mash


Mash temperatures play a very critical role in determining the body, fermentability and developing the aroma and flavor profile of your beer. Depending on the style of beer brewed and the type of malt and/or adjuncts used, a different mash temperature or a combination of temperatures and schedule may be best for the brewing beer.


Influencing Factors on Denaturing Enzymes in Beer


Alpha and beta-amylase act together to degrade starches to produce a range of soluble sugars in the wort. Below a certain temperature (149°F), alpha-amylase activity is low and so the large starch molecules remain insoluble because the enzyme is unable to break them up. Same goes for above a certain temperature (150° F), beta-amylase activity is hindered, limiting the amount of fermentable sugars for the wort.

These temperature ranges are small, and leaves little room for a brewer to operate and influence the types of sugars that end up in the wort. A lower temperature results in a wort that is more fermentable but may yield slightly less, while a higher temperature will yield less fermentability but increased extract efficiency. Here are some important influencing factors on denaturing enzymes in beer.
  • Enzyme and substrate concentration
  • Temperature
  • pH

Enzyme & Substrate Concentration


Enzyme and substrate concentration is how concentrated your mash is, and mostly dependent on mash thickness. Although not a critical factor, mash thickness is still important to consider when you start mashing. A thick mash is anywhere between 1-1.25 quarts water/pound of grain.

A thick mash gives a quicker starch conversion and is more beneficial for protein breakdown because it offers better protection for your enzymes (i.e. beta-amylase). It’s more suited for step mashes because enzymes are not denatured as fast by temperature increases. A thin mash is anywhere around 2 quarts water/pound of grain, which dilutes the concentration of enzymes and thereby gives them less protection, a slower conversion, but provides a more fermentable mash because the enzymes are not inhibited by a higher concentration of sugars.

Temperature


Each enzyme has an optimum temperature, the temperature at which the enzyme is most active. Once the temperature goes below or above the temperature range, you affect the productivity of that enzyme. Think about a cold morning. You’re lethargic and slow, but as it warms up you start to move faster and your energy improves. However, if it gets too hot, you start to slow down again. This is essentially how enzymes work. More specifically, the active site on the enzyme changes and the substrate that pairs with the enzyme will no longer fit and becomes inactive.

pH


Mash pH is another factor that affects the activity of various enzymes. It should fall within a range of about 5.2 to 5.5 for the primary enzyme activity. If you mash using distilled water, you’ll end up with a pH in between 5.8 and 6.0. Adding calcium ions to the water will cause the mash pH to drop down into the 5.5 to 5.6 range, with additional calcium ions dropping it further. You’ll want to use a pH strip to calibrate your water pH level as you mash.

Key Take Aways
  • Although enzymes are fragile, they are reusable and generally affected by temperature and pH.
  • Enzymes have an optimum temperature and pH that they are most active.
  • Enzymes have a significant affect on finished beer and are also present in yeast cells.
  • Understand the primary mash enzymes (alpha and beta-amylase) and their optimal temperature and pH levels to achieve best results.
  • It’s important to understand the factors that denature enzymes.
  • Know what you want to accomplish before deciding your mash technique.

Sources: “Making Enzymes Work For You” by Randy Scorby, BJCP Continuing Education Director and Grand Master II Judge, 2015 National Homebrewers Conference Seminar

Thursday, February 11, 2016

Brew-Boss Product Release: Stainless Steel Ripple Heating Element


#Brew-Boss introduces it's newest product! We have developed a stainless steel #ripple heating element that has an integrated L6-30P plug and a 1.5 inch Triclamp ferrule. The element is ULWD, 5500 watts, 240 volts. We also have 120 volt 1500 watt foldback elements as well with teh same L6-30P and Triclamp ferrule. This element eliminates the issues when trying to build your own electric brewing system related to how to connect the wires to the element and properly enclose the connections and properly ground the element. This element solves all those problems. All you need to do is add an L6-30R receptacle on your controller and install a 1.5" triclamp ferrule on your kettle. Of course the Brew-Boss kettles and controllers are natural mates to this heater!


Order yours today!
http://www.brew-boss.com/ULWD-L6-30P-Stainless-Steel-Ripple-Heater-Element-p/htr-5500-ripple-l6-30p.htm


www.brew-boss.com

#electricbrewing #homebrew #brewboss

Wednesday, February 10, 2016

Understanding Water for Homebrewing


Discussions about water can get complicated fast, especially if you aren’t familiar with hydrology. But there are a few basics that specifically apply to the homebrewer, which can set the foundation for further exploration into the realm of brewing water.

Let’s take a look at the four key aspects of water that relate to homebrewing and how they affect the beer making (and drinking) process.

pH


pH is the measurement of acidity in water. The amount of concentrated hydrogen ions determines where a sample of water will fall on the 0-14 pH scale. A neutral reading (seven) indicates there is an even balance of hydrogen and hydroxide ions. Anything below seven treads into acidic territory, and above seven towards the base side of the scale.

The affects of pH begin in the mash and follow through to the last sip of a pint. pH influences everything from enzymatic activity and fermentability to color and taste of beer, making it a crucial aspect of water. However, it is a common misconception that water must be a certain pH prior to brewing. While this is somewhat true, the real concern is achieving a certain pH in the mash and ultimately in the kettle. After all, mash pH directly affects kettle pH, and kettle pH ultimately impacts how the character of beer will be perceived on the palate.

Ideally, mash pH should be in the range of 5.1-5.8 (5.2-5.5 being optimal). When lautering, it is key to ensure that the pH of the runoff is not above 5.8, since this is when astringent, lip-puckering tannins can make their way into the kettle. Many brewers who have issues with runoff pH being too high will use phosphoric acid to acidify the sparge water. The final beer should be in the 4.2-4.4 pH range to achieve optimal taste and stability. Brews above 4.5 will likely exhibit heavier, harsher character with a lacking freshness. Below 4.0 can start to create a thin drinking experience and even add an unintentional tartness.

Hardness


Chances are you’ve heard of “hard water” before, especially if you live in an area that has hard tap water. Hardness was originally developed to indicate how difficult it is to get soap to lather in the water sample, which is not all that useful when it comes to homebrewing beer. However, hardness can also be used as an indicator of the amount of calcium and magnesium ions in water.

Hardness is categorized as either temporary or permanent. Temporary hardness is a signifier as to how much calcium carbonate is present, which can be reduced by boiling the water and allowing the calcium carbonate to precipitate out. Permanent hardness on the other hand is based on the amount of sulfates and chlorides present.

While hard water might not be pleasant to drink, the calcium present is key to brewing, so it’s not typically a priority to reduce the hardness of brewing water.


Alkalinity & Residual Alkalinity


Alkalinity is a measurement of how much a water sample will resist a change in pH, otherwise known as water’s buffering capacity. Hydroxide, carbonate and bicarbonate ions primarily contribute to alkalinity, which undergo reactions with acidic substances that increase water’s pH value. On water reports, alkalinity is often times recorded as the amount of bicarbonate or calcium carbonate.

Because much of the United States water sources have medium to high alkalinity, it can cause the mash pH to increase, which can cause mash efficiency issues and carry over into the final beer as an overall dullness and other unfavorable characteristics.

The alkalinity remaining in solution after phosphates present in malt react with the calcium and magnesium water, which precipitates out insoluble salts lowering the pH, is termed residual alkalinity. In the end, it is largely the residual alkalinity and the acidity of the malts being mashed that will determine the mash of the pH and affect the outcome of the final beer.


“Flavor” Ions


Sometimes called stylistic ions, flavor ions are the most important when it comes to affecting beer character. Flavor ions include sodium, chloride and sulfate, while calcium and magnesium mainly affect hardness and carbonates and bicarbonates affect alkalinity. Together, all three groups affect pH and mash chemistry, which impact the flavor of the final beer.

Calcium is arguably the most important ion for brewing. It affects enzymatic activity in the mash, protein coagulation during the boil and benefits yeast health. Clarity, flavor and stability of the final beer all rely on calcium. Ideally, the mash should have 50-200 ppm or calcium.

Magnesium also affects mash pH, but to a lesser extent than calcium. It mainly enhances flavors and sourness when present at lower levels. 10-30 ppm of magnesium will help this flavor accentuation and act as a yeast nutrient, but as concentrations exceed 50 ppm, an unpleasant sour-bitterness and astringency can become apparent.

Sodium also helps round out flavors, particularly accentuating malt sweetness, at an ideal concentration of 70-150 ppm. In higher concentrations (>200 ppm), sodium can add harsh salty-sour notes and potentially become toxic to the yeast.

Chloride accentuates a fuller body and sweetness in beer, particularly in malt-forward styles. In appropriate quantities it will also improve stability and clarity, but in excess it can cause a harsh drinking experience.

Sulfate, on the other hand, accentuates a dry crispness and hop bitterness in beer, particularly in hop-forward styles. If concentrations exceed appropriate amounts, a harsh, sulfury quality can be instilled and the hop bitterness can come across as harsh.

Bicarbonate is the primary source of alkalinity in beer. Its role affects the pH, more specifically the ability to alter the pH, of wort and ultimately the final beer.

Sources: Brewing Better Beer: Master Lessons for Advanced Homebrewers by Gordon Strong; The Oxford Companion to Beer by Garrett Oliver et al; Water: A Comprehensive Guide for Brewers by John Palmer and Colin Kaminski; “Water: The Role of Residual Alkalinity” by John Palmer (July/August 2008 Zymurgy)

Monday, February 8, 2016

How to Build a Hop Oast

#beer #hops #brewboss www.brew-boss.com Electric Homebrew EquipmentDIY-hop-oast-featured


Hop Oast

One of the more substantial costs for homebrewers from batch to batch is hops, especially if you want to homebrew lots of American styles—IPA and Double IPA (and variants) in particular. Finding a way to keep costs down on hops isn’t as simple as re-pitching yeast or filling spray bottles full of Star-San. Though some brewers have supposedly dry hopped a beer and then put those hops into the kettle for bittering another brew, I’d recommend not doing this as you don’t know what kind of bittering you will get, and what do you do with the hops between brews to ensure they don’t spoil?

We’d like to suggest another, more effective ways to save money on hops. I like to buy hops in bulk, but this can still be costly. So I decided to grow them. Check out past posts on and learn how to grow hops and harvest and prepare hops for brewing. This post explains how to build a Hop Oast to dry hops.


Construction

  • Parts Needed: (around $30)
  • 7 pieces 2x4x8′ kiln-dried fir
  • 48″ x 7′ aluminum screen material roll
  • 3″ wood screws (56)
  • Staple gun
  • Box knife
  • Cordless drill

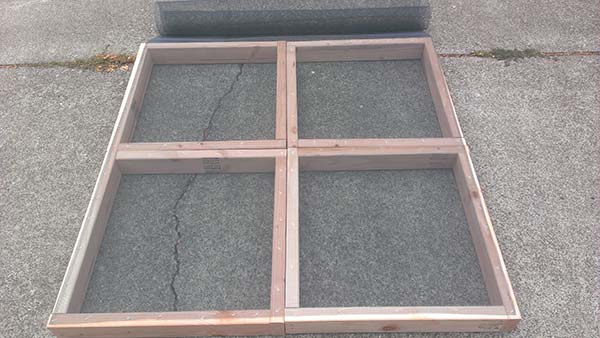
Begin by cutting each board into 4 – 23″ pieces (keep the scraps). I just had the guy at Lowes do this for me. Take each of the pieces and begin screwing them together using two screws to each joint. Align each joint so that they are flush on top and bottom, and that the end of one board is flush with the side of the next at a 90° angle. Don’t go overboard to insure a perfect angle as it will self align when you make the last connection. Once you have all four corners drilled together, set the tray aside. Repeat this until all seven trays are built.


After you have all seven trays built, set one aside. Place the others together two wide, and three tall on a flat surface. I did this on my driveway. Once they are flush and straight, roll the screen out over the top of them. The 48″ width should be a perfect fit across two trays, and the 7′ should easily cover the three trays up. Once you have the screen spread over, use the staple gun to attach it to the corners, then work your way around all of the trays along every side rail and every corner until each tray is fully attached to the screen.


Now take your box knife and insert the blade between two trays through the screen and cut along the separation until all the trays are cut apart. You will have a little hangover from the edges, feel free to clean them up with your box knife, I just left mine for now (more important to get the hops dry when you build this after the bines have been cut down). It would be good to glue along the inside edge and allow it to dry to seal the trays from allowing hops to get stuck between the screen and box frame, and it will make cleaning easier after you are done with them.

After they are separated, take the small scrap pieces and use them to raise a box fan off of the ground a few inches. This will give you air flow to go up and through your hops. You will want to pick a place where there will be some heat, air flow for the humidity to escape, and that is not in direct sunlight. I used my garage and put a space heater next to it to blow under the fan since we had a cold front hit when I got the hops picked. I didn’t let it run unattended. I only did this on the weekend while I was home as I did not trust the space heater to run while I wasn’t home or while asleep.

Place the screenless tray on top of the box fan as a diamond for use as a base. If your box fan is large enough, you can stack it on top at the same angle as the box fan edges, but for mine, it worked perfect to turn it slightly so that it became a diamond to the square fan, creating an eight pointed star if outlined. This empty tray with no screen allows a little extra flow for the fan so it isn’t blowing directly against the screen and hop bed which may cause it to overheat.

Function

At this point, you should pick your hops into sacks and weigh them. It is always more fun to have a helper. Place a single variety into a single (screened) tray. Once your tray is full (about 1/3 up the side), set it on top of the base tray over the fan so that the tray edges align perfectly over each other. Continue to pick your hops, fill your trays and stack them up. Leave one of the trays empty to the side. I used a piece of masking tape to mark each tray to know which variety was in which tray. Next year, I may just add a plastic sleeve to the side and make up cards with the names of the varieties I grow to sort them that way (it will look much nicer).
Once your trays are filled with hops, place the last empty tray on top. This tray’s screen will keep things from falling into your hops, and keep the stray hop leaves in place to make clean up a little easier. At this point, turn on your fan to medium. Low will take longer, and high would be faster, but you don’t want to have it so high that you end up blowing any of the lupulin out of the hops.

Leave the hops to dry for a few days, gently fluffing them up every 12 hours or so to ensure even drying. I also swapped trays out so that the bottom trays became middle trays, top became bottom and middle became top. I continued this rotation whenever I fluffed them. They say that the hops should be about 20 percent the weight they were when you picked them. If you got one pound of hops, you should have around 3-3.5oz of dried hops. Another telling sign is that when you take a hop cone and bend it in half the strig in the middle should snap clean. If if bends and moves back then they are still too moist.

Saturday, February 6, 2016

Fly Sparging vs Batch Sparging

www.brew-boss.com Electric Homebrew Equipment


To the new #homebrewer, understanding the differences between batch sparging and fly #sparging can be confusing. For the seasoned masher, deciding which is a better process for your homebrewing set-up can be an even greater challenge.


What is Sparging?

Sparging is part of the mashing process in homebrewing. After the initial mash step, sparging is used to rinse the grain bed of as much sugar as possible for the most efficient mash. The tricky part is sparging in such a way that the maximum amount of sugars are extracted and lautered into the boil kettle without bringing along tannins from grain husks which show up in beer as unpleasant astringency.

For both batch and fly sparging, it is important to keep sparge water temperatures between 165-170°F (74-77°C) to reduce tannin extraction while still effectively rinsing the grains. Now let’s look at the two most common sparging methods.


Fly Sparging


Also known as continuous sparging, fly sparging is a method used by most commercial breweries and all-grain homebrewers. Commercial brewers fly sparge largely due to the claim that the method has higher efficiency than other sparge methods. While a few points difference in efficiency may not mean much to a homebrewer, commercial brewers are trying to make high quality beer at an affordable price, so higher efficiency means less malt is needed, and ultimately less money spent.

However, fly sparging takes considerable time and requires some special equipment. The process is conducted by slowly sprinkling sparge water evenly over the top of the grains while the mash is slowly lautered into the boil kettle. This process of continually adding the sparge water while also lautering is where the name “continuous sparging” derives.

The entire process can take anywhere from a half hour to two hours and requires the ability to pump sparge water into a device known as a “sparge arm,” which is rigged to evenly distribute sparge water over the top of the mash kind of like a shower head.

The depth of the grain bed is crucial in successful fly sparging, along with the rate of flow and even distribution of sparge water. Too shallow of a grain bed will cause wort to come out murky as there is not enough grain to settle and act as a filter. Too deep of a grain bed can cause the dreaded stuck sparge. Generally, 4-8 inches is ideal. Flow rate is also important. If the flow is too fast it can create a vacuum around the false bottom that will also cause a stuck sparge. The flow should be about a trickle and ideally the sparge water is being added at about the same rate as the wort being lautered out of the mash and into the boil kettle.


Batch Sparging


Batch sparging is, for the most part, strictly a homebrewing method. However, batch sparging is likely a descendant of “parti-gyle” mashing, which was a technique popular in England during the 19th century. Parti-gyle brewing is the process of completely draining the mash and using those runnings for one beer, while using the sparge runnings for other beers. Batch sparge uses the same general method of completely draining the mash before sparging, but all the runnings are combined in the boil kettle to be transformed into one beer.

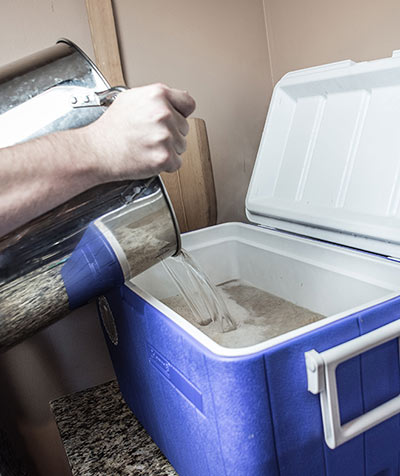
Homebrewers have taken a liking to batch sparging because it requires minimal equipment to conduct and takes considerably less time, compared to fly sparging. All you need in addition to your extract equipment is a cooler converted into a mashtun and an extra pot to heat up the sparge water.

After the mash is complete, collect a few pitchers of wort and slowly add it back to the mash tun to promote a settled grain bed that will act as a wort filter. Once the bed is settled, lauter the wort entirely into the boil kettle, shut the valve of the mash tun, add in the sparge water and stir. After 10 minutes or so, collect all the sparge into the same boil kettle as the mash wort. Some people do one sparge step, others do multiple.

As mentioned in the fly sparging section, batch sparging is said to have lower efficiency than continuous sparging, but for homebrewers making 5-15 gallon batches, it really isn’t much of a difference to grab some extra grain. Some homebrewers would also dispute that the difference even exists. Batch sparging can also fall victim to stuck sparge, especially when gummy malts like wheat are involved. Using these techniques toavoid or fix a stuck sparge can remedy the headache.

So Which Should You Choose?

Both sparge methods have their ups and downs, and either can lend themselves perfectly to a homebrewing setup.

Fly sparging might be best for those homebrewers making larger batches in order to save a little cash on ingredients. Prospective pro-brewers who are honing skills as homebrewers may also benefit from continuous sparging since this is typically the method used by commercial breweries.

Batch sparging, on the other hand, is great for the all-grain newbie and homebrewer on a budget. The batch sparge process requires minimal equipment, only adds 10-20 more minutes of time to the mash process and leaves little room for major snafus.

In the end, it’s up to you which to pursue, but either way we’re glad you’re making your own beer at home! Tell us in the comments which sparge method you use and why!

Source: How to Brew by John Palmer

Thursday, February 4, 2016

Measuring IBU's in Beer

#homebrew #BrewBoss

As many of you know, the #alphaacids found in #hops are what is responsible for the hop flavor and bitterness in beer. Alpha acids, usually reported as a percent, is the variable most people use to calculate the #IBU of the beer they are making. It isn’t just one acid, the term “alpha acid” refers to a group of acids found in hop flowers that include humulone, adhumulone, cohumulone, posthumulone, and prehumulone. When hops are added to boiling wort, an isomerization happens in the boil and the alpha acids are converted to iso-alpha acids. Since the most common alpha acid is humulone, the most common iso-alpha acids are cis- and trans-isohumulone.


Isomerization of alpha acid humulone to iso-humulone

There are several ways to mathematically estimate what the IBUs of a beer are going to be based on the rough alpha acid concentration reported on the bag of hops you use. The three most popular calculations are the Rager, Tinseth, and Garetz equations. I personally use the Tinseth equation.


Tinseth Equation

I like the Tinseth equation because it takes into account the gravity of wort, which affects solubility of the acids. You can read all about that sort of thing on Greg’s page. Other calculations often ignore this factor, which could lead to significant differences in expected and resulting concentrations of alpha acid. I believe many online calculators use the Rager equation which also takes into consideration gravity of the wort.


Rager Equation

So while researching how to measure IBU, I found an old protocol from the 1960s on how to measured the concentration of iso-alpha acids (and therefore IBUs) of a beer. First, I ordered some 2,2,4-Trimethylpentane also known as isooctane.


Trimethylpentane

This method of measuring the amount of isomerized alpha acid in solution is not the current method used (I’ll write about that one later) but it is an older method that is easy to do. The principle here is to do an organic extraction of the beer. By mixing the isooctane with the beer, the two naturally separate, like oil and water. The isooctane “floats” on top of the beer but by vortexing the solution for seveal minutes, the organic components of the beer can be moved to the organic phase, the isomerized acids are soluble in the isooctane and get absorbed into that phase. Then the task becomes measuring how much alpha acid is in the organic phase. This was done by doing a spectra of the solution and measuring absorbance at 275 nm, a wavelength of light absrobed by the iso-humulone. Knowing that number and the extinction coefficent of iso-humulone, calculating the IBU was easy after there.

Protocol


  • In a 15 ml conical tube mix
  • 1 ml of beer (degassed)
  • 100 μl of 3 M HCl
  • 2 ml of iso-octane


Vortex for 2 minutes to make an emulsion of the organic and aqueous phases. This shaking allows for the extraction of the acid into the organic phase. Allow the phases to separate and remove organic phase. Read absorbance at 275 nanometers against reference of iso-octane.

Calculation is EBU (European bittering Units) = 50 * A275

I cannot locate it now, but the paper I was using for this protocol had a table that converted EBU to IBU. I tried to Google it but there seemed to be a disagreement online if there is a difference. The paper I was using was from the 60s so there was likely a correction added for the coversion from metric to English units. That is the likely difference although the numbers were really close. Once I find it, I will take a photo of the table and post it on here (hopefully tonight).

UPDATE: I found it.


Table comparing IBU and EBU

I decided to test three samples, two Galaxy saisons I’ve brewed recently and a homebrew from a friend that we both agreed was really bitter.
Homebrewed examples
Beer Calculated IBU A275 Measured IBU (EBU)

Galaxy Saison Dupont 40 0.946 39.6 (47.3)
Galaxy Saison Blaugies 35 0.900 37.4 (45)
Niciu IPA unknown 4.31 (crazy bitter beer) >150 (215)

The Niciu IPA, provided by a friend and fellow homebrewer, was made for an “unreasonably hopped” club competition for the DC Homebrewers. The original extraction reading was “out of range” for the instrument I was using, meaning it was higher than “3”. I made a 1 in 10 dilution of the organic and got a reading of 0.431….this is likely not an accurate reading for a few reasons but this is a crazy bitter beer, so I marked it in the table as >150, apparently it is out of the range I can detect.

It shouldn’t surprise me that my numbers were close to the deconvulated IBU numbers given by the table in the paper…I was surprised how close. I’m also quite shocked with the result of the Niciu IPA. I think one of the problems with this technique is the linear range and reproducibility. I’m going to test a lot more samples in the coming months but overall this is a relatively silly technique. It requires pipetting the same amount of isooctane into several samples, there are several variables that might affect the outcome of the extraction, such as temperature and time mixing. I tried to keep these things as similar as possible but even with just three samples I ended up with variation in the organic phase, the Niciu IPA had a precipitate on top of the organic phase. Obviously if this were a lab, the samples would be tested multiple times to get enough data to do some stats but I’m not going to bother.

I hope people found this interesting, I loved doing it. Hopefully I can research additional techniques for measuring hops contributions to beer and write about those as a follow-up.

“Some people wanted champagne and caviar when they should have had beer and hot dogs.” –Dwight D. Eisenhower
Source:
http://phdinbeer.com/2014/09/16/beer-chemistry-1-measuring-ibus-in-beer/

Tuesday, February 2, 2016

Happy Groundhog Day!

Stuck in a rut? Ready for a newer, better way to make your own beer? Then you are ready for the Brew Boss Electric Homebrew System! www.brew-boss.com


#homebrew #beer #EBIAB #electricbrewing