Wednesday, November 25, 2015

4 Ways to Wood-Age Beer

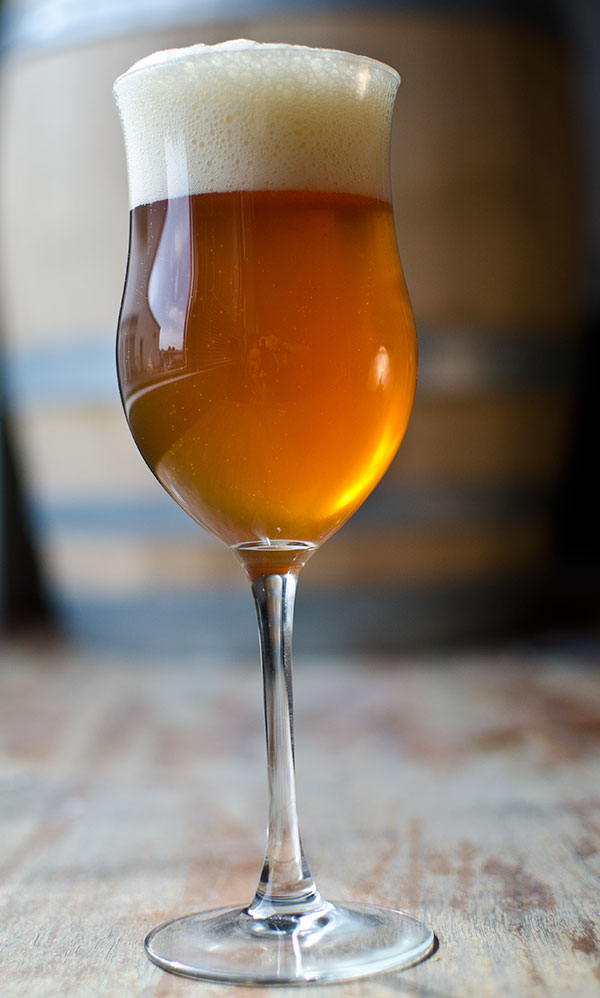
Barrel and wood-aged beers seem to be ever-growing in popularity among home and craft brewers. Aging beer on wood creates interesting complexity which varies due to wood type, level of the wood’s “toast” and the length of time the wood is in contact with the beer. It can bring your favorite homebrews to a whole new level!
Aging beer in an actual barrel is typically hailed as the best way to impart wood character, and many homebrewers and homebrew clubs are creating outstanding beers with this technique. But we decided to take a look at four other options to add wood complexity in your next homebrew without having to use an actual barrel.

Toasting Wood

Before jumping into different wood options, it’s important to understand what “toast” means. Whether barrels or chips, woods used to age beer (or other alcoholic beverages) are typically treated through a “toasting” step, which involves scorching the wood to a specific level to achieve a certain character in the intended beverage. Wood can be lightly toasted, which typically lends fresher wood characters with hints of fruit, all the way to heavy toasting which brings out more spicy, smoky wood character.
The thickness of a wood can also create variations in the toast level. The thicker the wood, the more variation in toast, generally speaking. This is beneficial in that you can create more complexity by extracting qualities from various toast levels of wood instead of just one.

4 Ways to Wood Age Beer
Barrel Aged Beer1. Chips

Wood chips are very thin “flakes” of wood, sort of like the large pieces of wood you may see in garden mulch. Since the chips are quite thin, the level of toast shows very little variation. The thinness paired with a high surface area also makes for a very fast extraction period compared to other methods. In some instances you may only need to age homebrew on wood chips for a few weeks. However, some homebrewers note that wood chips often times impart a very one-dimensional wood quality in beer.

2. Cubes

Cubes are similar to wood chips, except they are considerably thicker. During the toasting process, the thickness of cubes causes a variation in toast levels throughout wood. These different toasts can instill interesting wood-aged complexity to homebrew, akin to actual barrel-aged beer, especially compared to wood chips. Achieving quality wood character can take anywhere from a month to a year.

3. Staves

A stave is an individual piece of wood used to build a barrel. Some homebrewers use the whole stave, while others will chop it up into smaller pieces to fit into the fermenter. Keep in mind that aging the same beer for the same amount of time on an intact stave and a chopped up stave will likely instill different wood character, albeit similar. The toast level will depend on the barrel, but there tends to be some variation due to the relative thickness. Staves can take anywhere from a month to a year depending on the preferred extraction level.

4. Spirals

A spiral is a winding ribbon of wood surrounding a wood core–think a large drill bit. Wood spirals allow for a high surface area and variation in thickness to capture different toast levels. Spirals can be great for instilling complex wood-aged qualities, typically with a six-week to one year extraction period.

Monday, November 23, 2015

6 Tips for Making “Fast Brews”


Whether there is a party around the corner or the kegerator is running dry, you have probably been in a situation where you needed to brew a beer in a week or two. Producing “fast brews” comes with its challenges, but the following five tips will help you make a great beer in a short time span.

1. Stick with Ales

Fermenting lagers requires a prolonged secondary fermentation at low temperatures. Typically, lagers are held at lagering temperatures for anywhere from a few weeks to a few months. This fermentation time stabilizes the beer and ensures any harsh flavors have time to mellow out. The lagering step itself can take longer than the entire brewing and fermentation of an ale.

2. Keep Original Gravity Low

While it is completely possible for bigger beers to ferment in just a few days, it still takes time for high gravity beers to come into their own. The lower the gravity, the greater chance of producing a quality beer in a short amount of time—aim for something below 1.050. British and American session ales generally work well for a fast turn around. Certain styles can be brewed at higher gravity while still turning out a tasty brew in a week or two, such as some wheat or rye-based beers.

3. Utilize Bold Flavors

Even after picking an ideal style with a lower gravity, beers being pumped out in under a week or two can still embody the “green” characteristics common in young beer, such as acetylaldehyde and diacetyl. With sufficient time to mature and condition along with the yeast, these green characteristics will subside. When brewing in a short time frame, ingredients with bold flavors and aromas can be used to mask these imperfections. Darker specialty grains that lend chocolate and roasty notes tend to work well, or a healthy dose of hops.

4.  Pitch Lots of the Ideal Yeast

The key to a quick and clean fermentation is pitching more than enough yeast to effectively convert sugars to CO2 and alcohol, while still precipitating out to create clear(ish) beer. Look for strains with high attenuation and flocculation that produce minimal phenol and alcohol characteristics. Be careful when using Belgian strains, as powerful esters are not always pleasant in young ales. Also, be sure to pitch plenty of viable yeast cells. In fact, you may even want to use up to double the amount of yeast you typically pitch to ensure there is plenty of healthy cells to make quick work of the sugars.

5. Carbonate in Kegs

Bottlers beware. The “quickest” homebrews out there are being served from the keg. Bottle conditioning requires another week or more for the beer to fully carbonate to serving levels. If kegging, beer can be enjoyed shortly after being racked and force carbonated. If you need to bottle, rewind and start two weeks ago!

6. Use the Brew-Boss Electric Homebrewing System

 If you are unfamiliar with the Brew-Boss® home brew system, it is an all electric home brewing system that allows home brewers to brew extract or all-grain recipes with complete and accurate automatic control of temperature and timing. Automated control provides consistent results every time.   www.brew-boss.com
As with most things in homebrewing, the best way to find out what works for you is to brew, test and brew again!

Saturday, November 21, 2015

The Secrets to Better Beer Foam

(Brew on Brew Boss Electric Homebrew Equipment www.brew-boss.com)
There’s nothing like the look of a creamy head on a homebrewed stout or the lacing on a glass after finishing a Belgian ale.  But beer foam isn’t just about appearance. The bubbles from your beer impact carbonation level, aroma, flavor and body.
Beer foam is a complicated and far from understood phenomenon. So, what is foam? In short, foam is a dispersion of a relatively large amount of gas in a relatively small amount of liquid. It doesn’t happen spontaneously—it requires some energy by either agitating the beer (e.g. shaking or stirring) or creating a nucleation site (e.g. scratch on a glass or an engineered device) that allows bubbles to form and rise in the beer, sometimes referred to as “beading.”
So, how can homebrewers improve their beer foam?

maltChoose the Right Malt

Malts high in proteins and dextrin enhance the body and head retention of beer because the proteins act as a structural component in foam.
The malt-derived proteins are typically hydrophobic (water-hating), causing them to move up towards the foam where they encounter other positive foam stabilizing substances, like those from hops.
However, high levels of proteins and dextrins can interact with tannins and compromise clarity, provide more nutrients to spoilage microorganisms, and mean less fermentable extract per pound of grain (which means more money out of your wallet!). Finding a proper balance is the challenge.
Examples of foam-enhancing malts include crystal malts (e.g. Carapils, Carafoam, Caramel malts), as well as wheat malt. There is also some belief that dark malts (e.g. Chocolate) help improve foam stability because of their high levels of Melanoidin, a protein polymer which is formed when sugars and amino acids combine.

Adjust Your Mash Schedule

Head retention depends on the level of proteins in your wort. So, any step in the mash that breaks down these proteins will negatively affect your beer’s foam stability. For example, the typical protein rest at 120 – 130°F (49° to 54°C) is used to break up proteins which might cause chill haze and can improve head retention. However, this rest should only be used when you use moderately-modified malts, or fully modified malts with over 25% of unmalted grain (e.g. flaked barley, wheat, rye, oatmeal) because it will break down larger proteins into smaller proteins and amino acids, thereby reducing foam stability.
In contrast, fully-modified malts (most of what you’ll buy at a homebrew shop) have already made use of these enzymes and adding a protein rest will remove body and head retention. To improve head retention, you would want to favor a full bodied, higher temperature mash, with a main conversion in the 155 – 160°F (68 – 71°C) range, and avoid intermediate protein rests.

hopsHops

For all you hop-heads out there, here’s some more good news—hops help with foam stability. As mentioned above, the bitter substances from hops, isohumulones (a form of alpha acid), will help hold the bubbles together. These hydrophobic substances help form the framework for head formation.
However, this interaction doesn’t happen right away. You’ll notice when you pour a beer, the beer foam is wet and sloppy but changes to almost solid over a few minutes, in which the foam can adhere to the glass surface, otherwise known as “lacing.”
In other words, the longer you wait to slurp down your beer, the better your beer foam and lacing on the glass. Overall, highly-hopped beers should have better head retention, but remember to maintain a malt-bitterness balance.

Nitro Mix

As you may know, some beers are carbonated and poured with a mix of nitrogen and carbon dioxide (CO2). CO2 is relatively soluble in beer and therefore doesn’t promote the formation of bubbles as well as non-soluble gases (e.g. Nitrogen). Nitrogen is less soluble, so it tends to leave the beer and go directly to the foam, which reduces the permeability of gas through the bubbles and causes slower foam coarsening.
However, nitrogen will alter the character of the beer, giving it a creamy, thick mouthfeel and will also take away from some of the beer’s bitterness. Also bear in mind the percentage of each gas will depend on the style of beer you’re serving. Make sure to check what percentages work best with a particular style.

glasswareGlassware

The glass you choose can influence head formation and head retention. A tall, narrow glass is a good choice because it minimizes exposure to ambient air, and reduces the ability for CO2 to escape.
In contrast, if you have a large opening on your glass, there is more air exposure, which allows CO2to escape more easily. For example, many Bavarian wheat beers and Pilsners are served in tall narrow glasses to maintain head formation, retention and overall beer presentation.
This might seem obvious, but many beer drinkers forget about glassware. Your glassware should be “beer clean.” Follow proper cleaning procedures for beer glassware and avoid oil or grease. These substances will occupy space on the surface of the beer and prevent bubbles from forming. So next time your munching down a burger or putting on lipstick, make sure to wipe it off!

Other Factors

The Gush: Sometimes our beer begins gushing out the moment you pop it open. Most veteran homebrewers have experienced this. Next thing you know your pants and floor are soaked. This phenomenon is usually due to overpriming or microbial spoilage. Make sure to carefully measure priming sugar and practice good sanitation and this shouldn’t be a problem.
Temperature: Also, anything that increases the viscosity (thickness) of the beer should prevent foam from disappearing. Since viscosity increases as temperature decreases, colder beer has better foam stability. So make sure you pour your beer at a chilled temperature.

Better Beer Foam Tips

  • Get your carbonation right.
  • Choose malts with high protein levels (e.g. crystal malts, dark malts).
  • Avoid low-protein adjuncts (e.g. corn, rice, sugar).
  • Wheat malts and flaked barley will increase head retention.
  • Bittering hops help with head formation.
  • Sanitize and rinse your equipment well.
  • Depending on the grain, mash at high enough temperatures.
  • Nitrogen- CO2 gas mix can help with foam stability.
  • Avoid fats and oils.
  • Make sure glassware is beer clean.
  • Carefully measure priming sugar.
  • Serve beer chilled.
Overall, if you ensure that you provide your beer with as many foam enhancers as possible, you’ll end up with a delicious, good-looking beer.

Thursday, November 19, 2015

Making Mead for Home Brewers


Making mead with regular home brewing equipment. Mead is simply a wine made from honey, and is remarkably easy to make at home using your existing brewing equipment. 

What is Mead?

Mead is wine made from honey, or a combination of fruit and honey. Mead could possibly be the oldest alcoholic beverage, dating back to 9000 BC (Ref: Wikipedia) or longer, but is relatively unknown to the average American. Mead was widely consumed throughout history – in fact the term “honeymoon” is derived from a tradition of drinking mead at weddings. However a trip to the local wine store will rarely produce more than a handful of bottles on the shelf. Thankfully a handful of small mead makers like Moonlight Meadery are starting to change this.

Mead is a wonderfully complex and great tasting drink. Like beer, it comes in a dizzying array of styles including sweet mead, Pyment (with grapes), Cyser (with cider), Melomel (with fruit), Metheglin (with herbs/spices) and Braggot (with hops). In fact there are over 25 different varieties of mead.

Why you Don’t Need Two Years to Make Mead?

Back when I started home brewing it really did take 1-2 years to complete a batch of mead, and that myth still persists among many home brewers. The reality is that with modern techniques and yeast nutrients, a good batch of mead can be completed in 3 months – which is a bit longer than a batch of beer, but far short of the 18 months it used to take. The secret is to use staggered yeast nutrients as I will describe below.

Mead Making Equipment

If you brew beer, you already have the equipment you need to make mead. You need:
  • A large fermenter or carboy – 6.5-7 gallons is ideal for a 5 gallon batch since you need a little headspace to contain the foaming that occurs during fermentation
  • An airlock for the fermenter
  • A large pot if you want to pasteurize the honey first (not strictly required)
  • A hydrometer
  • Bottling equipment (bottles, bottle capper, bottle caps, bottle filler and tubing). Some people also bottle into wine bottles with corks, but beer bottles also work.
Mead Ingredients

The most important ingredient for making your first batch of mead is honey – you will need 15-18 lbs of it for a typical 5 gallon batch. Unfortunately you can’t just go to the grocery store and buy honey off the shelf – its really not the kind of honey you want. Instead you should try to find a good quality mead making honey variety such as tupolo or orange blossom honey. Often you can find this at your local home brew store or any of the major online brewing supply stores. Another good place is to check out your local honey growers. You can locate honey sellers in your state through theNational Honey Board locator (honeylocator.com).

Water is also important for making mead, as it is with beer. You need good quality drinking water – without excessive hardness or chlorine. If you can make good beer from your local water source, you can probably make good mead from it as well, but switch to bottled water if your local water is excessively hard or out of balance.

The next important ingredient is yeast. The “gold standard” for mead making is arguably 71B-1122 Narbonne White Wine Yeast which is a dry yeast widely used by commercial mead makers. You will need a minimum of 1 gram/gallon but pitching 2-3 grams of yeast/gallon will result in a stronger fermentation. This works out to 2-3 packets of dry yeast (5 gram packets) per 5 gallon batch of mead.

Finally you need yeast nutrients unless you want to wait a year for your mead to complete. The three critical ones are called “GoFerm”, DAP (diammonium phosphate) and “Fermaid-K” and are available from most good home brewing or wine making shops. I personally go with additions of Goferm and Fermaid-K (which contains DAP) but you will find various people use various combinations of the three nutrients staggered over time.

We’ll start with a simple sweet mead (makes 5 gallons):
  • 18 lb of Honey (tupolo or orange blossom)
  • Lalvin 71B-1122 Yeast
  • Fermaid-K and Goferm yeast nutrients
The Mead Making Process

There are two ways to start your mead. One is to pasteurize your honey by heating it, and the other is to simply mix water honey (cold) and then pitch the yeast. I personally go with the cold method (don’t heat the honey) as honey has some natural preservatives built in and is not at high risk of infection. In most cases pasteurization is not needed.
  • Sanitize your fermenter and also any tools (spoons, bowls etc) that will come in contact with the yeast or honey mixture.
  • Mix the honey with 5 gallons of tap water to create a liquid called “must”. Its OK to aerate the water (oxygen is good at this point) by using it directly from the tap. If you are adding fruits or spices, add them at this time.
  • Mix you first yeast nutrient addition (see below) along with a little bit of honey, warm water and yeast to hydrate the yeast. Let this sit for 15-20 minutes before pitching into the must. I generally sprinkle it over the top of the must and slowly mix it in.
  • For yeast nutrients, I mix up equal parts of GoFerm and Fermaid-K (roughly 1 tsp each) and then divide this mixture into four equal portions. One part is added to the yeast during hydration and one part is added at roughly 24 hours after active fermentation has started. Another portion of nutrient is added at 48 hours and then the final portion is added after roughly 2/3 of the sugar has been depleted (i.e. the original gravity has dropped by 2/3 of your target). Mix each portion of nutrients with a little honey and water, as adding it directly to the fermenting must can result in excessive foaming.
  • For the first few days, you can agitate the must with a sterile spoon to liberate some of the CO2 (from fermentation) which will speed the fermentation. It may also add some oxygen, but unlike beer adding oxygen is actually good for early fermentation. You should continue doing this for on the first 3-5 days. Be careful as sometimes large amounts of foaming can occur (as the CO2 is liberated) which can cause your fermenter to spill over.
  • Within 3-4 weeks the bulk of fermentation should be complete, but you need to allow another 8-10 weeks to allow the mead to clear. I recommend a minimum of 2 months before bottling.
  • Bottling mead is no different then bottling beer. Mead can be made either still (with no carbonation) or sparkling (with carbonation). I personally prefer still meads. The only consideration is that mead tends to continue a slow fermentation after bottling, so even if you bottle a mead with no carbonating sugar, it will tend to carbonate over time. To prevent this you need to use Potassium Sorbate on still meads. This will prevent further fermentation in the bottles.

Tuesday, November 17, 2015

Bottling Beer: 10 Tips for Home Brewers

EBIAB www.brew-boss.com / Brew Boss Electric Homebrewing Equipment


Bottling beer can be tedious, which is why many of us eventually make the switch to kegging. Home brewers say that bottling is their least favorite part of the brewing process. To help ease the pain, this week we present 10 tips on bottling your home brewed beer.

1. Inspect your Bottles Before Use – Inspect each bottle by holding it up in front of a window or light source and looking straight down the bottle. Bottles tend to chip and crack either around the mouth or bottom of the bottle, and they also tend to collect mold and other debris at the very bottom. Discard bad bottles to avoid a potential bottle bomb. Choose well made heavier bottles if possible and never use twist off bottles!

2. Remove Labels with Ammonia – Soak recycled bottles overnight in a solution of water and ammonia. After soaking, you will be able to gently rub off most bottle labels with your hands. Be sure to wear rubber gloves and work in a well ventilated area as the ammonia gas can be dangerous.

3. Use a “Jet Bottle Washer” and Bottle Brush – Used bottles frequently have clumps of mold in the bottom that can be difficult to remove. A “Jet Bottle Washer” washer is a device that screws onto the end of your faucet and has a valve on it that activates when you push the bottle over it. A bottle jet will make short work of cleaning most bottles. For stubborn sediment, a small bottle brush will remove the rest. Sanitize your bottles in a high quality sanitizing solution before bottling.

4. Don’t Bottle Directly from the Fermenter – Siphon your beer off the fermenter and into a temporary priming bucket or carboy when bottling. Minimize splashing, as air can easily oxidize your finished beer. Mix your priming sugar in while the beer is still in your priming bucket. This will help reduce the amount of sediment in your finished bottles, and also assure that the priming sugar is evenly mixed into your beer.

5. Use Fining Agents Well Before Bottling – Fining agents help to clarify your beer and reduce sediment in the finished bottles, but they need to be added well before bottling. Additions such as gelatin and polyclar should be added after active fermentation, but 5-7 days before bottling to give them time to settle as much of the excess yeast and proteins from the finished beer as possible.

6. Weigh your Priming Sugar ­- Avoid the habit of just adding 3/4 cup of corn sugar to your beer. Sugars vary widely in density, so one cup of a corn sugar may not be the same as another. Calculate the weight of the priming sugar needed for your target carbonation level using a tool such asBeerSmith or an online calculator and then weigh the sugar or DME before adding it.

7. Purchase a Good Bottle Capper – If you have ever used a cheap bottle capper, then you understand how important this piece of advice is. There are many different styles of bottle cappers, and all can work well, but spend a few extra dollars on a well made capper. Ask your local homebrew store owner which one he recommends. The extra dollars will save you a lot of pain and suffering on bottling day.

8. Oxygen Absorbing Bottle Caps or Not? – Oxygen absorbing bottle caps are a popular item, but are they really needed? Unless you are planning to store your beer for an extended period (a year or more), the answer is most likely no. The oxygen in the headspace of the bottle during bottling is consumed in part by fermentation of the priming sugar. In addition, CO2 is produced during fermentation of the priming sugar that helps protect the beer. As long as the caps are tight and properly sealed, there should be little risk of oxidization.

9. Fill bottles to the Brim – Bottles need the correct amount of headspace (air) at the top of the bottle for carbonation and proper pressure. If you are using a wand type of bottle filler, you can generally fill your bottles very close to the top before removing the wand. This should leave about 1″ to 1-1/2″ of headspace in the neck of the bottle, which will work well for carbonating your beer.

10. Store your Bottles Properly – After capping the bottles, store them at fermentation temperature for at least two weeks to allow proper fermentation of the priming sugar for carbonation. After that, store your beer in a cool place away from light. If you want to clear the beer more quickly, consider laagering (cold storing) your beer in the refrigerator. After use, rinse your bottles clean and store them upside down to make it easy to clean them next time.


Sunday, November 15, 2015

Factors for a Good Fermentation

Brew Boss Electric Brewing Equipment www.brew-boss.com


There are three principal factors that determine fermentation activity and results: Yeast, Wort Nutrients and Temperature.


Yeast Factors

The first step to achieving a good fermentation is to pitch enough yeast. The yeast can be grown via yeast starters or it can be harvested from previous fermentations. When yeast is harvested from a previous fermentation, it should be taken from the primary yeast cake and preferably from the upper layer of the cake or from the secondary. This yeast will have the optimum characteristics for re-pitching. In either case, you should target pitching at least 1/3 cup (75 ml) of yeast slurry to a typical 5 gallon batch of ale or 2/3 cup of slurry for lagers. For stronger beers, OG > 1.050, more yeast should be pitched to ensure optimum fermentations. For very strong beers like doppelbocks and barleywines, at least 1 cup of slurry should be pitched.

The yeast that is obtained from a healthy starter or recently from a prior fermentation will have good vitality and adapt readily to the new wort. With good levels of aeration and nutrients, the yeast will quickly multiply to the numbers necessary for an exemplary fermentation.


Wort Factors

There are two considerations that are needed to ensure that the wort has been properly prepared to support a good fermentation. The first is oxygen supplied via aeration.  The role of oxygen in yeast growth will be discussed further in the Adaptation Phase section later in this chapter.

The second consideration is the level of amino acid nutrients in the wort, specifically referred to as Free Amino Nitrogen or FAN. Malted barley normally supplies all of the FAN and nutrients that the yeast need to grow and adapt to the fermentation environment. However, if the recipe incorporates large amounts of adjuncts (e.g. corn, rice, unmalted wheat, unmalted barley), or refined sugars, then the wort may not have the minimum levels of nutrients necessary for the yeast to build strong cells. It is always advisable to add some yeast nutrient powder to worts that are made exclusively from light extracts because these extracts are typically thinned with corn sugar.

In addition, brewers should be aware that in a wort that contains a high percentage of refined sugar (~50%), the yeast will sometimes lose the ability to secrete the enzymes that allow them to ferment maltose. They will adapt themselves right out of a job!


Temperature Factors

The third factor for a good fermentation is temperature. Yeast are greatly affected by temperature; too cold and they go dormant, too hot (more than 10°F above the nominal range) and they indulge in an orgy of fermentation that often cannot be cleaned up by conditioning. High temperatures encourage the production of fusel alcohols - heavier alcohols that can have harsh solvent-like flavors. Many of these fusels esterify during secondary fermentation, but in large amounts these esters can dominate the beer's flavor. Excessively banana-tasting beers are one example of high esters due to high temperature fermentation.

High temperatures can also lead to excessive levels of diacetyl. A common mistake that homebrewers make is pitching the yeast when the wort has not been chilled enough, and is still relatively warm. If the wort is, e.g. 90F, when the yeast is pitched and slowly cools to room temperature during primary fermentation, more diacetyl will be produced in the early stages than the yeast can reabsorb during the secondary stage. Furthermore, primary fermentation is an exothermic process. The internal temperature of the fermentor can be as much as 10F above ambient conditions, just due to yeast activity. Thus it is very important to keep the fermentor in the proper temperature range; so that with a normal vigorous fermentation, the beer turns out as intended, even if it was warmer than the surroundings.


Brewing in the summertime is a definite problem if you don't have a way to keep the fermentor cool. A trick is to immerse (not completely) the fermentors in a spare bathtup during the summer. The water in the tub is slow to warm during the day even though temperatures would be in the 90's, and at night the water would be slow to cool, even when the temperature dropped to 45 F. In this way your are able to moderate his fermentation temperature between 60-70 F, and the beer turned out great. I have used this method myself with wash tubs and had great success. You can periodically add ice to the water to help keep it in the right temperature range for your beer. If you don't have a way to keep the fermentater cool, and the beer temperature gets above 70-75F (21-24C), the beer will probably suffer from off-flavors, such as very fruity, phenolic or solvent-like flavors and aromas. One of the best ways to control the fermentation temperature is to buy a used refridgerator and plug it into an external temperature controller. After sanitation, fermentation tempeature control is the most important factor for producing a good fermenation and a good beer.


http://www.howtobrew.com/section1/chapter8-1-3.html

Friday, November 13, 2015

Conical Fermenter Advantages for Home Brewing

by BRAD SMITH

Conical fermenters, once out of reach for home brewers,  recently become very popular as companies have started making conicals in small and affordable packages. Many home brew sized conicals have entered the market in the last few years in the sub-$200 price range. I have to say, I’ve been using primarily carboys for many years, but the conical does offer some advantages over a bucket or carboy.

Professional Conical Fermenters

Most modern professional fermentation vessels are cylindo-conical. They are typically cylindrical on the top, but have a conical shape on the bottom, and vary in size from a as little as a half barrel (about 60 liters) to hundreds of barrels (several thousand liters). Professional fermenters are made from stainless steel as it is easy to clean and can be reused almost indefinitely. They all have a valve at the very bottom of the cone which can be used to remove sediment, and also drain the finished beer for bottling or kegging when done. Most also have a second port higher on the cone which can be used to draw samples of beer for measurement or tasting.

The Advantage of the Conical Fermenter


The reason conicals are used almost exclusively in professional brewing is that they have several advantages for beer production:
  • One significant advantage is that a conical is a “uni-tank” which means that you can perform the primary fermentation as well as aging/storage in the same vessel. With a flat bottomed fermentation vessel, you have to transfer the beer to a second vessel to separate the sediment from the beer for aging. However in a conical, you can simply slowly open the valve at the bottom to let the sediment out, but leave the beer behind.
  • Closely related to that is the ability to remove yeast and sediment from the beer easily, and at any point in the fermentation. This makes it easy to reuse the yeast by drawing some yeast off and washing the yeast. This can save you some money in the long run as you can use one yeast vial for several batches.
  • Another advantage is that you can transfer the wort without siphoning, using just gravity as long as your fermenter is higher than your bottling/kegging vessel. Some fermenters with closed tops even allow you to apply CO2 pressure to the top of the fermenter to force the beer out the bottom to transfer.
  • Many conicals are made from stainless steel which makes them easy to clean and maintain. Even a plastic conical can be cleaned pretty easily in most cases.

Using a Conical Fermenter


Conicals are pretty easy to use. You transfer and ferment your wort just as you normally would. Most homebrew sized conicals have an airlock on the top to relieve pressure during fermentation, and you can draw sediment as desired from the bottom of the conical.

When drawing off yeast and sediment you will usually get a mix of beer and sediment – it is rare to get a clean plug of yeast. Its best to draw just a bit of sediment at a time from the bottom over several days than it is to try to remove all of the yeast/sediment all at once. Also you need to be aware that on some conicals, yeast can stick to the side of the cone, so it may require a gentle nudge to get it out. If harvesting yeast for reuse, I recommend that you wash your yeast and store it properly.

When drawing liquid from the bottom of a conical you also need to be aware that some air will enter via your airlock. Make sure you use a two-way airlock that will allow some air in or remove the airlock temporarily. Though adding air to the fermenter is not ideal, it will be fine if drawing off small amounts of sediment as there will still be a layer of CO2 over the beer protecting it, and also some fermentation will still be generating CO2 to push the air out.

When transferring for bottling/kegging, try to separate the sediment first, and once you have a mix that is mostly beer, let the valve run and transfer it all.

An Inexpensive Conical Fermenter

Several of the large online home brew shops are offering conicals now (even in stainless) for a few hundred dollars. If you are looking to get into a conical without a large cash outlay, we’re also offering the new FastFerment conical fermenter for $99.99 (full disclosure – an affiliate). You can learn more about the FastFerment conical fermenter here.


http://beersmith.com/blog/2014/12/30/conical-fermenter-advantages-for-home-brewing/