Showing posts with label wort. Show all posts

Tuesday, August 18, 2015

WORT AERATION – SHAKEN VS. PURE OXYGEN | EXBEERIMENT RESULTS!

Years ago, during one of my frequent moments of homebrew soul searching (i.e., coming up with excuses to buy shiny new gear), I got it in my head that the key missing ingredient in my process was oxygen (O2). Like many homebrewers, I’d been employiong the shake method since I first started homebrewing, a rudimentary process that involves shaking the living hell out of a fermentor full of chilled wort. A couple minutes of this and voila, it’s oxygenated.

As I progressed in the hobby, the shake method began to seem like a less viable option. First of all, it’s difficult to know just how much shaking is required to add the proper amount of oxygen to the wort. Then I had the realization this method relies on dissolving air from the immediate environment into a liquid I would later be ingesting… dirty, contaminated air.
This is when I decided go with pure O2 and was convinced I’d found the missing piece of the puzzle. I bought myself a lovely set-up and have used it for every batch since. I’ve been so committed to the idea pure O2 is an essential component to good beer that I’ve delayed brewing due to an empty tank. And you know what? It was worth it, my beers got better! The forum posts were right, pure O2 really did make a difference. I basked in the glory of my shiny new rig, confident I’d made a worthy investment.
Or at least that’s what I thought at the time.
Years later, I developed a nagging feeling inside, a deep inner questioning about my process– is pure O2 really necessary? Is it really the huge factor I thought it was years ago? Only one way to find out!

| PURPOSE |

To evaluate the differences between shake aeration and the use of pure oxygen on a split-batch of the same beer.

| METHOD |

For this xBmt, I decided to go with a light but aromatic Cream Ale recipe originally intended to be a light, easy drinker with strong hop aromatics. I’d brewed it a few months earlier using all Cascade hops and the result was a surprisingly delicious success. Keg depleted and interested in playing with other hop varieties, I swapped the Cascade for the ever popular Amarillo in this batch. The name pays homage to my organoleptic experience with this beer.

Cat Piss and Cream Recipe

Batch SizeBoil TimeIBUSRMOGFGABV
9 gal60 min7.8 9.71.053 SG1.012 SG5.37%

Fermentables

NameAmount%
Maris Otter14 lbs76%
Instant Rice1.5 lbs8%
Flaked Maize1 lbs5%
Munich (10L)1 lbs5%
Acid Malt12 oz4%
Carapils6 oz2%

Hops

NameAmtTimeUseFormAlpha %
Amarillo2 oz4 minBoilPellet8.5%
Amarillo6 oz40 min steepWhirlpool at 185˚FPellet8.5%

Yeast

NameLabAttenuationFerm Temp
Safale US-05Fermentis77%66°F
This brew day would have been a real struggle due to some leg pain if it weren’t for the assistance of my brew buddy, Maggie, whom I reluctantly agreed to refer to as the Brew Bitch (her request, she’s a wonderful person). Thanks to her doing the heavy lifting, the day went swimmingly. We mashed at 151˚F and recirculated for an hour before transferring the wort to the kettle. After a quick batch sparge, I brought the full volume of wort up to a boil and let it rip for another hour. On a whim, I added the first aroma hop charge at 4 minutes until flameout. Once the boil ended, I was excited to finally test out my new homemade counterflow chiller (CFC).
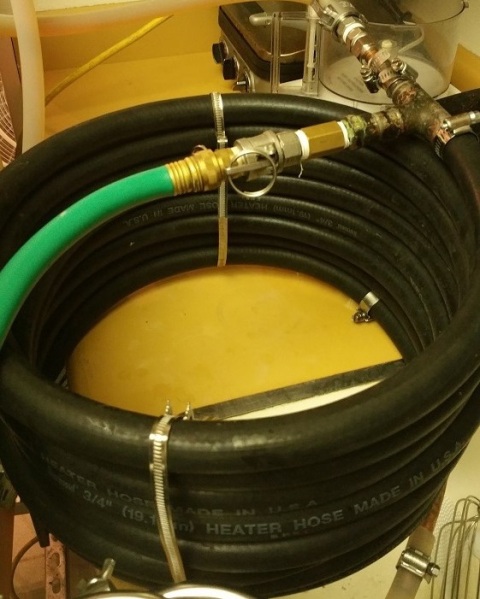
01_pureo2_chiller
I cut the chiller off at 185˚F and added the remaining hops to the kettle for an extended 40 minute steep. The entire batch was then cooled and split equally between 2 corny kegs that would be used as fermentation vessels.
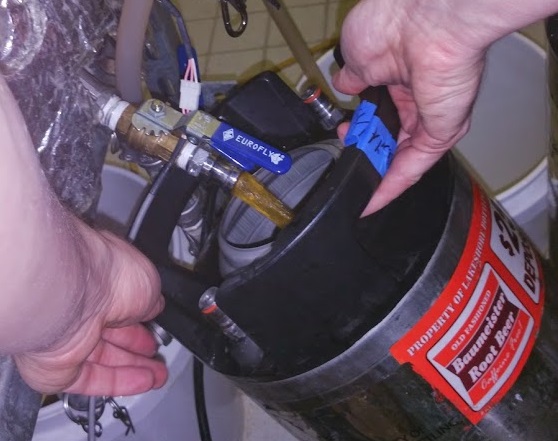
02_pureo2_filling keg
Maggie graciously volunteered to prepare the shake method batch, putting her CrossFit training to good use as she shook the crap out of the keg for a solid 90 seconds.
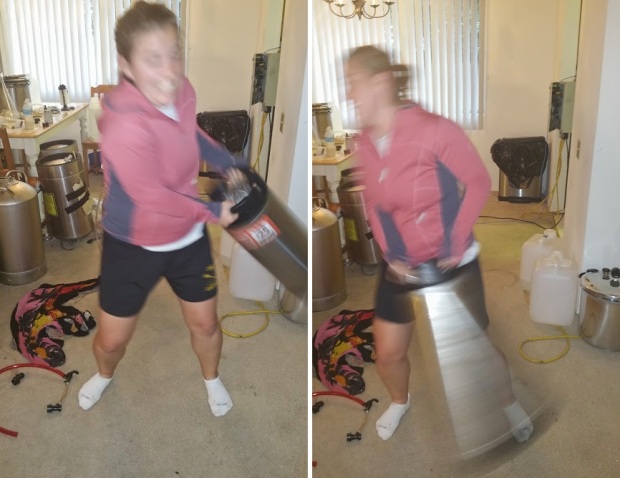
03_pureo2_maggie shakes keg
I, on the other hand, chose the much less physically demanding route and prepared the pure O2 batch by dropping in a tube with a .5 micron stone, opening a regulator valve, then waiting 2 minutes.
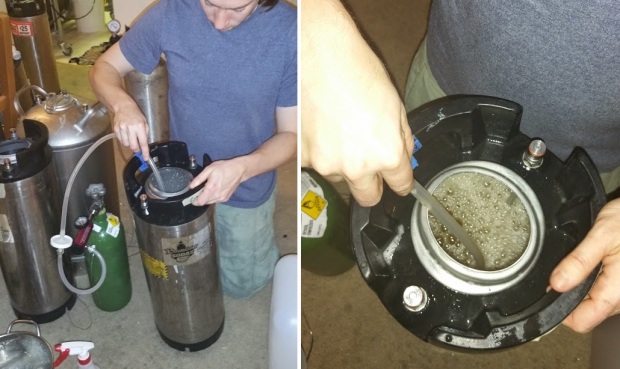
04_pureo2_oxygenate
With both batches aerated in their respective ways, I pitched the rehydrated yeast and placed the fermentors in my chamber controlled to 66˚F.
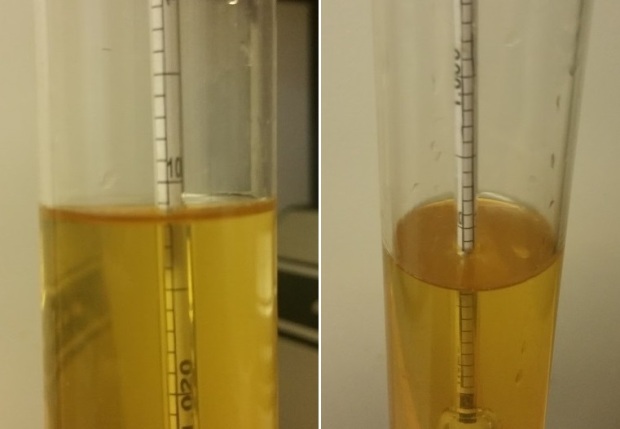
One downside to fermenting in kegs is the fact you can’t see the typical signs things are going well, so my solution is to monitor fermentation activity by periodically checking the bubbles coming from the blowoff tubes. I was surprised to find both batches showed signs of fermentation at an identical time, progressed similarly, then finished at nearly the same FG simultaneously.
05_pureo2_shake-O2
I have to admit, I was hesitant to continue this xBmt because of the strong cat piss aroma I got from these samples. But in the name of science, I forged ahead! Both beers were force carbonated and shared a similar appearance by the time they were presented to tasters.

08_pureo2_beer

| RESULTS |

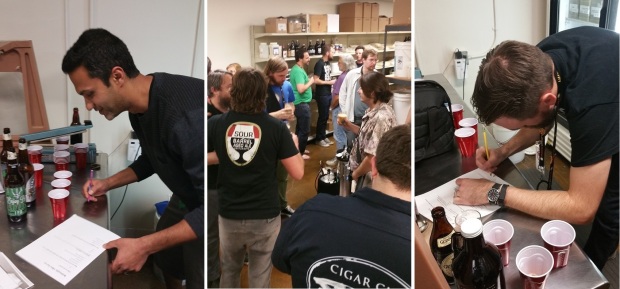
Data for this xBmt was collected at a Pacific Gravity Homebrew Club monthly meeting where 21 members were kind enough to volunteer their tasting devices to the cause. All participants were provided 3 samples, 2 from the shake aeration batch and 1 from the pure O2 batch, then asked to select the odd-beer-out. Establishing a statistically significant result at this sample size would require 12 tasters (p<0.05) to accurately select the different beer in the triangle test; only 9 tasters (p=0.36) were capable of doing so, suggesting the beer aerated via shaking was largely indistinguishable from the one dosed with pure O2. Some may find it interesting to note that one of the similar samples was endorsed with an equal frequency as the different sample, while only 3 tasters selected the other similar sample.
06_pureo2_tasters
Immediately following the triangle test, participants were asked to select how confident they were in their selection, the results of which left me somewhat confounded.
Level of ConfidenceCorrectIncorrect
Not very confident10
Somewhat confident63
Very confident16
Absolutely confident13
Taken at face value, this data appears to indicate an inverse relationship between level of confidence and likelihood of being wrong– killed by confidence! Go figure. I originally lobbied the team to add this question because I thought perhaps some “super” tasters might be able to discern subtle differences in triangle tests that the average person could not. I hoped I might discover these superior palates using this question as they would be more certain about their selection, but unfortunately multiple xBmts have failed to support this notion, hence our decision to drop it from the survey.
My Impressions: My experience testing these beers mimics the data above in that I couldn’t reliably tell a difference. I tried triangle testing myself multiple times and repeatedly failed. The fact of the matter is I was keenly aware of my own bias and fully expected to fail. I originally hypothesized the pure O2 batch would be the first to take off fermenting and do so with greater vigor. When this clearly didn’t occur, I couldn’t help but speculate that both batches likely had “enough” oxygen and therefore wouldn’t be noticeably different. A small part of me still thought perhaps some contaminated air particles might create differences in the shake batch, but for the most part, I was expecting them to be about the same, and I was right.

| DISCUSSION |

This xBmt did not yield statistically significant results, something I believe may be due to the lower O2 requirements of the moderate OG base beer. Would the outcome have been different if the wort was of a higher OG? Given the results of Ray’s recent shaken vs. no oxygen xBmt, I’m keen on testing the differences between the same high OG wort hit with pure O2 vs. no aeration at all. Consider it added to the top of the xBmt list!
As for me, I will continue to use pure O2, not only because I like knowing the yeast are well taken care of, but it also alleviates my hypochondriacal fears of some evil contaminant making it into my beer and spoiling a batch. Plus, I already have the fancy gear and it’s easy enough to use, no reason it should collect dust!
On a final note, please be cautious when interpreting these results as they are merely a single data point from a single xBmt. In no way am I claiming the use of O2 isn’t important, but rather that a group of participants were unable to reliably distinguish between samples of a particular beer in a particular setting. Cheers!

Monday, July 27, 2015

What really happens in the brewpot?

Wort Boiling: Homebrew Science

How wort is transformed in the kettle


Boil Basics

Many new all-grain brewers are prepared for the added difficulty of mashing. They already have read about the effects of different temperatures, mash thicknesses and rest combinations. However, because the techniques for wort boiling are very straightforward, they may not have learned about the important benefits that boiling the wort correctly brings to their beer. When asked for advice on what it takes to make great beer, a famous German brewer listed four things: Buy the best ingredients you can possibly afford, clean everything all the time, boil the kettle well and pray.
There are several reasons why a good wort boil is important.

Wort sterilization
Boiling your wort provides enough heat to render the wort free from any bacterial contamination. The principle wort bacteria are Lactobacillus and they are easily killed by heat. The low pH and the antibacterial action of certain hop constituents will ensure that the pathogenic and spore-forming organisms that would otherwise survive are precluded.
Enzyme inactivation

Most of the enzyme action ceases early during wort collection, either due to raising the mash temperature for mash-off or by sparging at a higher temperature in an infusion mash. Boiling ceases the remaining enzyme activity and fixes the carbohydrate composition of the wort, and hence the dextrin content of the final beer. Dextrins are complex carbohydrates. In the absence of enzyme activity to break them down into simpler sugars, brewers yeast cannot ferment them.

Boiling’s effect on proteins
Under the favorable conditions of wort boiling, proteins and other polypeptides present in the wort will combine with polyphenols or tannins. The rate and extent to which this occurs is influenced by several factors. Since the meeting of the components depends on chance encounters, the rate is increased by the mixing action of the wort, and also by their relative concentrations. Protein-tannin complexes collide with other protein-tannin complexes and stick together until they achieve a certain mass and precipitate out of solution.

Boiling also can destroy a protein’s three-dimensional structure. Proteins are large molecules made from smaller molecules called amino acids. In a protein, amino acids are linked end to end to form a “string.” This string is coiled, folded and looped into a three-dimensional structure. In addition, some proteins are actually complexes formed from several different protein strands. The three-dimensional shape of a protein determines the protein’s function. Thus, when boiling destroys the three-dimensional shape of protein, it also destroys its function. (This is, in fact, why wort boiling stops enzyme functions. Enzymes are proteins.)

Protein and tannins are the primary constituents of the hot break in the kettle. The hot break is the brown scum that forms on top of the wort as boil approaches and is also known as hot trub. Its formation is aided by the addition of kettle finings, usually extracted from seaweed. Irish moss can be added to the kettle 15 minutes before the end of the boil; the moss is negatively charged and can attract positively charged proteins in the wort. Although boiling for extended periods can increase the amount of trub formed, boiling for too long creates “shear forces” that break up the larger flocs back into smaller ones, making their ultimate removal more difficult. Lower pH causes flocs to be larger and more stable, and the presence of calcium ions aids protein aggregation by binding proteins together.

Hot break must be removed so that the hot wort can be clear. Most commercial brewers whirlpool their wort and leave the hot break behind when the hot wort is moved to the heat exchanger. Other proteins are precipitated by cooling and this material is called cold break.

Cold break is very similar in makeup to hot break except that the flocs are much smaller. Opinion is divided on the need to remove this prior to fermentation. Some brewers feel that removal provides cleaner flavor, but cold break contains some unsaturated fatty acids required for yeast nutrition.

Irish moss is a seaweed-derived polymer of the sugar galactose. Individual galactose molecules are linked to other galactose molecules through alpha 1-3 or alpha 1-4 linkages. In Irish moss, some hydroxyl (OH) groups are substituted with sulphate groups, giving it an overall negative charge. Irish moss acts like a net that falls through the wort and traps any positively charged proteins by binding to them. It is usually added to boiling wort around 15 minutes from the end of the boil.

There is an optimum rate of use for Irish moss, and tests should be done using different rates of addition. Most homebrewers add between 3/4 and 1-1/2 teaspoons per five gallons of wort. Too much Irish moss will form very clear wort, but results in a fluffy sediment that leaves behind a lot of wort in the trub. Excessive levels of Irish moss in the boil can reduce the levels of proteins responsible for head formation.

Solubilize and isomerize hops
Although there are a great many reactions occurring during the kettle boil, the principle one of interest is the isomerization — and subsequent solubilization — of alpha acids. Isomerized alpha acids are the molecules responsible for the bitter flavor in beer. The chief component of alpha acids is the compound humulone.

The isomerization of humulone to isohumulone is facilitated by the presence of magnesium ions. The extraction and isomerization are very inefficient, however, and as many as 70% of the alpha acids remain unconverted, and hence insoluble.

Other reactions have secondary effects on bitterness. For example, the oxidation of the beta acids — including the oxidation of lupulone to hulupone — produces a molecule that is much more bitter and is probably responsible for more lingering unpleasant bitterness in beer.

Factors affecting hop utilization
There are many factors that affect hop utilization. Boil intensity is one such factor. The longer and more intense the boil is, the more alpha-acids isomerization occurs. The pH of the wort also has an effect. The higher the wort pH, the greater the isomerization and solubility of humolone.

It is generally accepted that hop utilization is better in low-gravity worts than in high-gravity wort. This is why homebrewers are told to decrease the amount of hops in a recipe if they switch from boiling a concentrated wort to conducting a full-wort boil.

The amount of hot break present can also influence hop utilization. Hops are associated with proteins that precipitate during boiling. For this reason, some brewers wait until the hot break begins before adding their first charge of hops.

The form of hop used is yet another factor. Hop extracts produce the most bitterness, follow by pellet hops and whole-leaf hops.

High hopping rates reduce hop utilization. Adding more hops always increases hop bitterness, but — beyond a certain point — you get decreasing returns with greater hop additions.

Oxidation of lupulone
Beta acids are insoluble, but they can oxidize during storage to a variety of compounds that are soluble and bitter in boiling wort. While it is accepted that the bitterness of oxidized beta acid is different from isomerized beta acid, opinions are divided as to its quality. Some researchers insist that the oxidized beta acids are more mellow than isomerized beta acids, while others say that oxidized beta acids are more harsh. Either way, oxidized beta acids go some way to replacing the bittering potential of alpha acids that are lost during storage.

Volatalize aromas
Dimethyl sulphide (DMS) is an intensely aromatic compound present in most beers. When it’s present in amounts large enough for it to be tasted and smelled, it can be an important flavor characteristic or defect. At low levels it smells of corn or sweet corn. When it is more intense it can resemble over-stewed vegetables or even garlic. In some European lagers, it is an important part of the flavor profile; a large regional brewer in the United States (Rolling Rock) also features it.

DMS is formed from s-methyl-methionine (SMM), which in turn is produced from amino acids during malting. SMM is converted to DMS by heat and then the DMS is volatilized and whisked away with the steam during wort boiling. Some homebrewers who leave a lid on the kettle find that this compound is re-introduced when the steam condenses on the lid and drips back in. Unless the precursor is all removed, then more DMS can be formed during wort clarification and this DMS will survive to the final beer. This is a problem in commercial breweries using whirlpools. For this reason, homebrewers should attempt to cool their wort as quickly as possible after the boil is complete.

Hop aroma
Hops also contain an essential oil component, which is responsible for the characteristic hop aromas. Each oil imparts its own smell, and hop aroma is made up from the combinations of many smells. The oils are soluble in hot wort and are very volatile. So, they are soon boiled away in the steam from the kettle. This is why many brewers add a charge of hops as late in the boil as possible to try to trap the aroma before it is evaporated away. Dry hopping is another technique designed to avoid losing volatile hop compounds.

Color development
Color pick-up in the kettle is a combination of several factors. The caramelization of wort sugars darkens the wort as it boils. Loss of an H2O molecule from the complex sugar molecule forms a double bond inside the sugar molecule, which changes the way the sugar molecule absorbs light, thereby affecting the color. Drive off all water and you’re left with carbon.

Color development also comes from melanoidin production from polymerization of reductones. (These Maillard reactions are described in more detail in the November 2001 “Homebrew Science” article on crystal malts.) These reactions also contribute some flavor compounds. The rate that these reactions occur is slow due to the unfavorable pH and temperature conditions in boiling wort.

Finally, the wort can be darkened due to charring or burning from excessive heat at a heat transfer surface. Homebrewers can experience this if their brewpot has a thin bottom.

Concentration of the wort
In a large brewery, up to 10% of the kettle contents can be lost due to evaporation during a boil of normal duration. This increases the original gravity of the wort accordingly. This is important when brewing some high-gravity beers, such as barleywines, made only from grains. In order to achieve their high original gravities, the wort is boiled for an extended period — often up to three hours.

Good place for the addition of syrups and sugars
Some recipes call for an increase in wort gravity above that which can be obtained by the mashing system. Alternatively, when nitrogen-rich malts are used, it may be necessary to add an adjunct that contributes no nitrogen. In that case, corn syrups or brewing sugar can be added in the kettle. Home brewers can also add flavorings and other adjuncts, such as fruit.

pH
Wort pH will fall from 5.6–5.8 at the start of boiling to around 5.2–5.4 at the end. This is primarily due to the precipitation of calcium phosphate. Calcium ions in brewing water reacts with phosphates from the malt to form calcium phospate and hydrogen ions, which lower wort pH.

This demonstrates the importance of excess calcium ions in the wort after mashing. For this reason, it is sometimes a good idea to add gypsum to the kettle. If your mash pH is fine, but the pH does not drop to at least 5.4 by the end of the boil, add 1/4–1/2 teaspoon of gypsum per five gallons.

Sunday, June 7, 2015

Counter-Flow Wort Chiller


Exchillerator Max Counter Flow Wort Chilller Kit

We don't believe there is a more efficient chiller made.  Simply pump your wort directly from the brew kettle through this chiller, and adjust the output valve to attain the proper pitching temperature.  Literally chills an entire batch in the time it takes to pump it out!

  • Easy to use
  • Fast Clean-Up
  • Inner tubing uses Co-Helical Design for Maximum chilling power
  • Uses PEX material to provide low energy loss to atmosphere
  • Removable temp gauge
  • 1/2" SS Tee, 1/2" SS Close Nipple, 1/2" SS ball valve, comes standard


Buy Now:
http://www.brew-boss.com/product-p/chiller-cf.htm


www.brew-boss.com  Your Beer, Your Way!